
Managing Widgets
Infoveave widgets are dynamic components that allow you to visualize and analyze data in a variety of formats, enhancing your data-driven decision-making process. Widgets allows you to select from options like charts, tables, maps, gauges, and more to visualize your data.
Linking Report
You may link a widget under My Widgets to a report.
- Locate the Widget to Link Report.
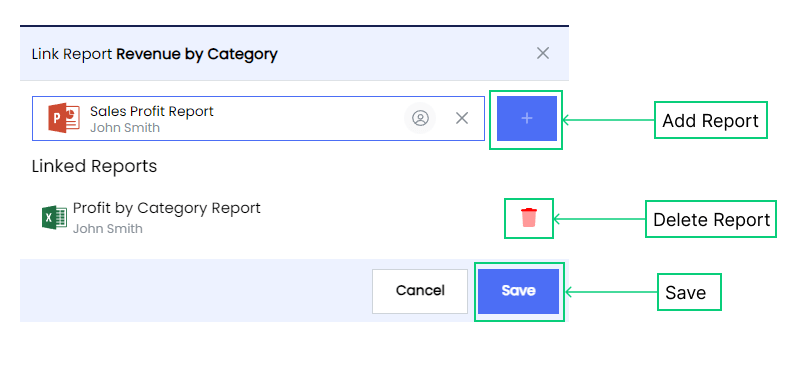
- Click on Link Report to link to a report.
- Search and select the report from the drop-down to be linked with the widget.
- Click to add the report.You can link multiple reports to a single widget.
- Click Save to link report.
To access the report, select the Infoboard housing the widget. Mouse over the widget, right click the mouse to see the Linked Report.
Cloning Widget
Duplicating or cloning Widget in Infoveave can save you time and effort, especially when you want to create similar data table with minor variations.
- Locate the Widget you want to clone.
- Click on the Clone button associated with the Widget.
- After clicking “Clone”, a prompt will appear that allows you to provide a name for the cloned Widget.
- Enter a name for the cloned Widget.
- Click the Save button to create the cloned Widget.
- The cloned List View will now be available in My Widgets. You can customize the cloned Widget by adjusting settings, filters, date ranges, or any other configurations to suit your needs.
Sharing Widget
Sharing options in Infoveave Widgets such as user and role-based sharing, ensure efficient distribution and utilization of analysis among the intended audience.
You can share your Infoveave Widget with other users or roles in Infoveave. Follow these steps to share your Infoveave Widget
- Click on the Share icon to share the Infoveave Widget with the team/role.
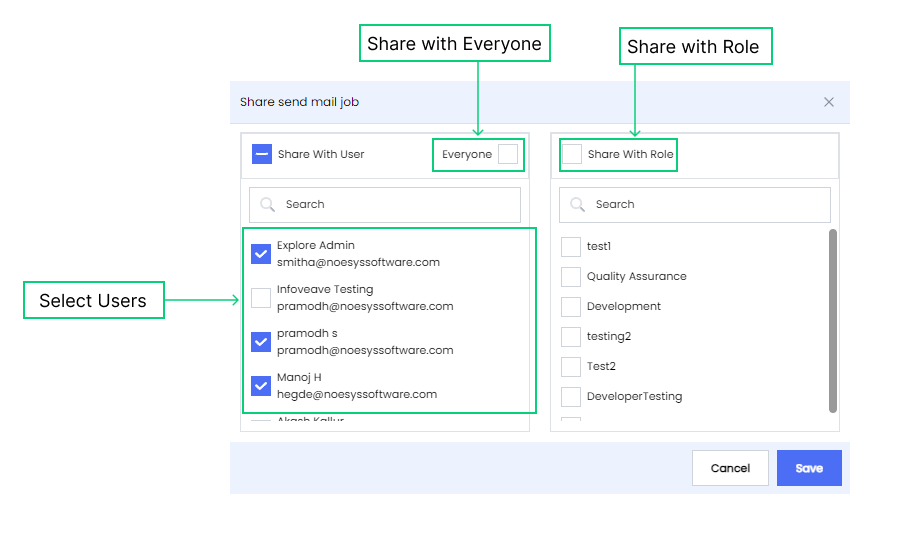
- Select between the available options- Share with User or Share with Role.
- If you choose Share with User, go to the Share with Users.From the share dialogue box, select the user(s) you want to share the Infoveave Widget with.
- If you want to share the Infoveave Widget with all users, select the Share with Everyone option.
- If you choose Share with Role, switch to the Share with Role.Pick the roles you want to share the Infoveave Widget with from the share dialogue box.
- To remove a specific user or role from the shared list, uncheck the corresponding checkbox.
- Click Save to share your Infoveave Widget with the selected users/roles.
Adding Description

To add a description to your Widget, follow these steps
- Select the desired Widget.
- Click on the Add Description option.
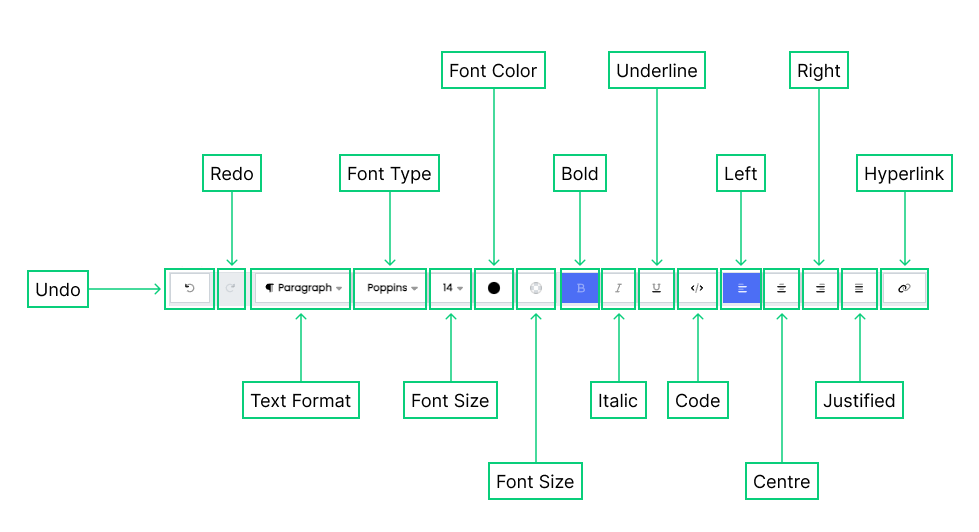
- Choose the type of editor you prefer- Rich Text Editor or Markdown Editor.
- Fill in the necessary information in the provided fields
- Tags Add any relevant tags to categorize your Widget.
- Description Enter a description that provides a brief overview or explanation of the Widget.
- Content Include any additional details or notes related to the Widget.
- Click Save to save the description.
Deleting Widget
To delete a Widget in Infoveave, follow these simple steps
- Find the Widget you want to delete.
- Click on the Delete icon .
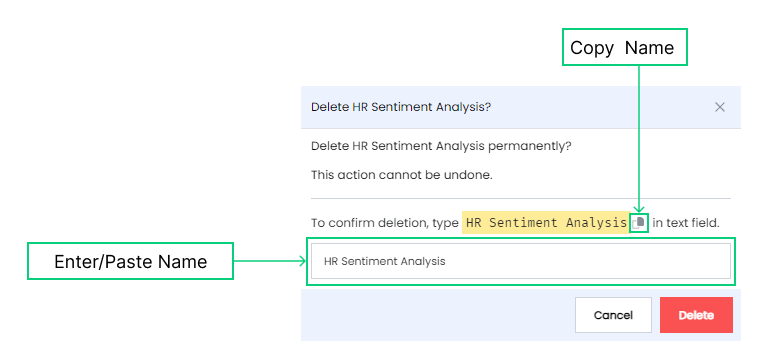
- Type the specified text from the warning message in the provided text field.
- Alternatively, you can copy the text from the icon and paste it in the text field.
- Once you have entered the correct text, click on Delete.