---
title: Databases
description: Effortlessly connect databases like Microsoft SQL, Oracle, and MongoDB for data analysis, visualization, and reporting.
---
import { Aside,Steps } from '@astrojs/starlight/components';
import { MediaPlayerComponent } from "../../../../../components/video-player";
import RunScript from "../../../../../components/RunScript.astro";

# Databases

<MediaPlayerComponent video="Create-Datasource-Using-Microsoft.mp4"
chapters={
    [
  {
    "start": 0,
    "end": 6,
    "text": "Click Datasources under Studio",
    "description": "From the Infoveave menu, click 'Studio', then click 'Datasources' from the dropdown menu. Wait for the datasources list to load."
  },
  {
    "start": 6,
    "end": 9,
    "text": "Create New Datasource",
    "description": "On the Datasources page, click the New Datasource button, typically located in the top-right corner of the screen, to begin the process of adding a new data source."
  },
  {
    "start": 9,
    "end": 15,
    "text": "Select Oracle Database Type",
    "description": "In the New Datasource window, scroll down to the Databases section. Click on Oracle to select it as your database type."
  },
  {
    "start": 15,
    "end": 20,
    "text": "Select Oracle Connection",
    "description": "In the Edit Connection dialog, choose your existing Oracle connection (e.g., Oracle Akash Kottur) from the dropdown. Click Save to apply the connection."
  },
  {
    "start": 20,
    "end": 24,
    "text": "Select Oracle Table",
    "description": "In the search bar on the left, type ACME_SALES and select the table from the search results. This will load the schema of the ACME_SALES table."
  },
  {
    "start": 24,
    "end": 28,
    "text": "Name the Datasource",
    "description": "In the right-hand panel, locate the Datasource name field and enter Oracle Sales data to give your new datasource a clear, descriptive name."
  },
  {
    "start": 28,
    "end": 36,
    "text": "Add 'Order ID' as a Measure",
    "description": "Hover over the ORDER_ID column in the loaded table schema and click on ellipsis and add measure. In the Add measure dialog, select Sum for Aggregation. Click Add measure to define it. A success notification will confirm the addition."
  },
  {
    "start": 36,
    "end": 43,
    "text": "Add 'Order Priority' as a Dimension",
    "description": "Hover over the ORDER_PRIORITY column and click on ellipsis and add dimension. In the Add dimension dialog, accept the default settings and click Add dimension. A success notification will confirm the addition."
  },
  {
    "start": 43,
    "end": 50,
    "text": "Add 'Order Date' as a Dimension",
    "description": "Hover over the ORDER_DATE column and click on ellipsis and add dimension. In the Add dimension dialog, accept the default settings and click Add dimension. A success notification will confirm the addition."
  },
  {
    "start": 50,
    "end": 65,
    "text": "Save the Datasource",
    "description": "Finally, click the Save button in the top-right corner of the screen to save the newly configured Oracle Sales data datasource with all its defined measures and dimensions. A notification will appear, confirming that the datasource has been saved successfully."
  }
]

}
poster="/images/introduction-poster.png"
posterText="Creating A Datasource Using Oracle"
client:load/>

Infoveave supports Datasource creation from databases such as [Amazon Athena](/administration/database/amazon-athena/), [ClickHouse](/administration/database/clickhouse/), [Databricks](/administration/database/databricks/), [MariaDb](/administration/database/mariadb/), [Microsoft SQL](/administration/database/microsoft-sql/), [MySQL](/administration/database/mysql/), [Oracle](/administration/database/oracle/), [Percona](/administration/database/percona/), [Postgres](/administration/database/postgres/) and [Snowflake](/administration/database/snowflake/).

## Creating a Database Datasource

<Aside>
The configuration settings may vary based on the specific database type you choose.
 </Aside>

<Steps>
1.  To access Infoveave Datasource types, navigate to **Studio** → **Datasources**. All types of Datasources created by you or shared with you are displayed under **My Datasources** and **Shared Datasources**.
2.  To create a new Datasource, click on **New Datasource**.
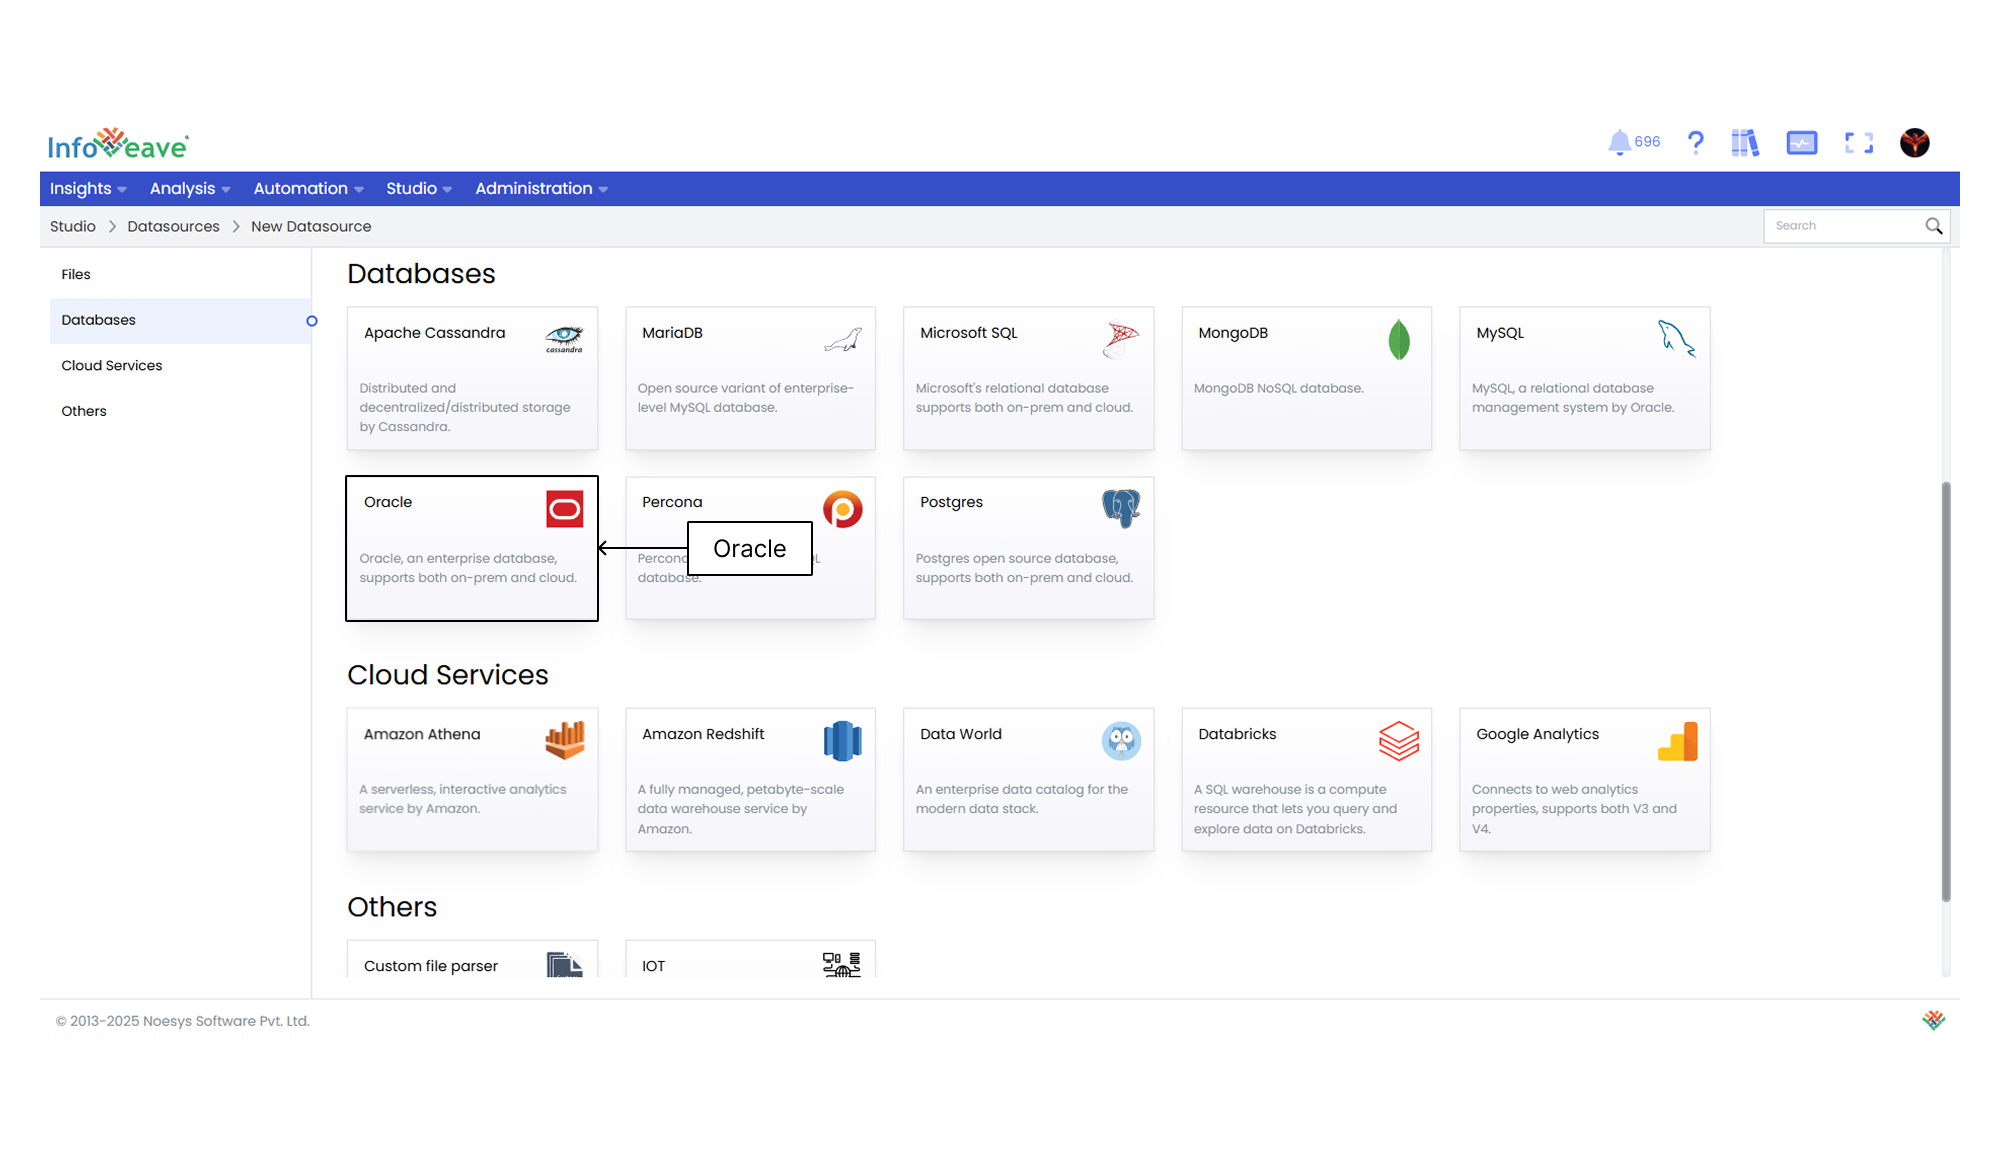
3.  Under the **Databases** category, choose your desired database type (e.g., **Oracle**, **MySQL**, **Postgres**, etc.).  
    ![oracle database](/images/oracle-database.png)
4.  Select the desired connection from the dropdown list. You can also add a new connection by clicking on the Add connection **+** icon.  
    *Example connection selection:*  
    ![oracle connection](/images/oracle-connection.png)
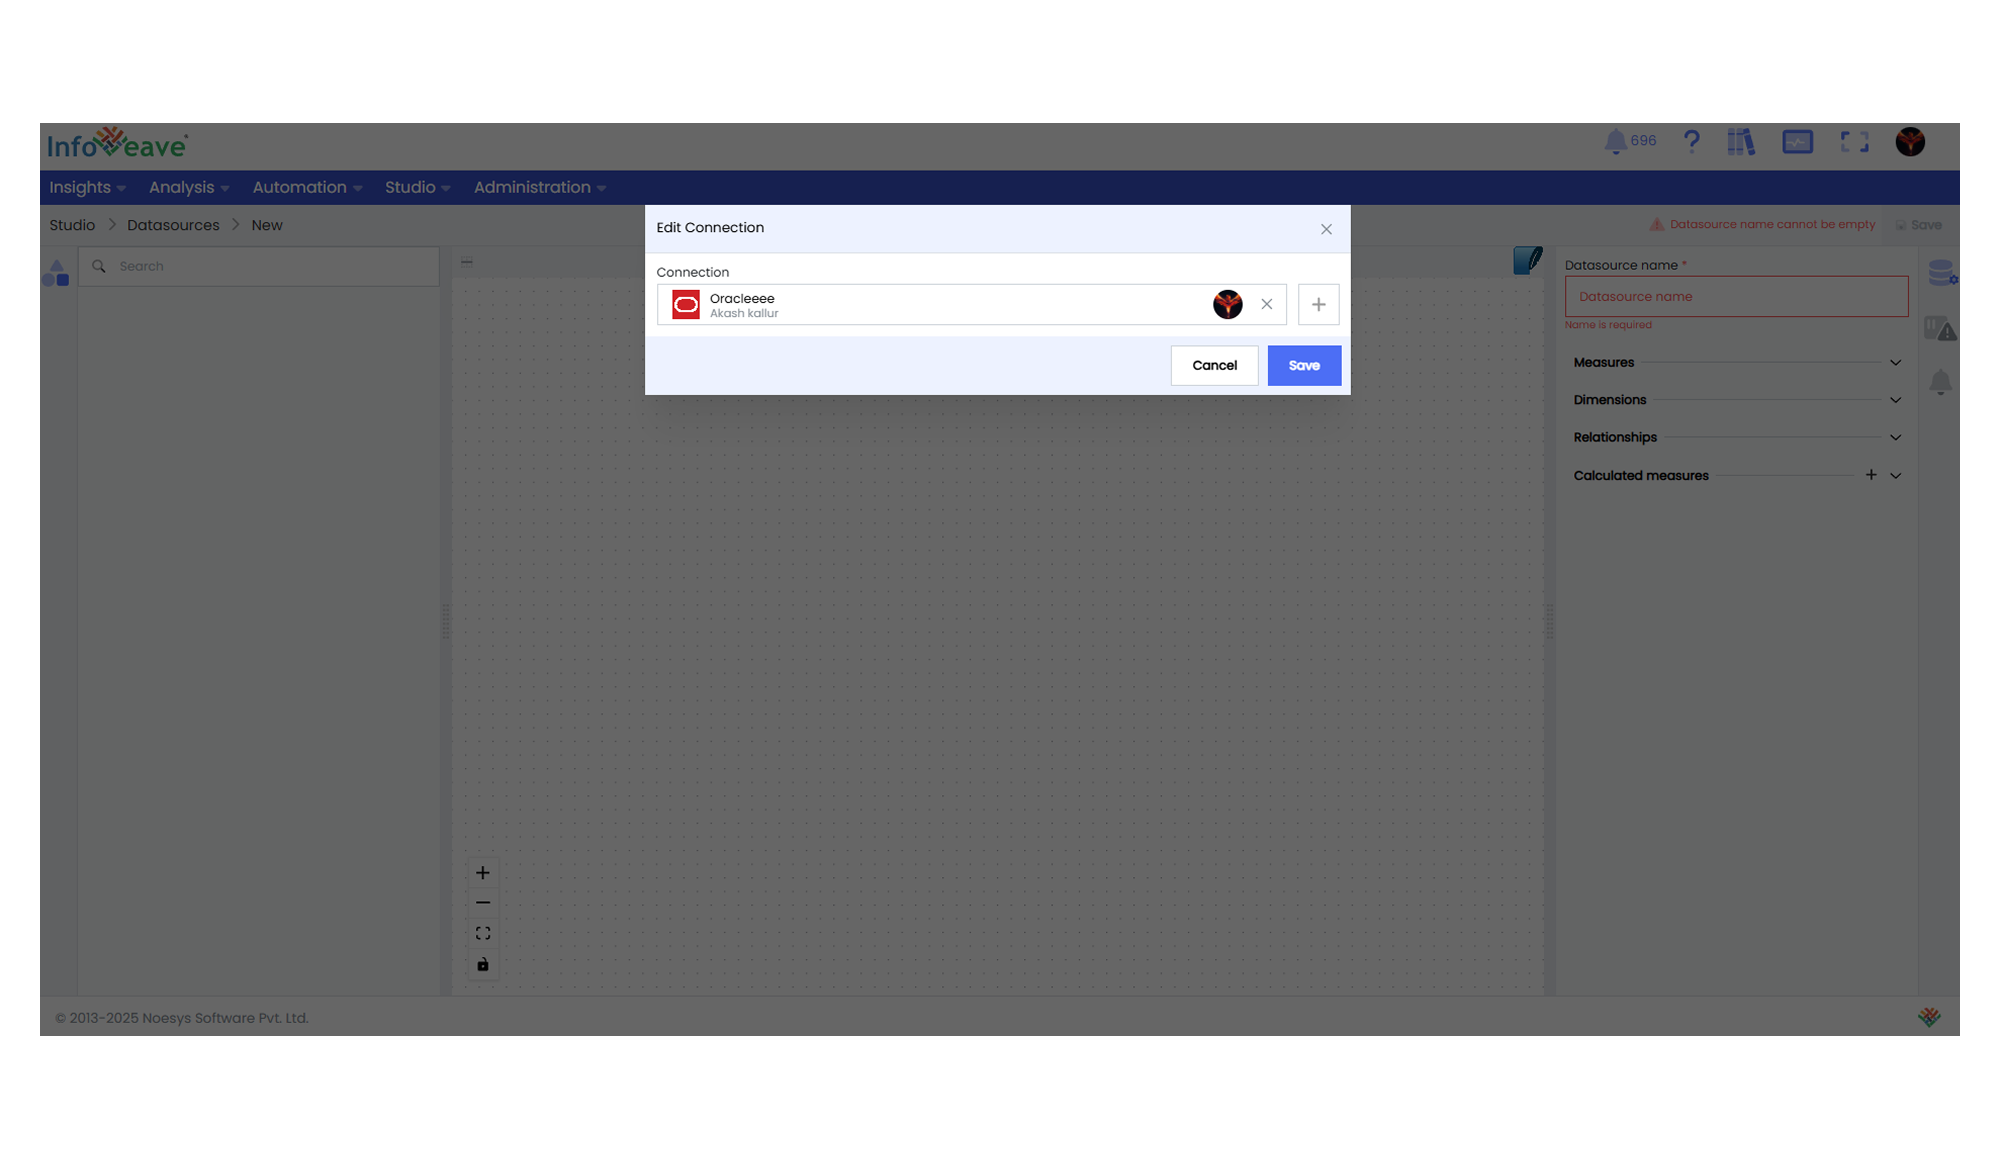
5.  Click on **Save** to establish the connection and proceed to the Datasource designer.  
    ![oracle designer](/images/oracle-designer.png)
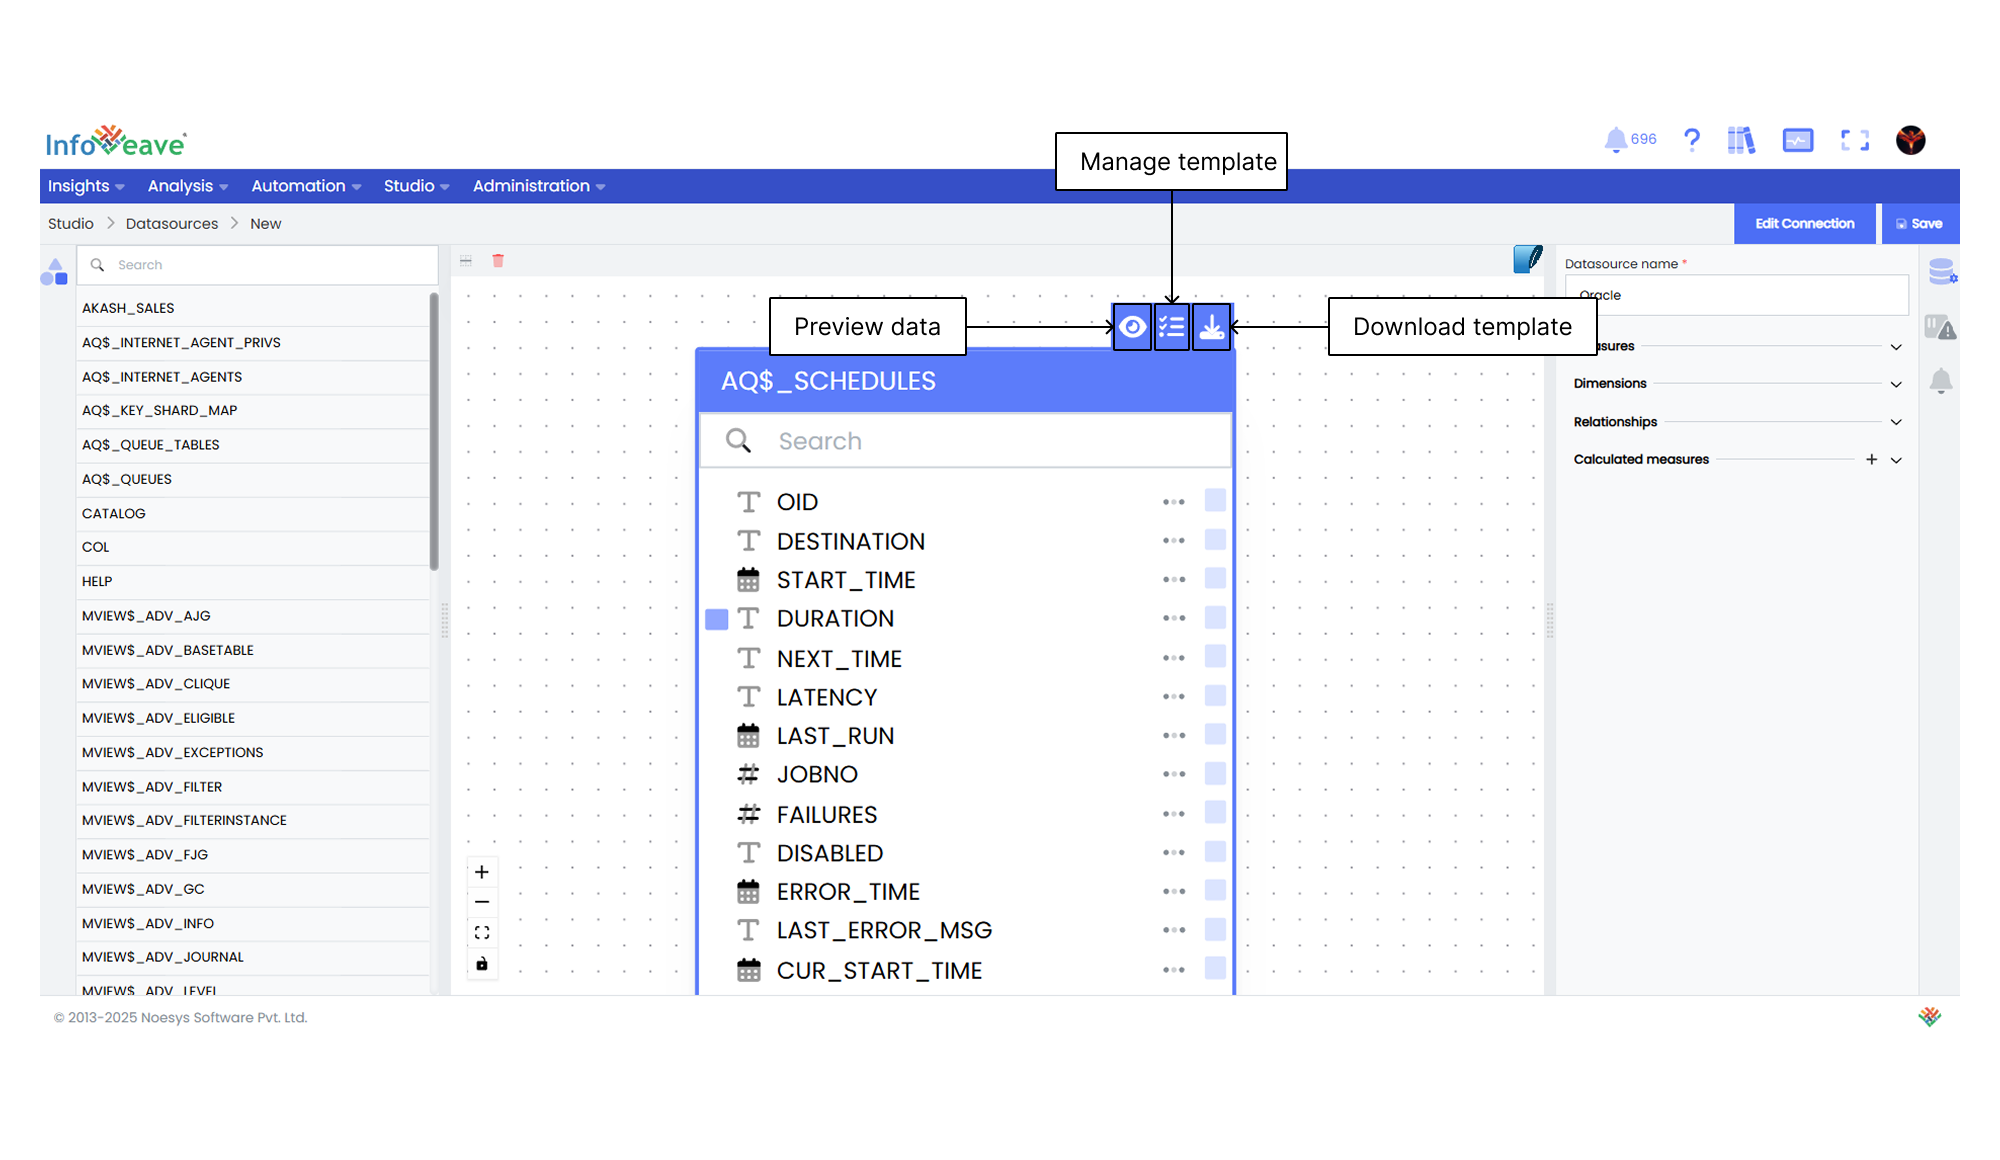
6.  Enter a descriptive **Datasource Name**.
7.  Drag and drop the required tables from your database into the designer canvas.
8.  Configure your data by enabling the appropriate **measures** and **dimensions** from the available fields in the tables.
</Steps>

To learn about adding measures and dimensions to the data table, visit [Measures and Dimensions](/studio-v8/datasources/measures-dimensions-and-hierarchies).

To learn about adding calculated columns, visit [Calculated Columns](/studio-v8/datasources/calculated-columns-datasource#configuring-calculated-columns).

To learn about adding calculated measures, visit [Calculated Measures](/studio-v8/datasources/calculated-measures#configuring-calculated-measures).


<Aside>
A connection between your target database (e.g., Oracle, MySQL, etc.) and Infoveave must be pre-configured under **Database Connections** in the [**Control Center**](/administration/control-center/) before you can create a Datasource.
</Aside>


