---
title: Calculated Columns
description: Learn how to use calculated columns for dynamic data manipulation, including JavaScript transformations, formatting, and conditional filters.
---
import { Aside, Steps } from '@astrojs/starlight/components';
# Calculated Columns
Calculated columns in Infoveave allow you to create new data columns based on existing data. By using JavaScript, you can perform complex transformations and clean column values directly within Infoveave. This enables you to manipulate and refine your data to meet specific analysis requirements.
## Configuring Calculated Columns
Here is a step-by-step guide to configure calculated columns in Infoveave.
1. Open the required table in the **Datasource Designer**.
2. Choose the data table where you want to add a calculated column.
3. Click on the **Add calculated column** icon at the top of the data table. The **Add calculated column** module will open.
4. Enter a name for the calculated column.
5. Select the appropriate column type.
6. Enter the required formula or JavaScript code. Use `(@)` to refer to a column from the source.
7. Click on **Validate** to preview the new column.
8. Check the **Recalculate on add** option for the table to instantly validate the expression and add values to the new column. Enabling this checkbox avoids the need to reupload the data to populate the calculated column.
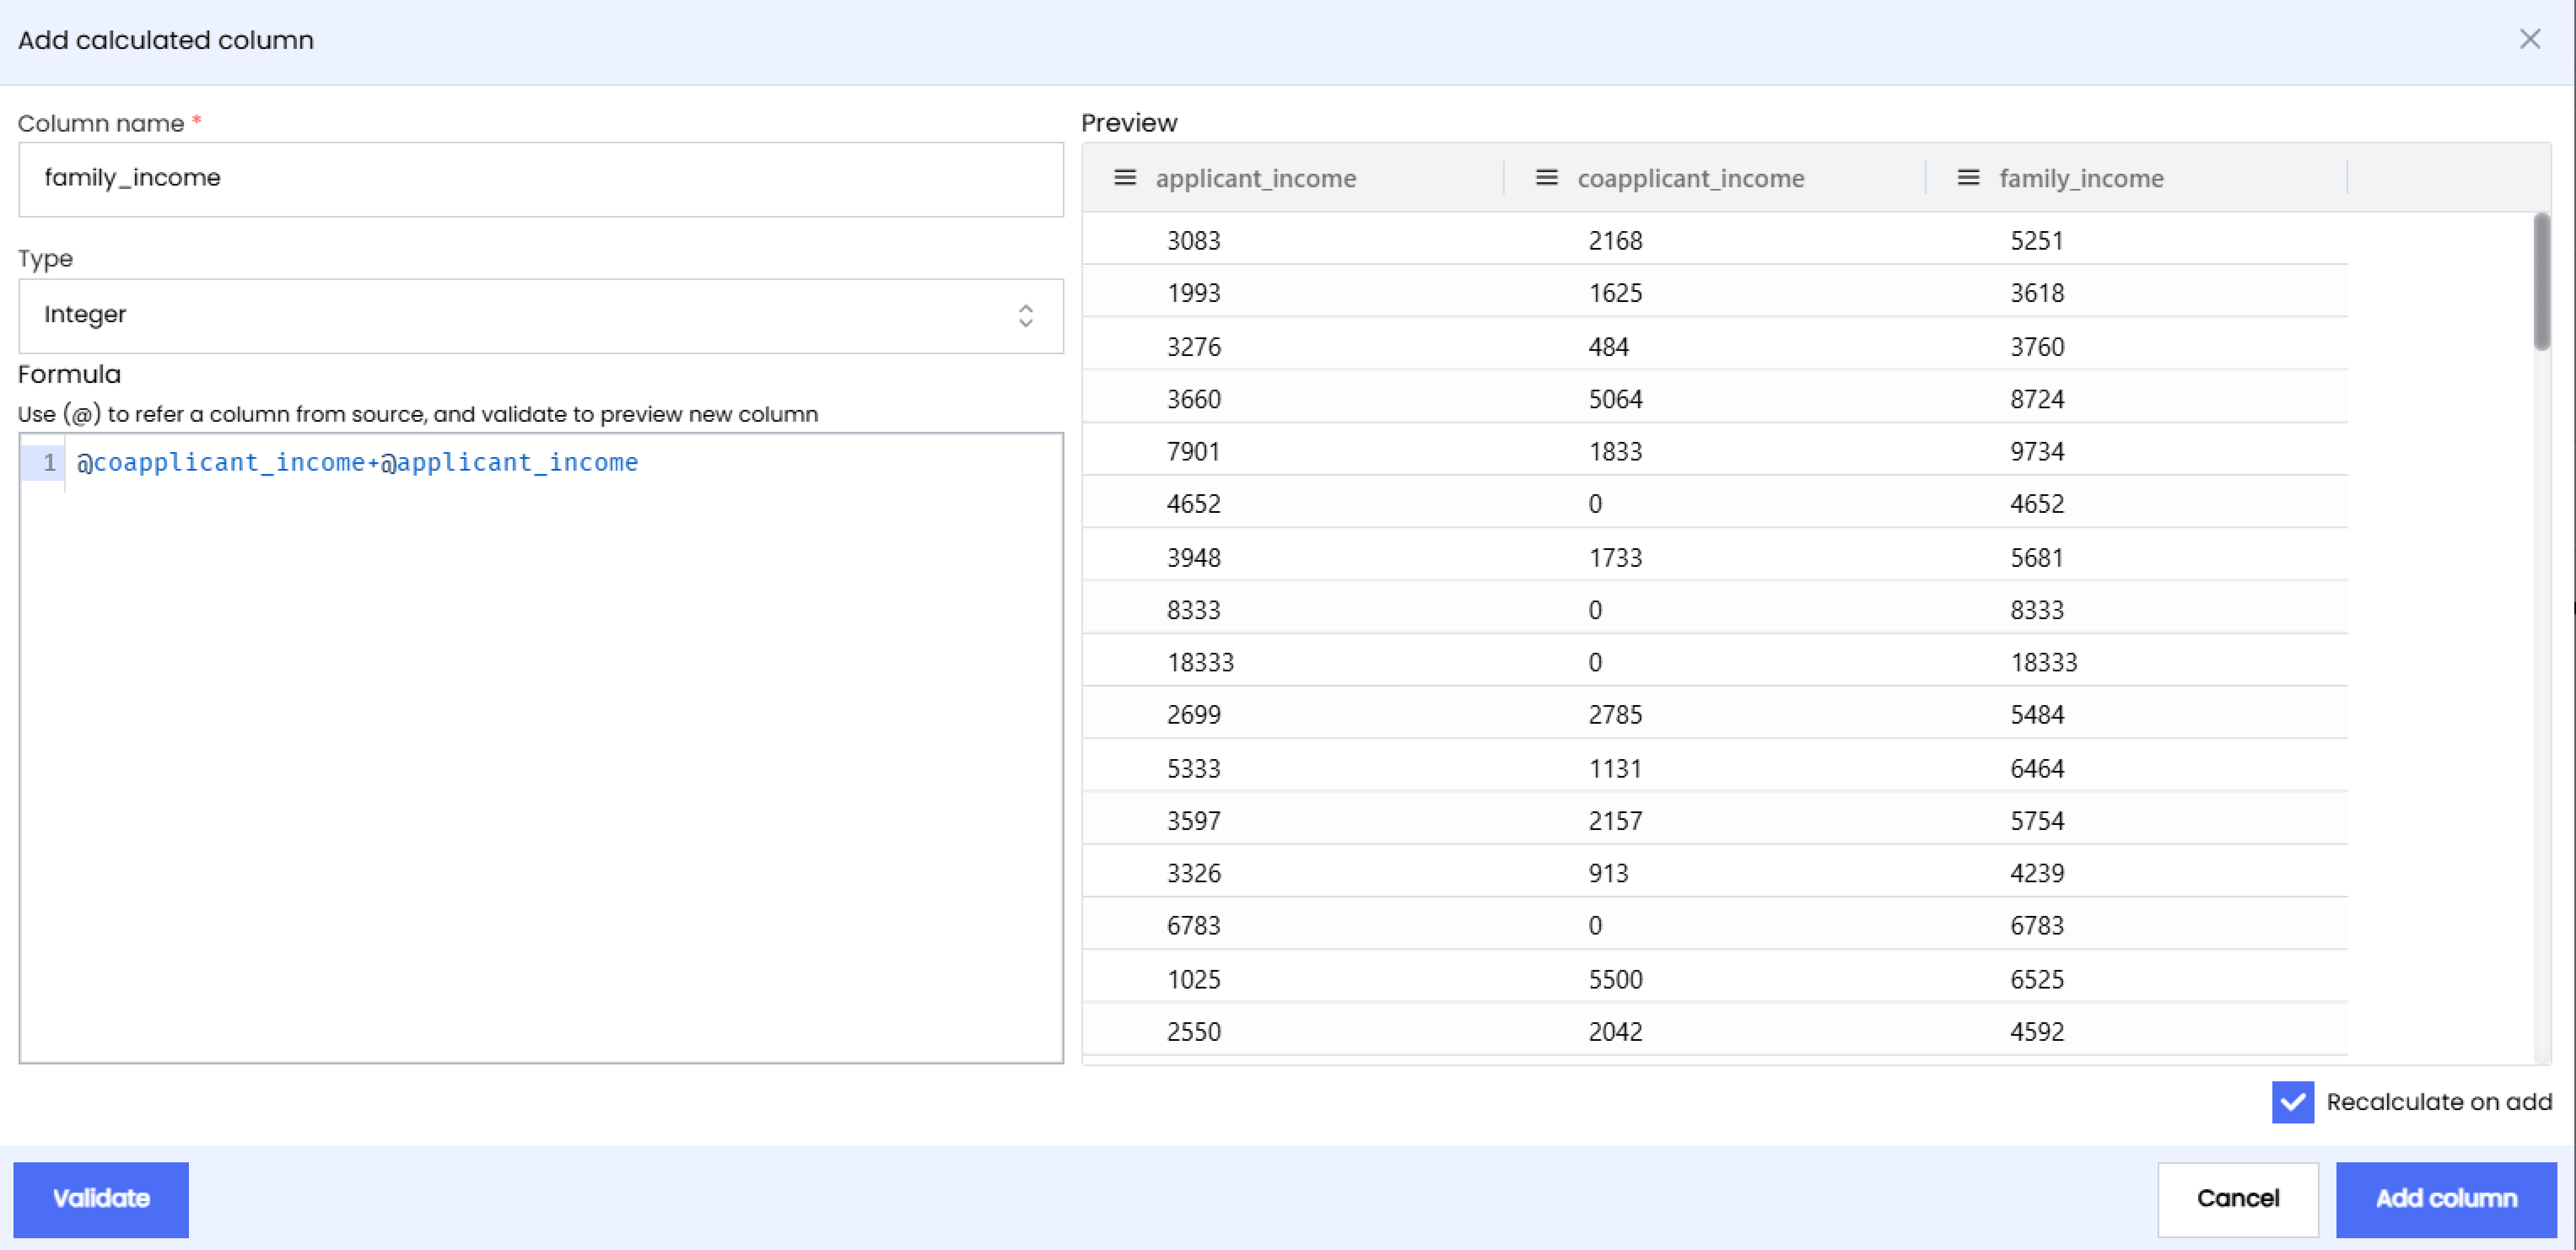
9. Click on **Add column** to finalize and add the calculated column to your data table.
## Scenarios
#### Change Column Format
In data analysis, it is often necessary to change the format of a column to meet specific requirements or conform to certain rules. With Infoveave, you can easily do this using calculated columns and custom JavaScript to transform data. In this tutorial, you learn how to add an alphabet as a prefix to numeric values in a column.
**Example**
Consider a dataset containing sales information, including a **Customer ID** column with numeric values representing unique customer identifiers. In this example, you add the alphabet **A** to each **Customer ID** value to create a new identifier format.
**JavaScript Code**
```javascript
let customerID = @Customer ID; // Get the value of the Customer ID column
let newCustomerID = 'A' + customerID.toString(); // Concatenate 'A' with the Customer ID and convert to string
newCustomerID; // Return the new Customer ID
```
#### Replace Nulls
During data preparation for analysis, you may encounter missing or null values that can impact the accuracy of your insights. Addressing these gaps is essential for meaningful analysis. Infoveave provides tools to efficiently handle such scenarios. In this tutorial, you explore how to replace null values with a specified text, such as **Not available**, using calculated columns in Infoveave.
**Example**
Consider a dataset containing customer information where some fields may have missing values. Focus on the **Age** column and replace null values with **Not available**.
**JavaScript Code**
```javascript
let age = @Age; // Replace 'Age' with the actual column name
if (age === null || age === "") {
age = "Not available"; // Replace null or empty values with "Not available"
}
age; // Return the modified value
```
#### Replace Column Values
You may need to modify specific values in your dataset to reflect updated information or new business requirements. With Infoveave’s calculated columns feature, you can achieve this easily by applying custom JavaScript code to manipulate your data. In this tutorial, you learn how to replace specific values in a column. Use an example dataset where you update the dealer name **Sipes Group** to **New Spkies** due to a recent company merger.
**Example**
Consider a dataset containing dealer information where some fields may contain incorrect values. Focus on the **Dealer Name** column and replace **Sipes Group** with **New Spkies**.
**JavaScript Code**
```javascript
let dealerName = @Dealer Name; // Access the value of the "Dealer Name" column
// Check if the dealerName is "Sipes Group", replace with "New Spkies", else keep the original value
if (dealerName === "Sipes Group") {
dealerName = "New Spkies";
}
dealerName; // Return the modified value
```
#### Remove Timestamps from Date Columns
In data analysis, it is common that the date columns contain timestamps. In certain cases, you may need to remove the time stamp analysis or visualization. In this tutorial, we will demonstrate how to remove timestamps from date columns using Infoveave’s calculated columns feature. We will use an example dataset containing order information with timestamps and show how to extract and format the date portion only.
**Example**
Consider a dataset containing order information with timestamps in the “Order Date” column. We want to remove the timestamps and display only the date portion.
**JavaScript Code**
```javascript
var time = @Order Date;
var newTime = time ? time.split(" ")[0] : new Date().toISOString().split("T")[0];
var parts = newTime.split("-");
var formattedDate = parts[2] + "-" + parts[1] + "-" + parts[0];
formattedDate;
```
#### Add Conditional Filters
Filtering data based on specific conditions is a common task in data analysis to focus on relevant subsets of data. With Infoveave, you can implement conditional filters using JavaScript code within calculated columns. This tutorial demonstrates how to create a conditional filter to select rows based on a specific condition. Use an example of filtering customers older than 30 years from the dataset.
**Example**
Consider a dataset containing employee information with columns for **Employee Name** and **Age**. You want to filter out employees who are older than 30 years.
**JavaScript Code**
```javascript
var age = @Age;
if (age && age <= 30) {
true;
} else {
false;
}
```