---
title: Targets and Thresholds
description: Learn to set up and manage targets and thresholds in Infoveave, including alert configuration, template uploads, and notifications.
---
import { Aside, Steps } from '@astrojs/starlight/components';
# Targets and Thresholds
In Infoveave, targets and thresholds help you define significant points in your data and notify you when a measure reaches a specific level. A target allows you to visualize the difference between the desired score and the actual measure of an indicator on a specific date. Thresholds define a normal range of measures for an indicator and alert you when certain events occur, such as when a measure reaches an all-time high or low.
## Creating Targets and Thresholds
1. To create and set up the targets and thresholds based on your available Datasource, click on **Targets and Thresholds** tab in **Datasource Setup panel**. All targets and thresholds created by you or shared with you are displayed.
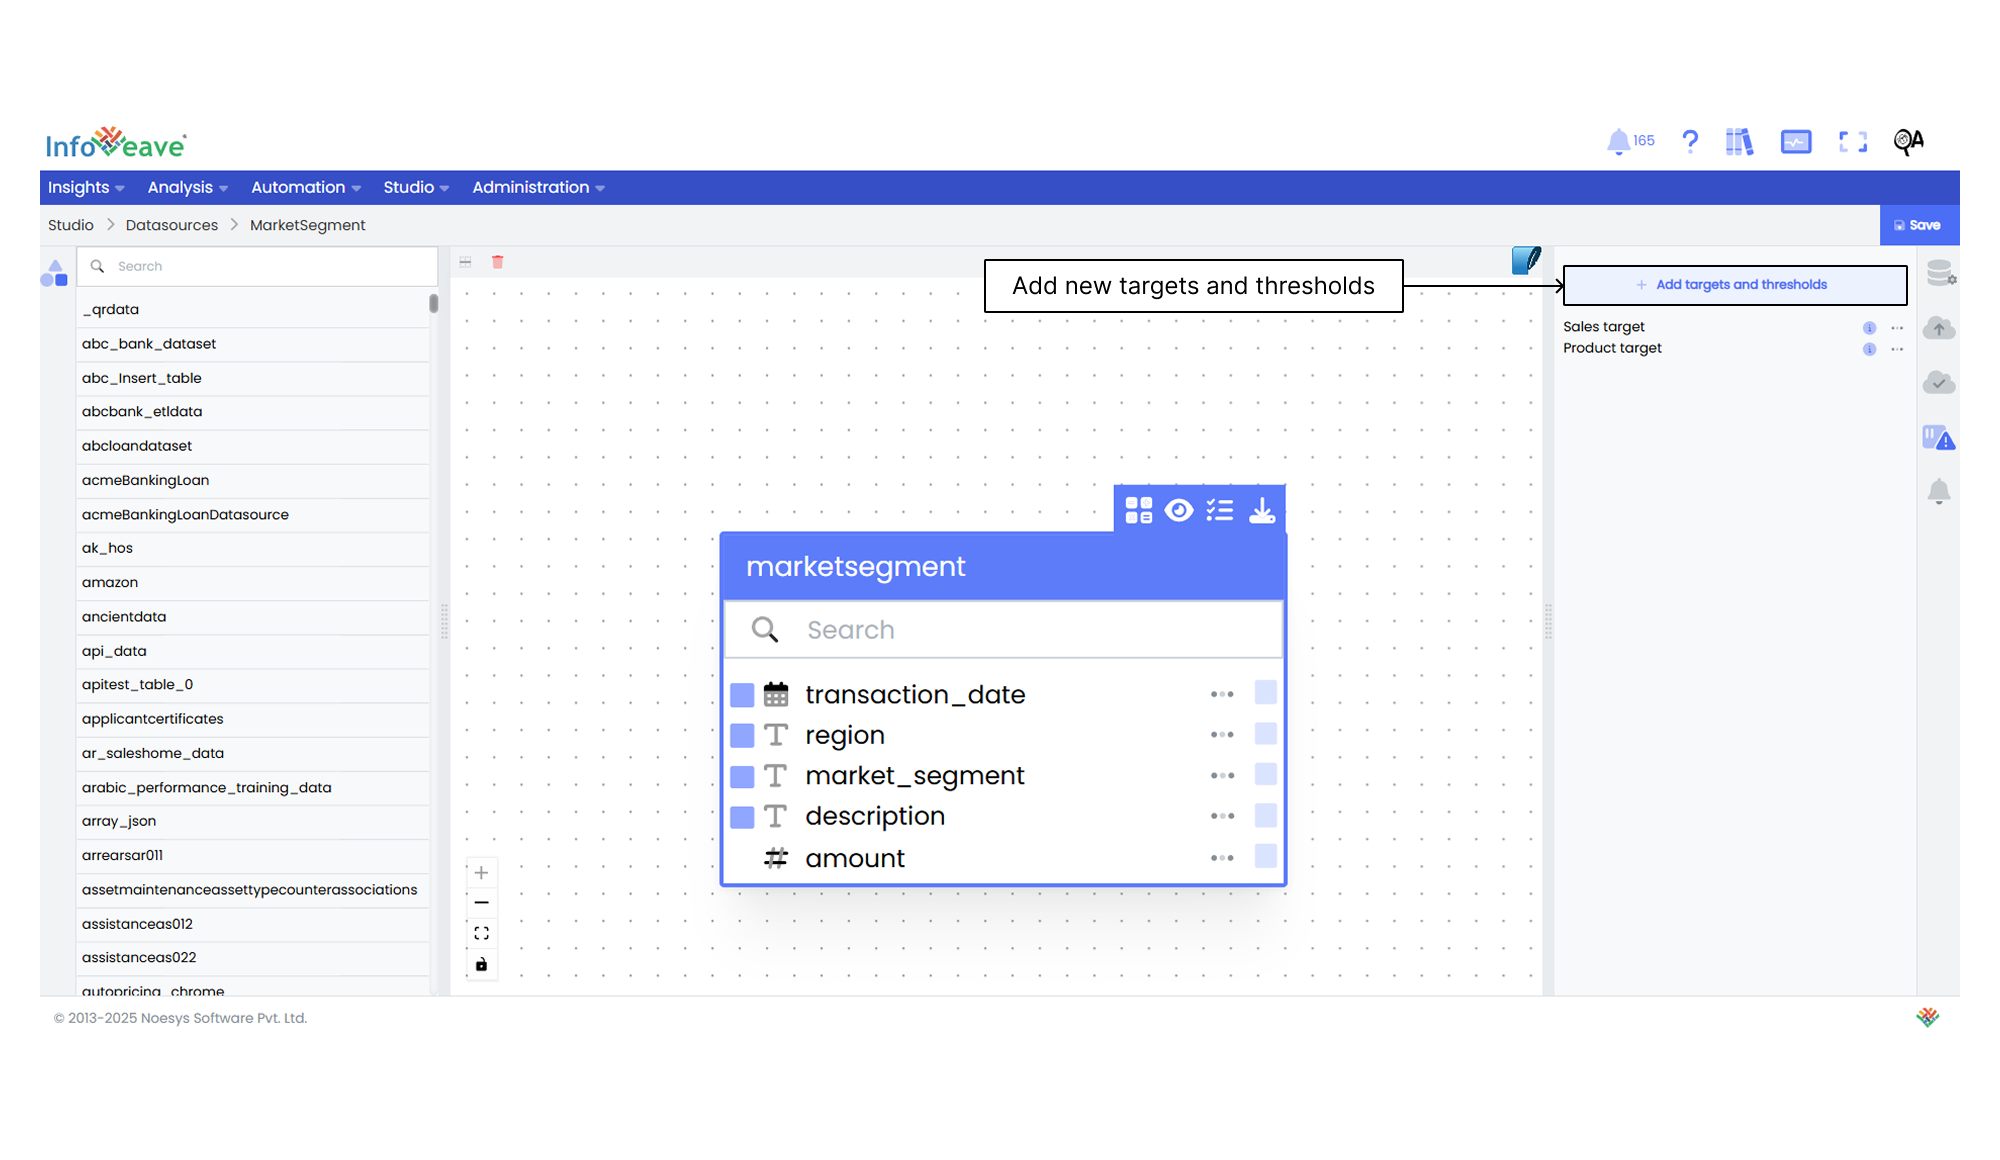
2. To create a new formula, click on the **+ Add targets and thresholds** button.
3. Enter the targets and thresholds **Name**.
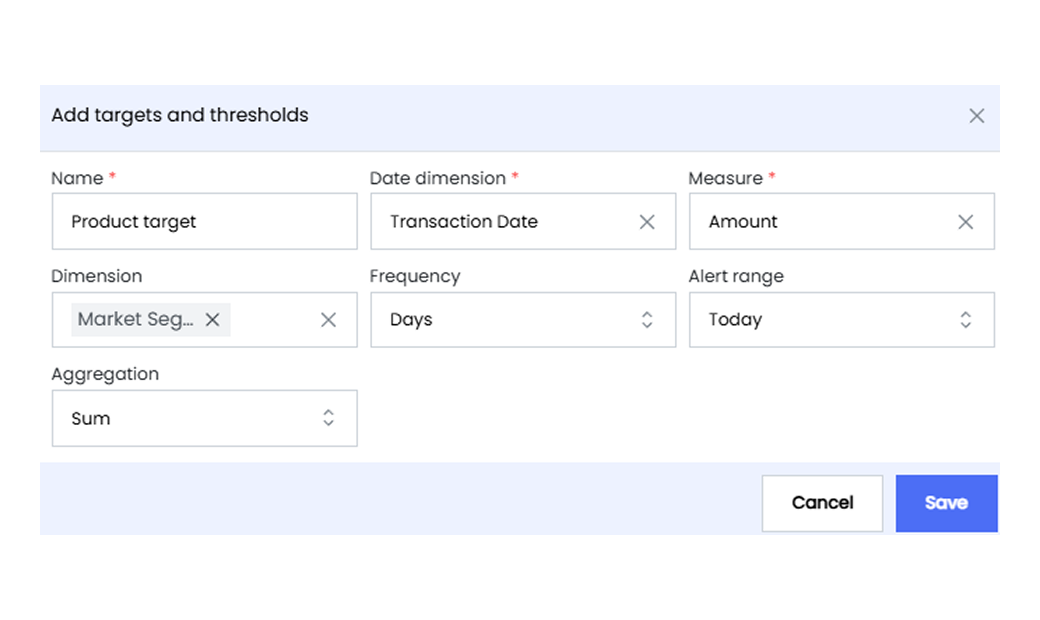
4. Select the required **Measures** and **Dimensions** from their respective lists.
5. Select the alert frequency for the date dimension such as years, quarters, months, weeks, or days.
6. After configuring all measures and dimensions, define the aggregation type as either sum or average.
7. Click on **Save** to save the targets and thresholds configuration.
## Downloading the Targets and Thresholds Template
The targets and thresholds template serves as the foundation for your targets and thresholds values. The downloaded template allows you to define your targets and thresholds values before uploading them back into Infoveave.
1. To define the targets and thresholds values, start by downloading the template.
2. Click on the **ellipsis** icon on the required targets and thresholds. Click on the **Download** button. A download template dialog box appears showing the selected dimension values.
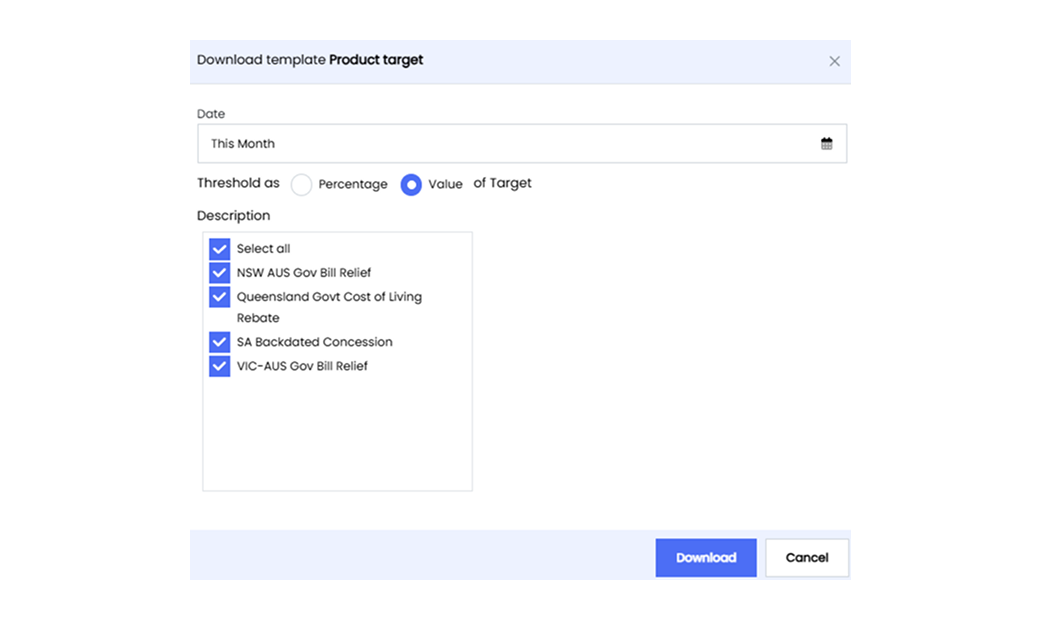
3. Select the date range based on the frequency you want.
4. Choose between **Percentage** or **Value** of the target depending on the type of value you want to insert in the template.
5. Select the dimension item(s) for each dimension on which you want to apply the targets and thresholds. If you want to select all available dimension values, you can use the **Select all** option.
6. Click on the **Download** button to download the template in .csv format.
7. Open the downloaded template and define the targets and three threshold values. The threshold values are represented as Threshold_1, Threshold_2, and Threshold_3.
## Uploading the Targets and Thresholds Template
Uploading the targets and thresholds template back into Infoveave allows you to bring the configured targets and thresholds values into the system.
1. Click on the **ellipsis** icon on the required targets and thresholds. Click on the **Upload** button to start the process. The upload template dialog box appears for you to upload the configured template.
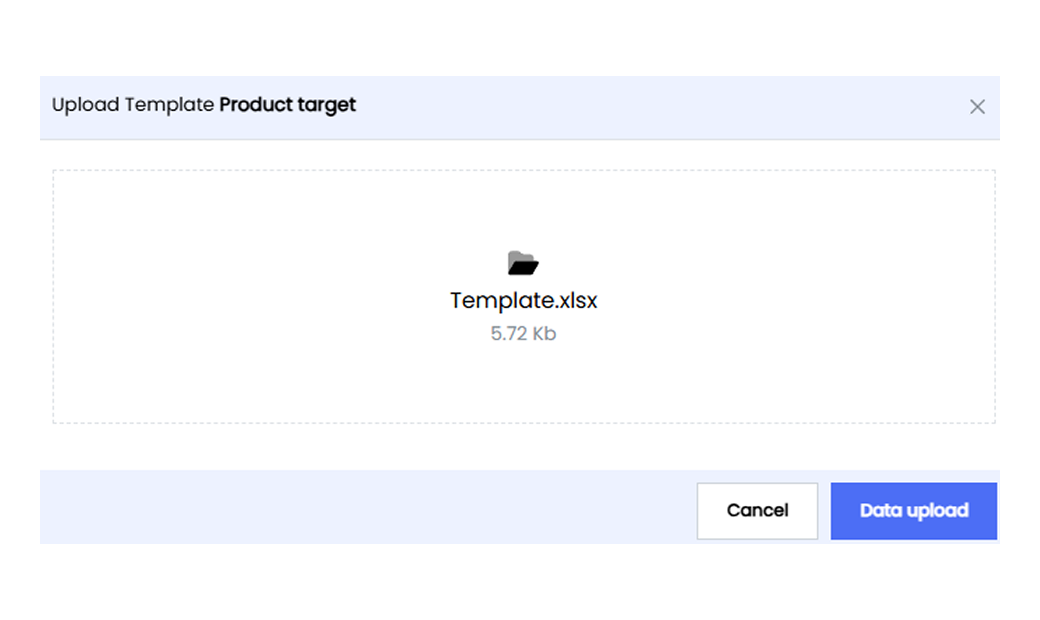
2. Browse your local storage and select the template file you created earlier.
3. Confirm the upload by clicking on the **Data upload** button. The system processes the data for integration and shows a success notification once the upload is complete.
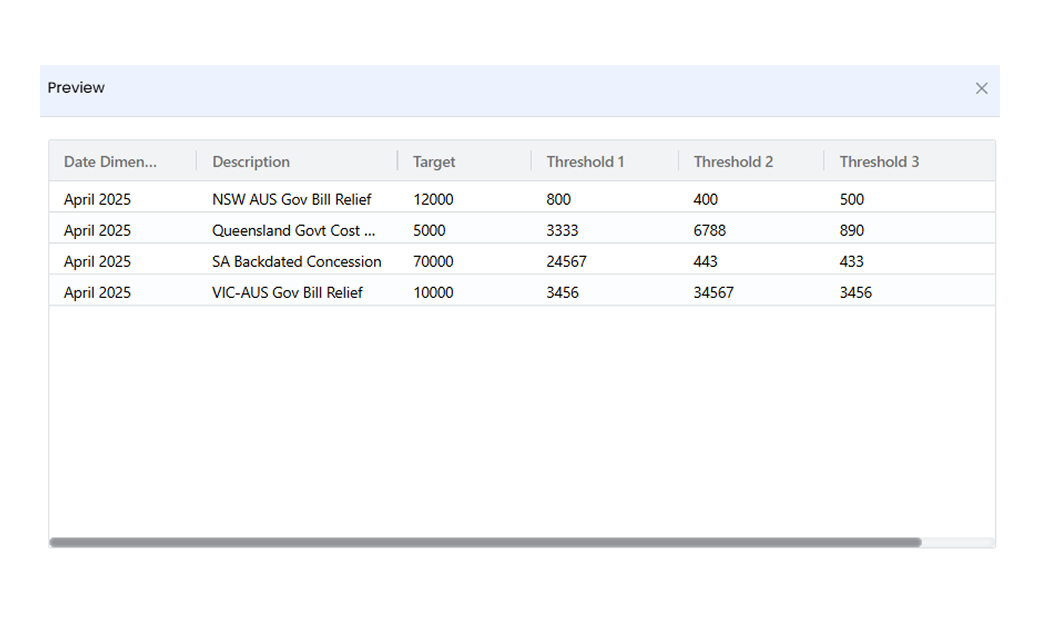
4. To verify the uploaded template and ensure it accurately reflects your targets and thresholds values, click on **Preview** button by clicking on the **ellipsis**.
## Activating the Targets and Thresholds Alerts
1. Infoveave sets up four alerts for every target and threshold. To access the alerts, click on **Automation** **Alerts** . All alerts set by you or shared with you are displayed under the tabs **My Alerts** and **Shared Alerts**.
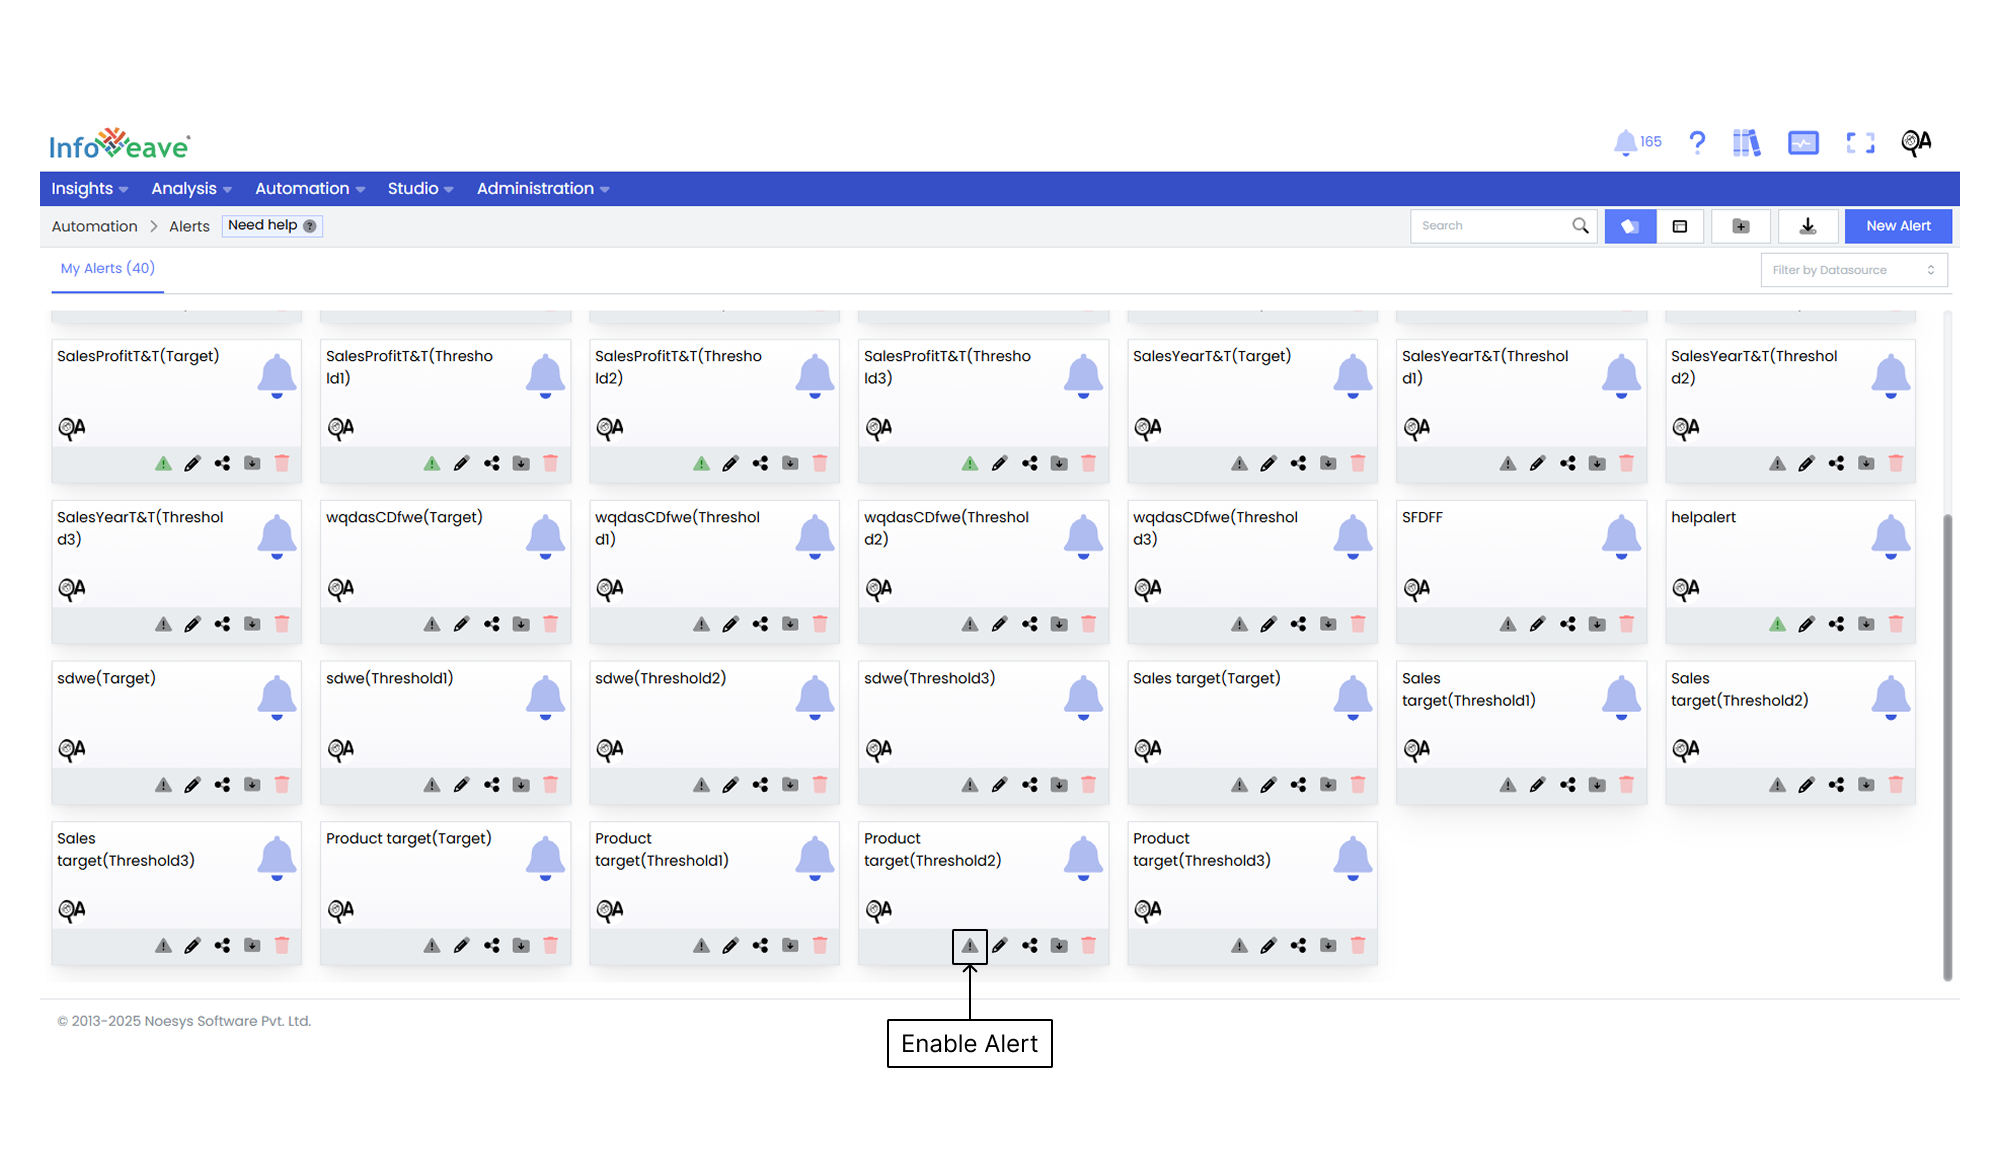
2. To activate an alert, click on the **Enable alert** icon.
3. Click on the **Edit** icon to configure or customize the alert message. Select a relational operator from the dropdown list and choose the notification type.
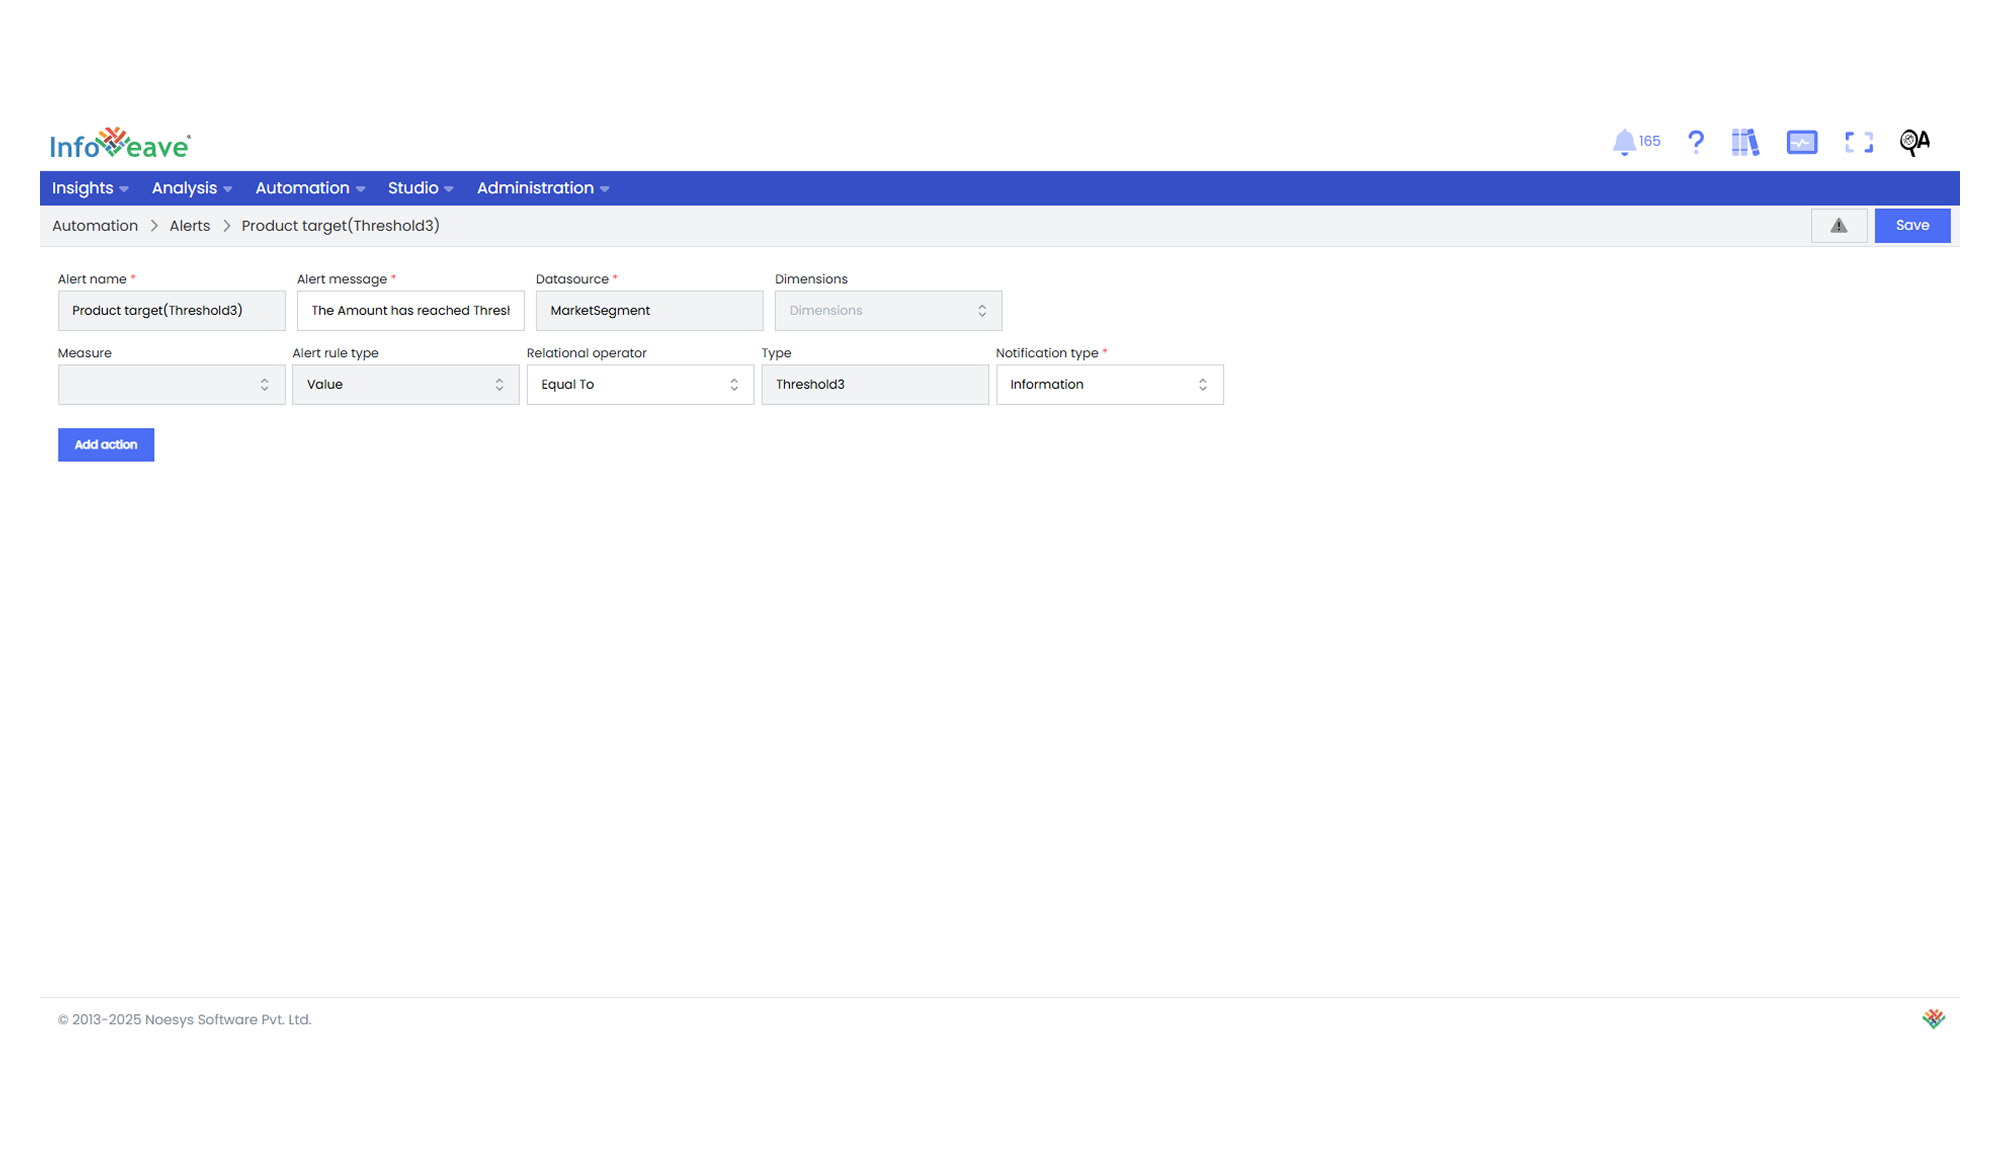
4. Update the **Alert message** field with the desired message. This message is displayed when the condition set in the alert is met.
5. Select a **Relational operator** from the dropdown menu to define the relationship between the measure and the alert rule. For example, greater than, less than, or equal to.
6. Under **Notification type**, choose the type of notification for the alert. This includes success, error, information, and warning.
7. To add a new action for the alert, click on **Add action**. This allows you to select either a specific activity or a workflow to be initiated when the alert is triggered.
8. If you want the selected activity or workflow to be executed automatically when the alert condition is met, enable the **Is automated** checkbox.
9. Once you have made all the required changes, click on **Save** to apply the updated settings to the alert.