---
title: Custom Parser
description: Create and manage datasources with Custom Parser, configure data tables, and utilize various data ingestion methods.
---
import { Aside, Steps } from '@astrojs/starlight/components';
# Custom Parser
Use the Infoveave Custom Parser to Create a Datasource from an Unstructured Dataset
## Creating a Datasource Using the Custom Parser
1. To access Infoveave Datasource types, navigate to **Studio** **Datasources**.
2. All types of Datasources created by you or shared with you are displayed under **My Datasources** and **Shared Datasources**.
3. To create a new Datasource, click on **New Datasource**.
4. Choose **Custom file parser** as the Datasource type.
5. A new window opens for the Datasource creation process.
6. Click on the option to select the file under **Create Datasource using file** to upload the file.
* You can select a file from your local storage.
* Supported file extensions are .txt, .prn, .dat, .dtf, .xlsx, .csv, .xls, .xlsm.
7. After providing the necessary details, proceed to **Next** in the Datasource configuration.
8. Once the file upload is complete, a preview of the unstructured data becomes available.
9. You must create a custom **parse code** in either **.txt or .json** format for an **unstructured file**.
10. You can click on **Import template** to import the formatting template from your storage location and convert the Datasource to a structured format.
11. Click on **Preview** to see the conversion of the Datasource from an unstructured format to a structured format.
12. Click on **Next** to configure the measures and dimensions in the Datasource.
13. Once the file processing is complete, a tabular preview of the data becomes available.
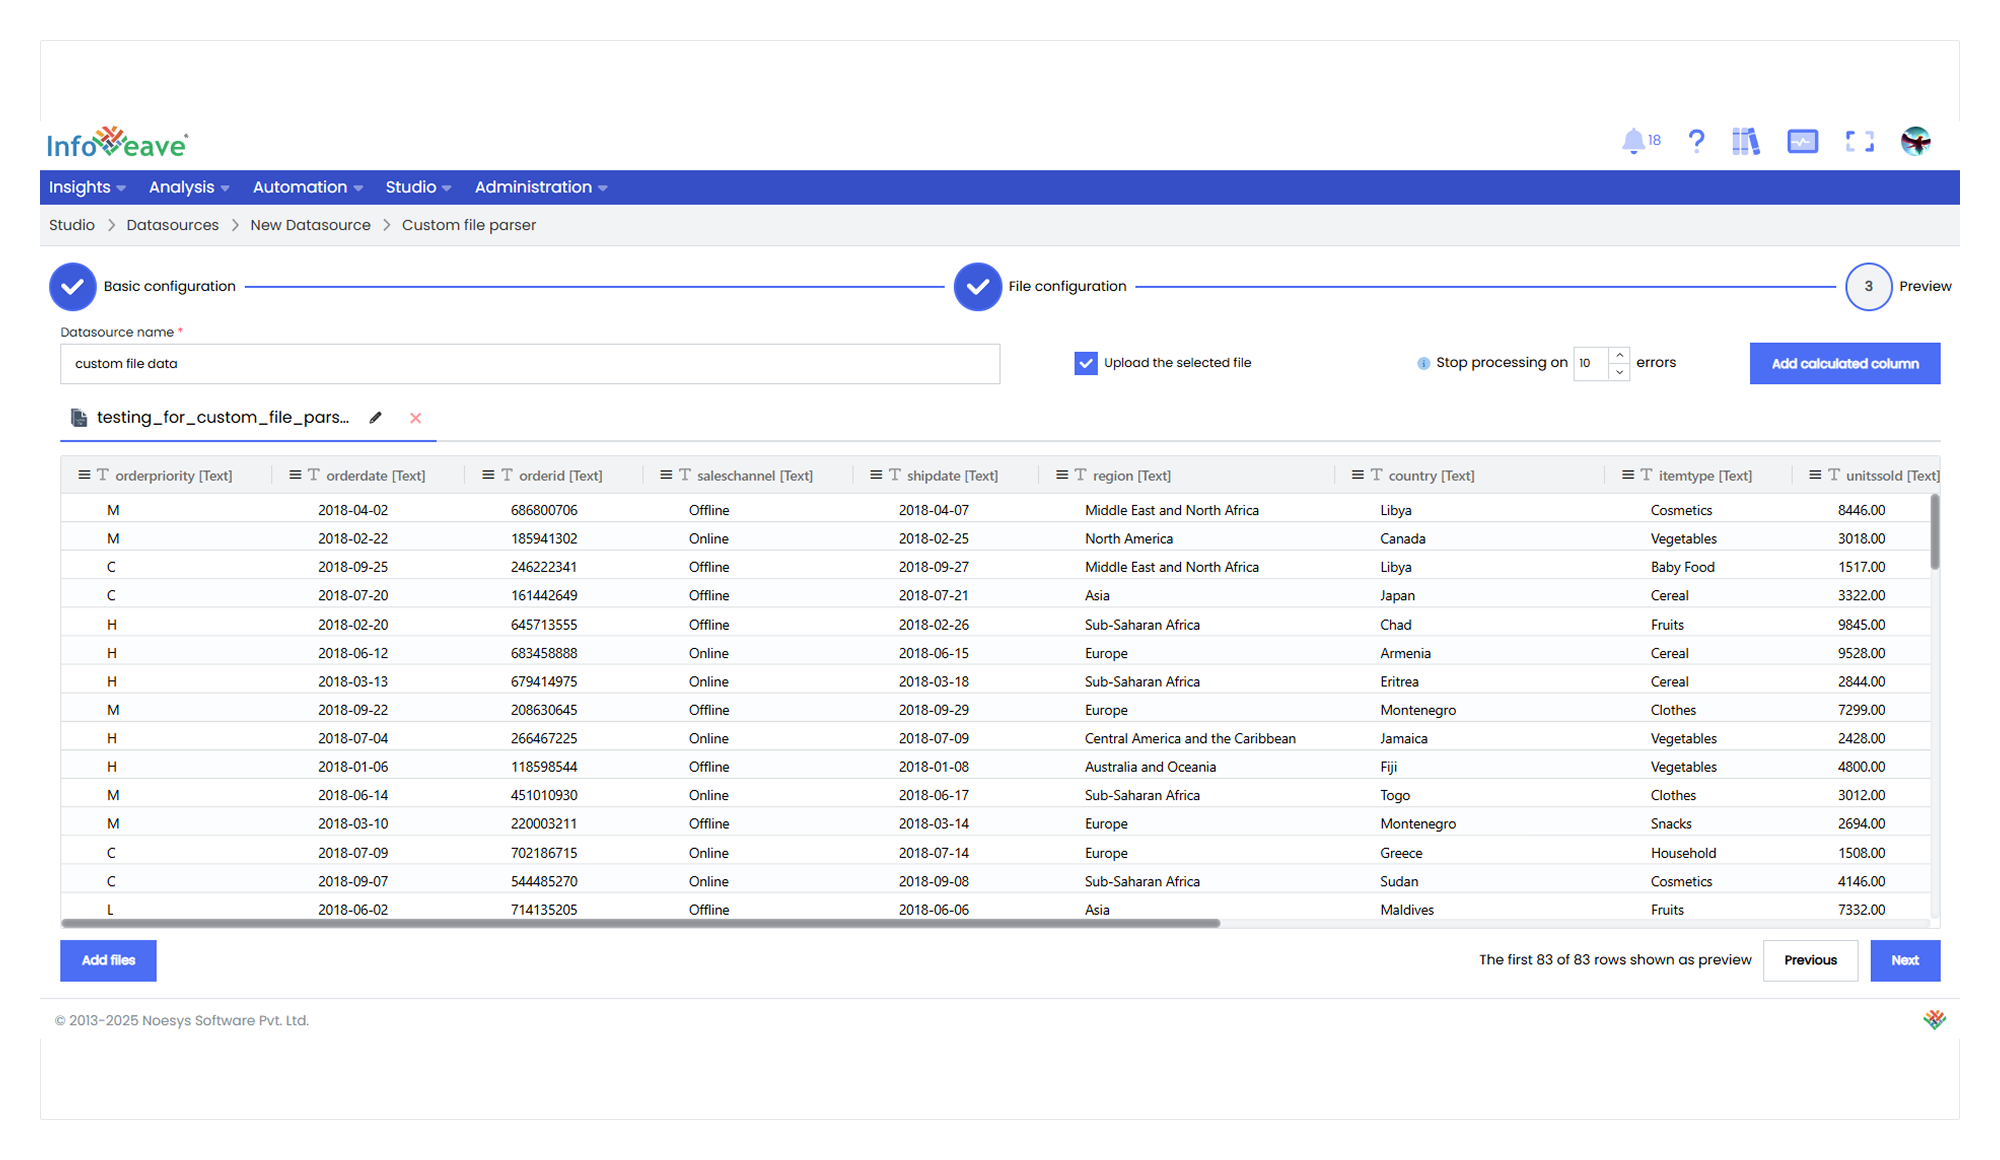
14. Provide a name for your Datasource.
15. To add additional files to supplement your Datasource, click on the **Add files** option.
16. To customize the **Table name** and choose the **Ingestion type**, click on the **Edit** icon close to the table name. Configure the following fields within this section.
* **Table name** Specify the desired table name.
* **Ingestion type** Choose from options such as **Incremental**, **Truncate and Reload**, or **Update** to define how new data is integrated into the existing dataset.
* **Date column exists** This checkbox identifies the date column in your dataset by default.
* **Add upload date** If you wish to include an upload date column, select this checkbox. It can help you track when new data is added to the dataset.
* **Incremental** With the "Incremental" ingestion type, new data is added to the existing dataset without affecting the already loaded data. This mode is ideal when you want to continuously append new records to your dataset without modifying or reloading the existing information. It is efficient for scenarios where your dataset is frequently updated.
* **Truncate and Reload** Selecting "Truncate and Reload" means that the existing dataset is completely replaced with the new data. This mode is useful when you want to refresh your dataset with the most recent information and remove any previous data. It is particularly suitable for scenarios where the entire dataset needs to be updated periodically.
* **Update** In this mode, Infoveave identifies matching records between the new data and the existing dataset based on defined keys. Updated records are replaced while new records are added. This mode is efficient when you want to refresh your dataset with new information and update existing records without starting from scratch.
17. Click on the column header in the tabular view to set the following.
* **Column Type** Change the column data type.
* **Auto Size All Columns** Perfectly fit the data in the columns.
* **Fit to Chart** Set the visibility of the data for quick viewing.
18. Enable the **Upload the selected file** option to upload the data to the table structure.
19. To make any changes to the data table, select the required one and click **Previous**.
20. Use the [Add calculated column](/studio-v8/datasources/calculated-columns-datasource) feature to create a new column with calculated values not available in the original dataset. This is especially useful for performing custom calculations on your data.
21. To define the measures and dimensions in the dataset, click on **Next**.
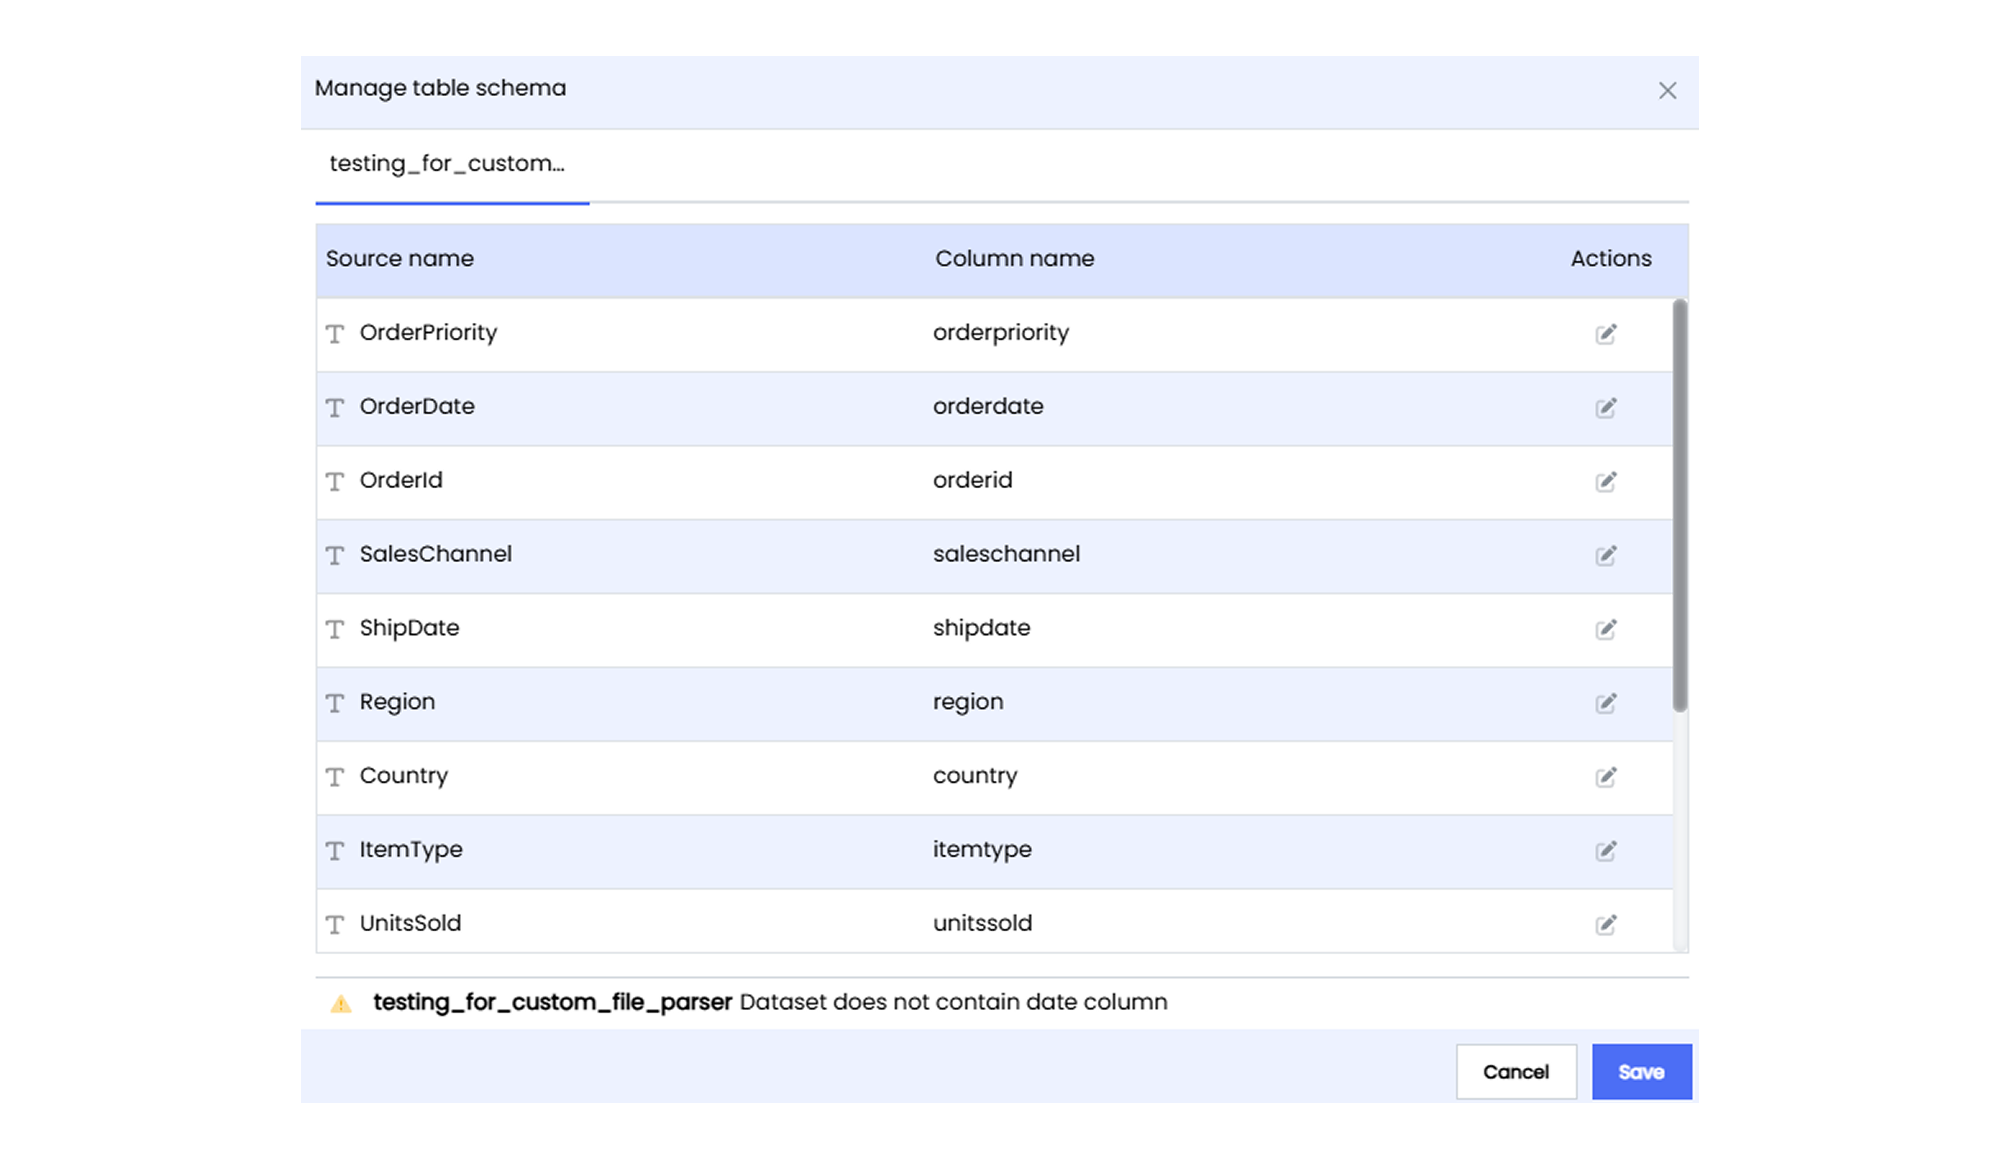
22. The table schema appears, allowing you to rename the columns if required.
23. Click on **Save** to save the updated table schema. You are redirected to the Datasource Designer.
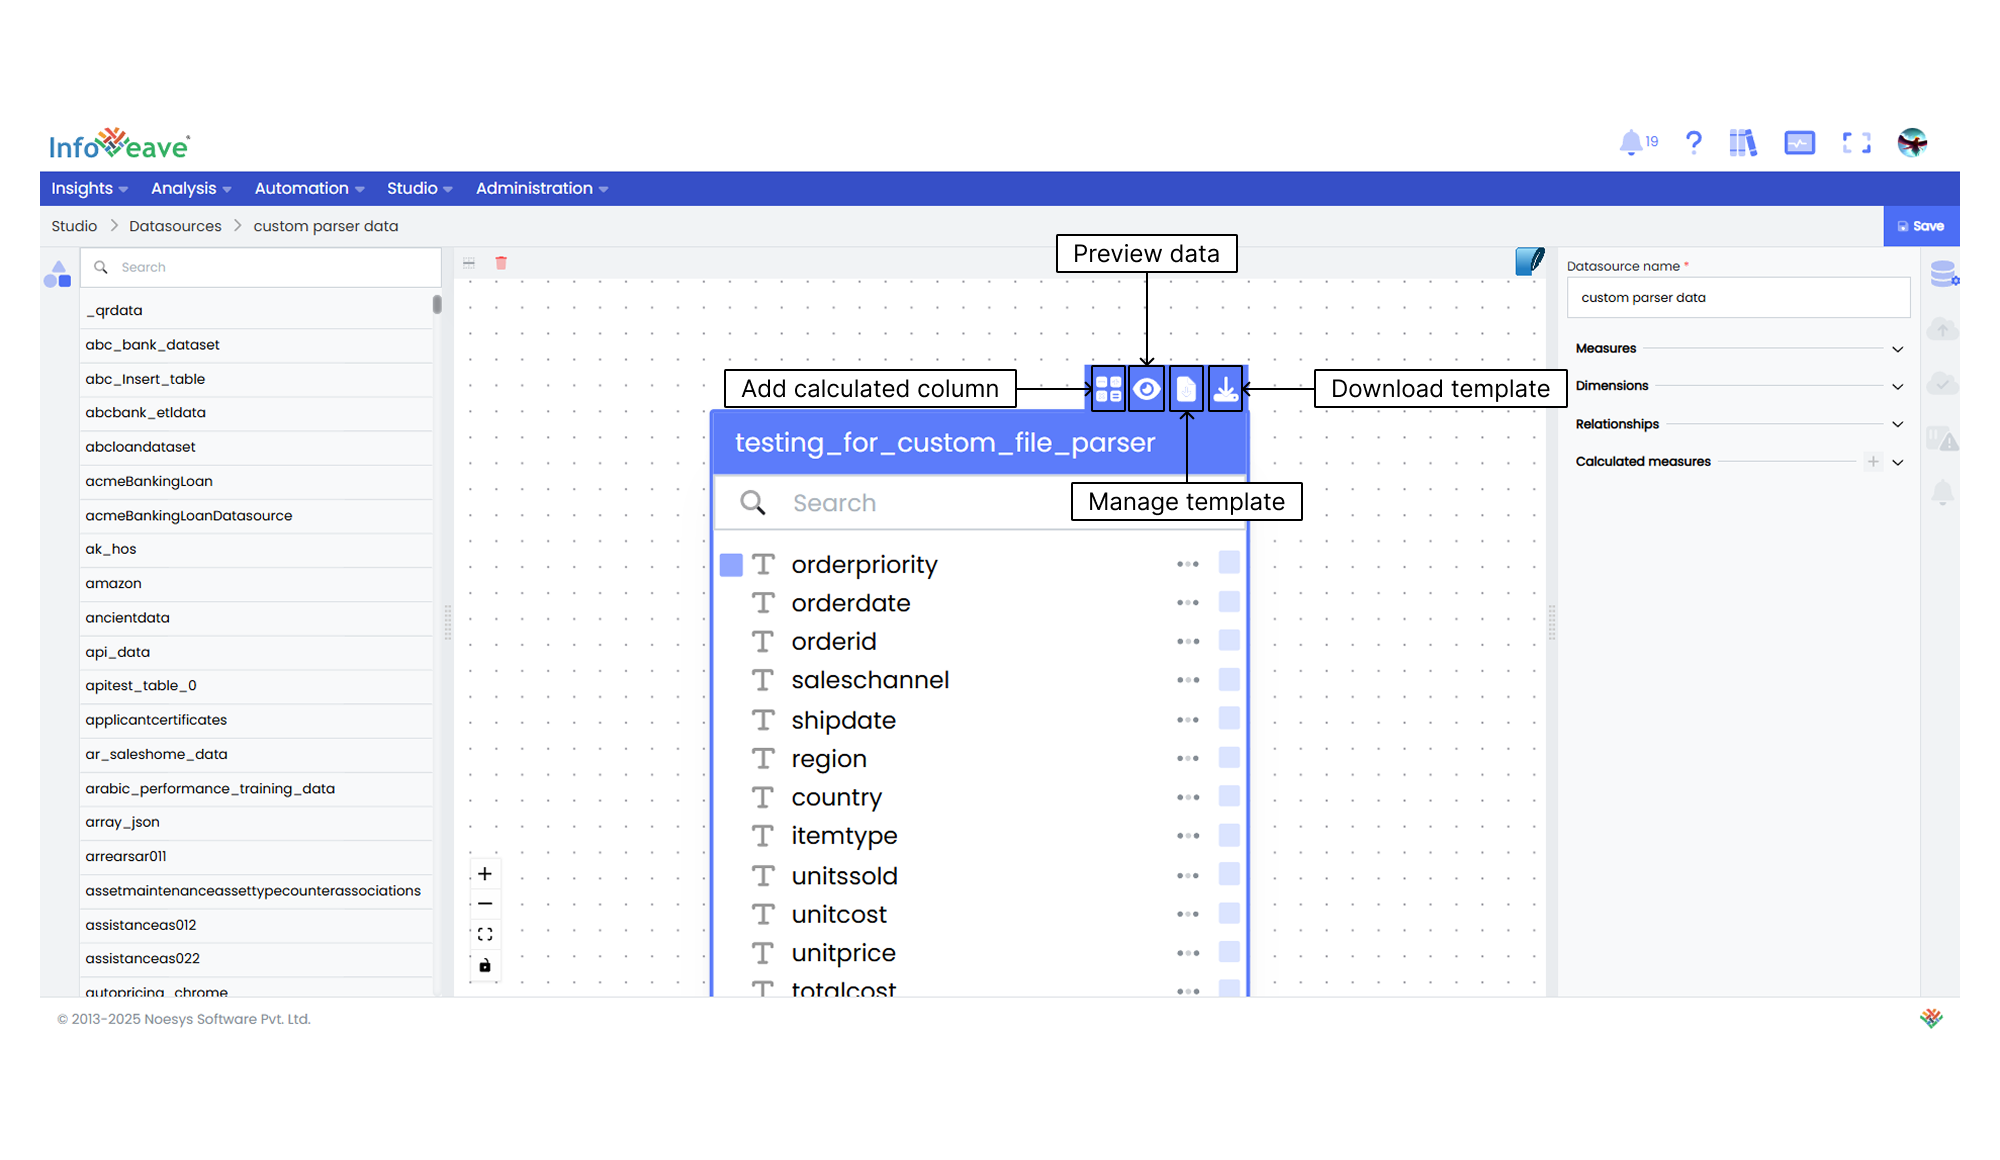
24. The Datasource you created is now available in the designer window.
To learn about adding measures and dimensions to the data table, visit [Measures and Dimensions](/studio-v8/datasources/measures-dimensions-and-hierarchies).
To learn about adding calculated columns, visit [Calculated Columns](/studio-v8/datasources/calculated-columns-datasource#configuring-calculated-columns).
To learn about adding calculated measures, visit [Calculated Measures](/studio-v8/datasources/calculated-measures#configuring-calculated-measures).