---
title: Upload Data and Previous Uploads
description: Effortlessly upload data, via email, or NGauge forms. Manage previous uploads with download and delete options.
---
import { Aside, Steps } from '@astrojs/starlight/components';
# Upload Data and Previous Uploads
Data upload and ingestion are fundamental processes in Infoveave. These processes enable you to populate your datasets and facilitate meaningful analyses and insights. This guide walks you through the detailed steps and methods for seamless data upload.
## Uploading data using the Upload data feature
Follow these steps to upload data using the **Upload data** feature.
1. Navigate to **Studio Datasources**.
2. Select the Datasource into which you want to upload data.
3. Click on the **Edit** icon.
4. Click on the **Upload data** tab in **Datasource Setup panel**.
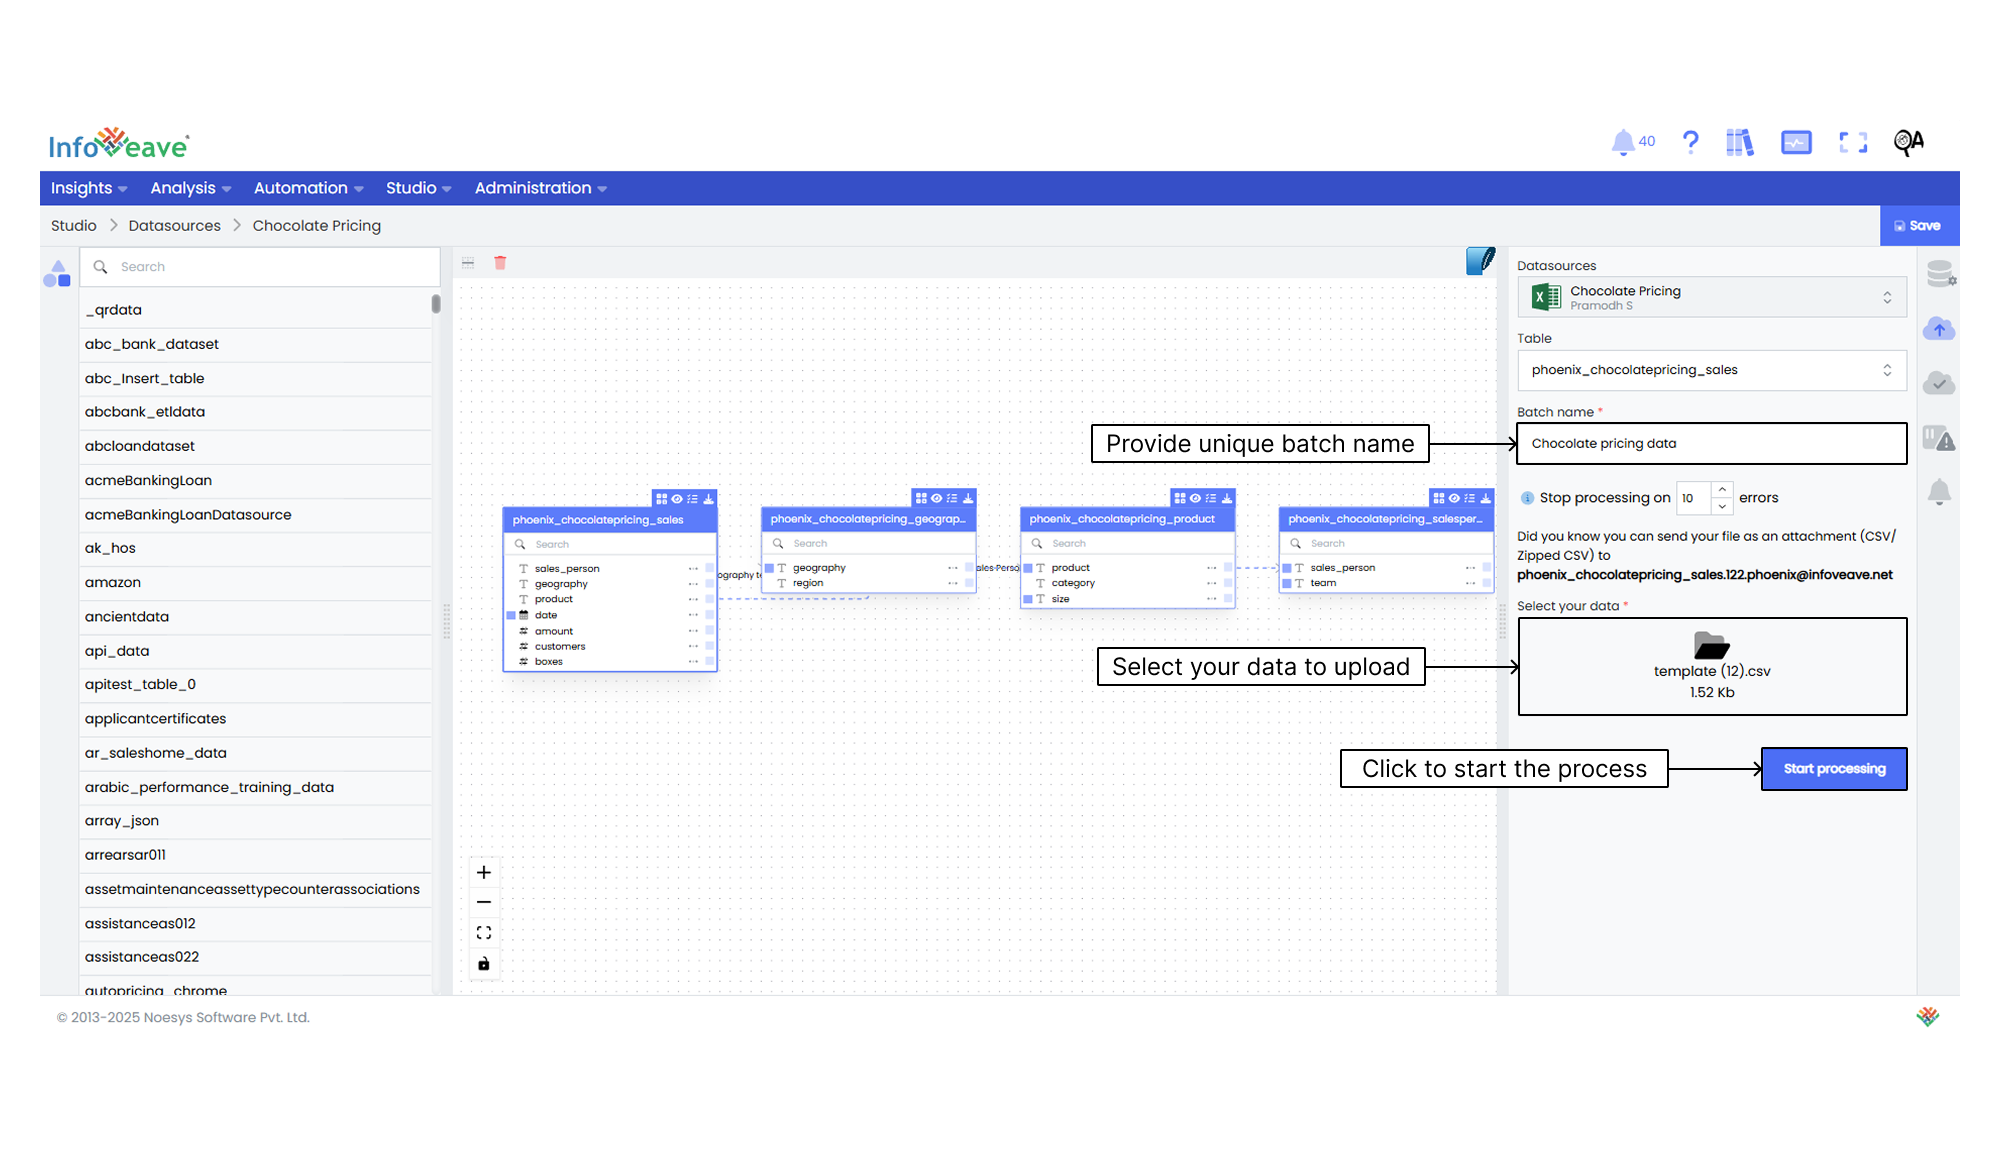
4. Assign a unique batch name to identify the data upload.
5. Click the **Select your data** box to choose the file you want to upload.
6. Use the file picker dialog box to select the specific file from your local system.
7. Click **Start processing** to begin the upload.
8. You receive a notification confirming a successful upload or an error if any issues occur.
## Uploading Data by Using an Email
You can also upload data by sending it through email.
1. Navigate to **Studio Datasources**.
2. Select the Datasource into which you want to upload data.
3. Click on the **Edit** icon.
4. Click on the **Upload data** tab in **Datasource Setup panel**.
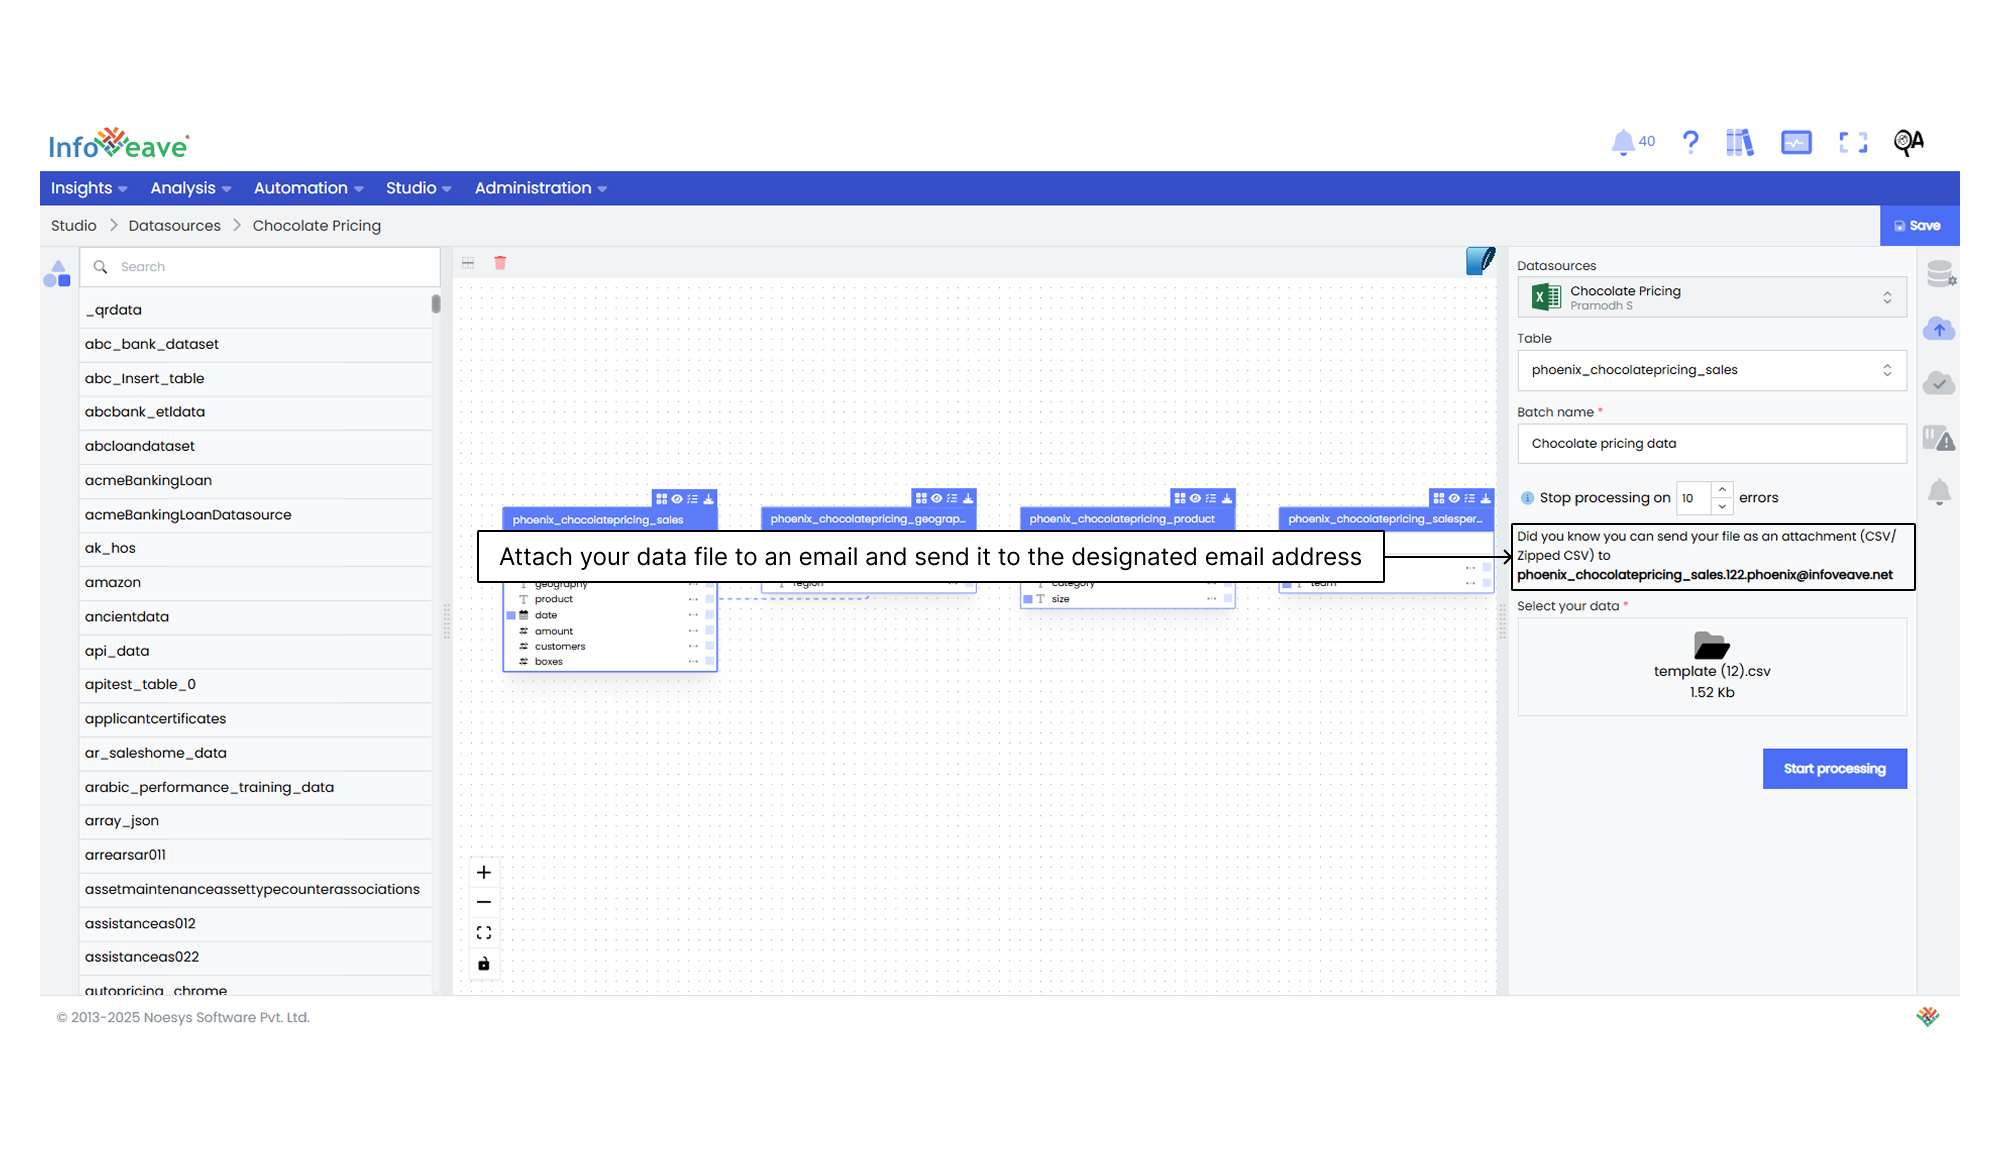
1. Attach your data file to an email and send it to the designated email address listed in the **Upload data** tab.
2. Ensure that the attached file follows the correct data template.
3. You receive a notification confirming whether the upload was successful or failed.
4. You do not need to log in to the Infoveave platform to use this method.
## Viewing and Managing the Previous Uploads
The previous upload options in Datasource settings allow you to view upload history. You can download earlier versions for offline analysis or delete older uploads to maintain effective data management.
Follow these steps to use the previous upload options efficiently.
1. Navigate to **Studio Datasources**.
2. Select the Datasource into which you want to upload data.
3. Click on the **Edit** icon.
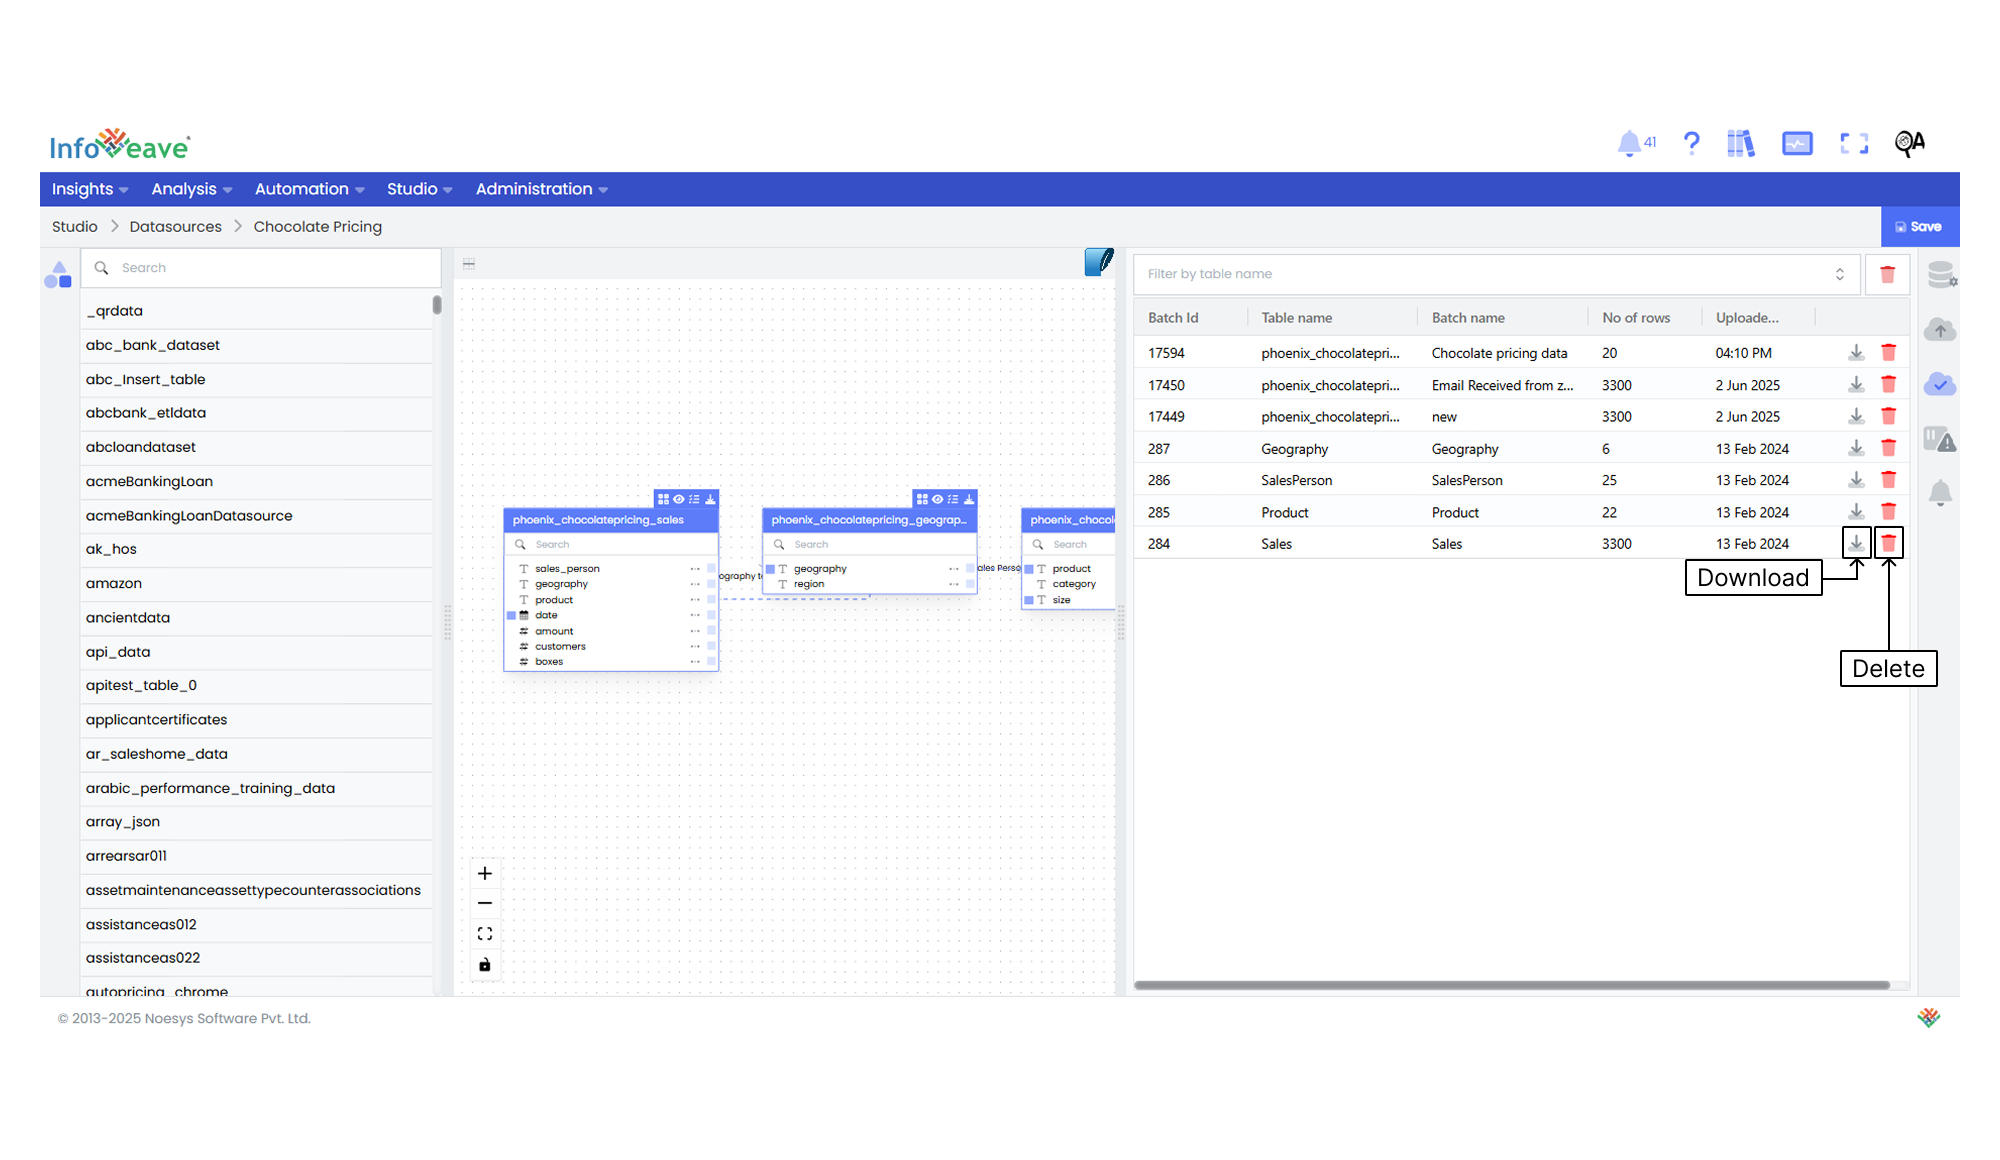
4. Click the **Previous uploads** tab to view all past data uploads. You can **Download** or **Delete** any of them.
5. Click the **Download** icon next to the desired uploaded table to download it.
6. Click the **Delete** icon next to the desired uploaded table to delete it.
7. To delete multiple data tables, click the **Delete** icon in the top right corner of the module.
8. Select the date range for which you want to delete uploads.
9. Choose either **If row count is zero** or **All batches** as your deletion criteria.
10. To confirm the deletion, type “Delete” in the confirmation field and click **Delete**.