---
title: Authentication with Microsoft Entra
description: Microsoft Entra Integration using OIDC
---
import { Aside, Steps } from "@astrojs/starlight/components";
# Authentication with Microsoft Entra
Microsoft Entra is a cloud-based identity and access management service that enables single sign-on (SSO) for users.
Infoveave supports Microsoft Entra integration using the OpenID Connect (OIDC) protocol.
## Setup Microsoft Entra
1. Create a new App Registration in Microsoft Entra Administration Center.
2. Name the Application Infoveave
3. Choose Supported account types as "Accounts in this organizational directory only"
4. Redirect URI should be set to `https:///External-Auth//OIDC-Callback`
5. Copy the Application (client) ID and Directory (tenant) ID
6. Generate a new client secret and copy the value
## Setup in Infoveave
1. Go to Administration > Control Center > External Authentication
2. Select Enable External Authentication
3. Choose Microsoft Entra as the provider
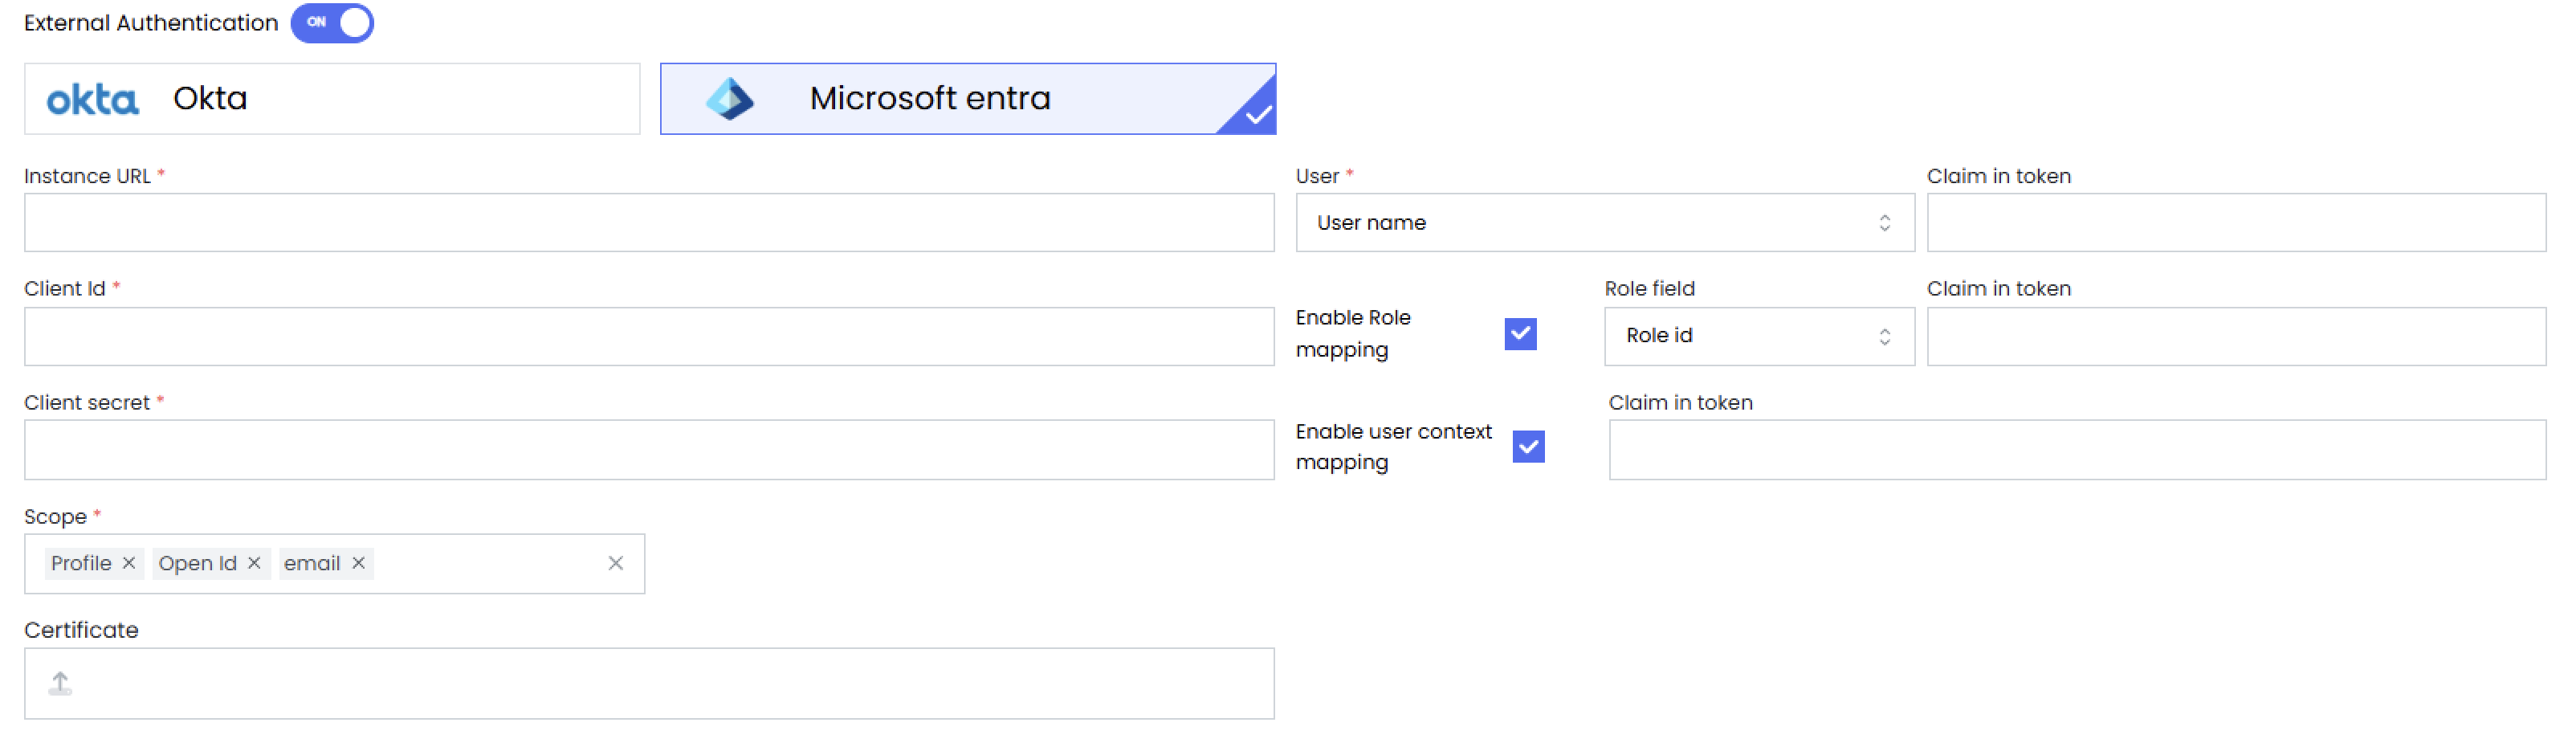
4. Enter the Application (client) ID, Directory (tenant) ID, and Client Secret
5. In the User Mapping Select Email in User Field
6. Enter `unique_name` as the claim in token
7. Save the configuration
## Integrate roles
1. In Microsoft Entra, create App roles equivalent to roles in Infoveave
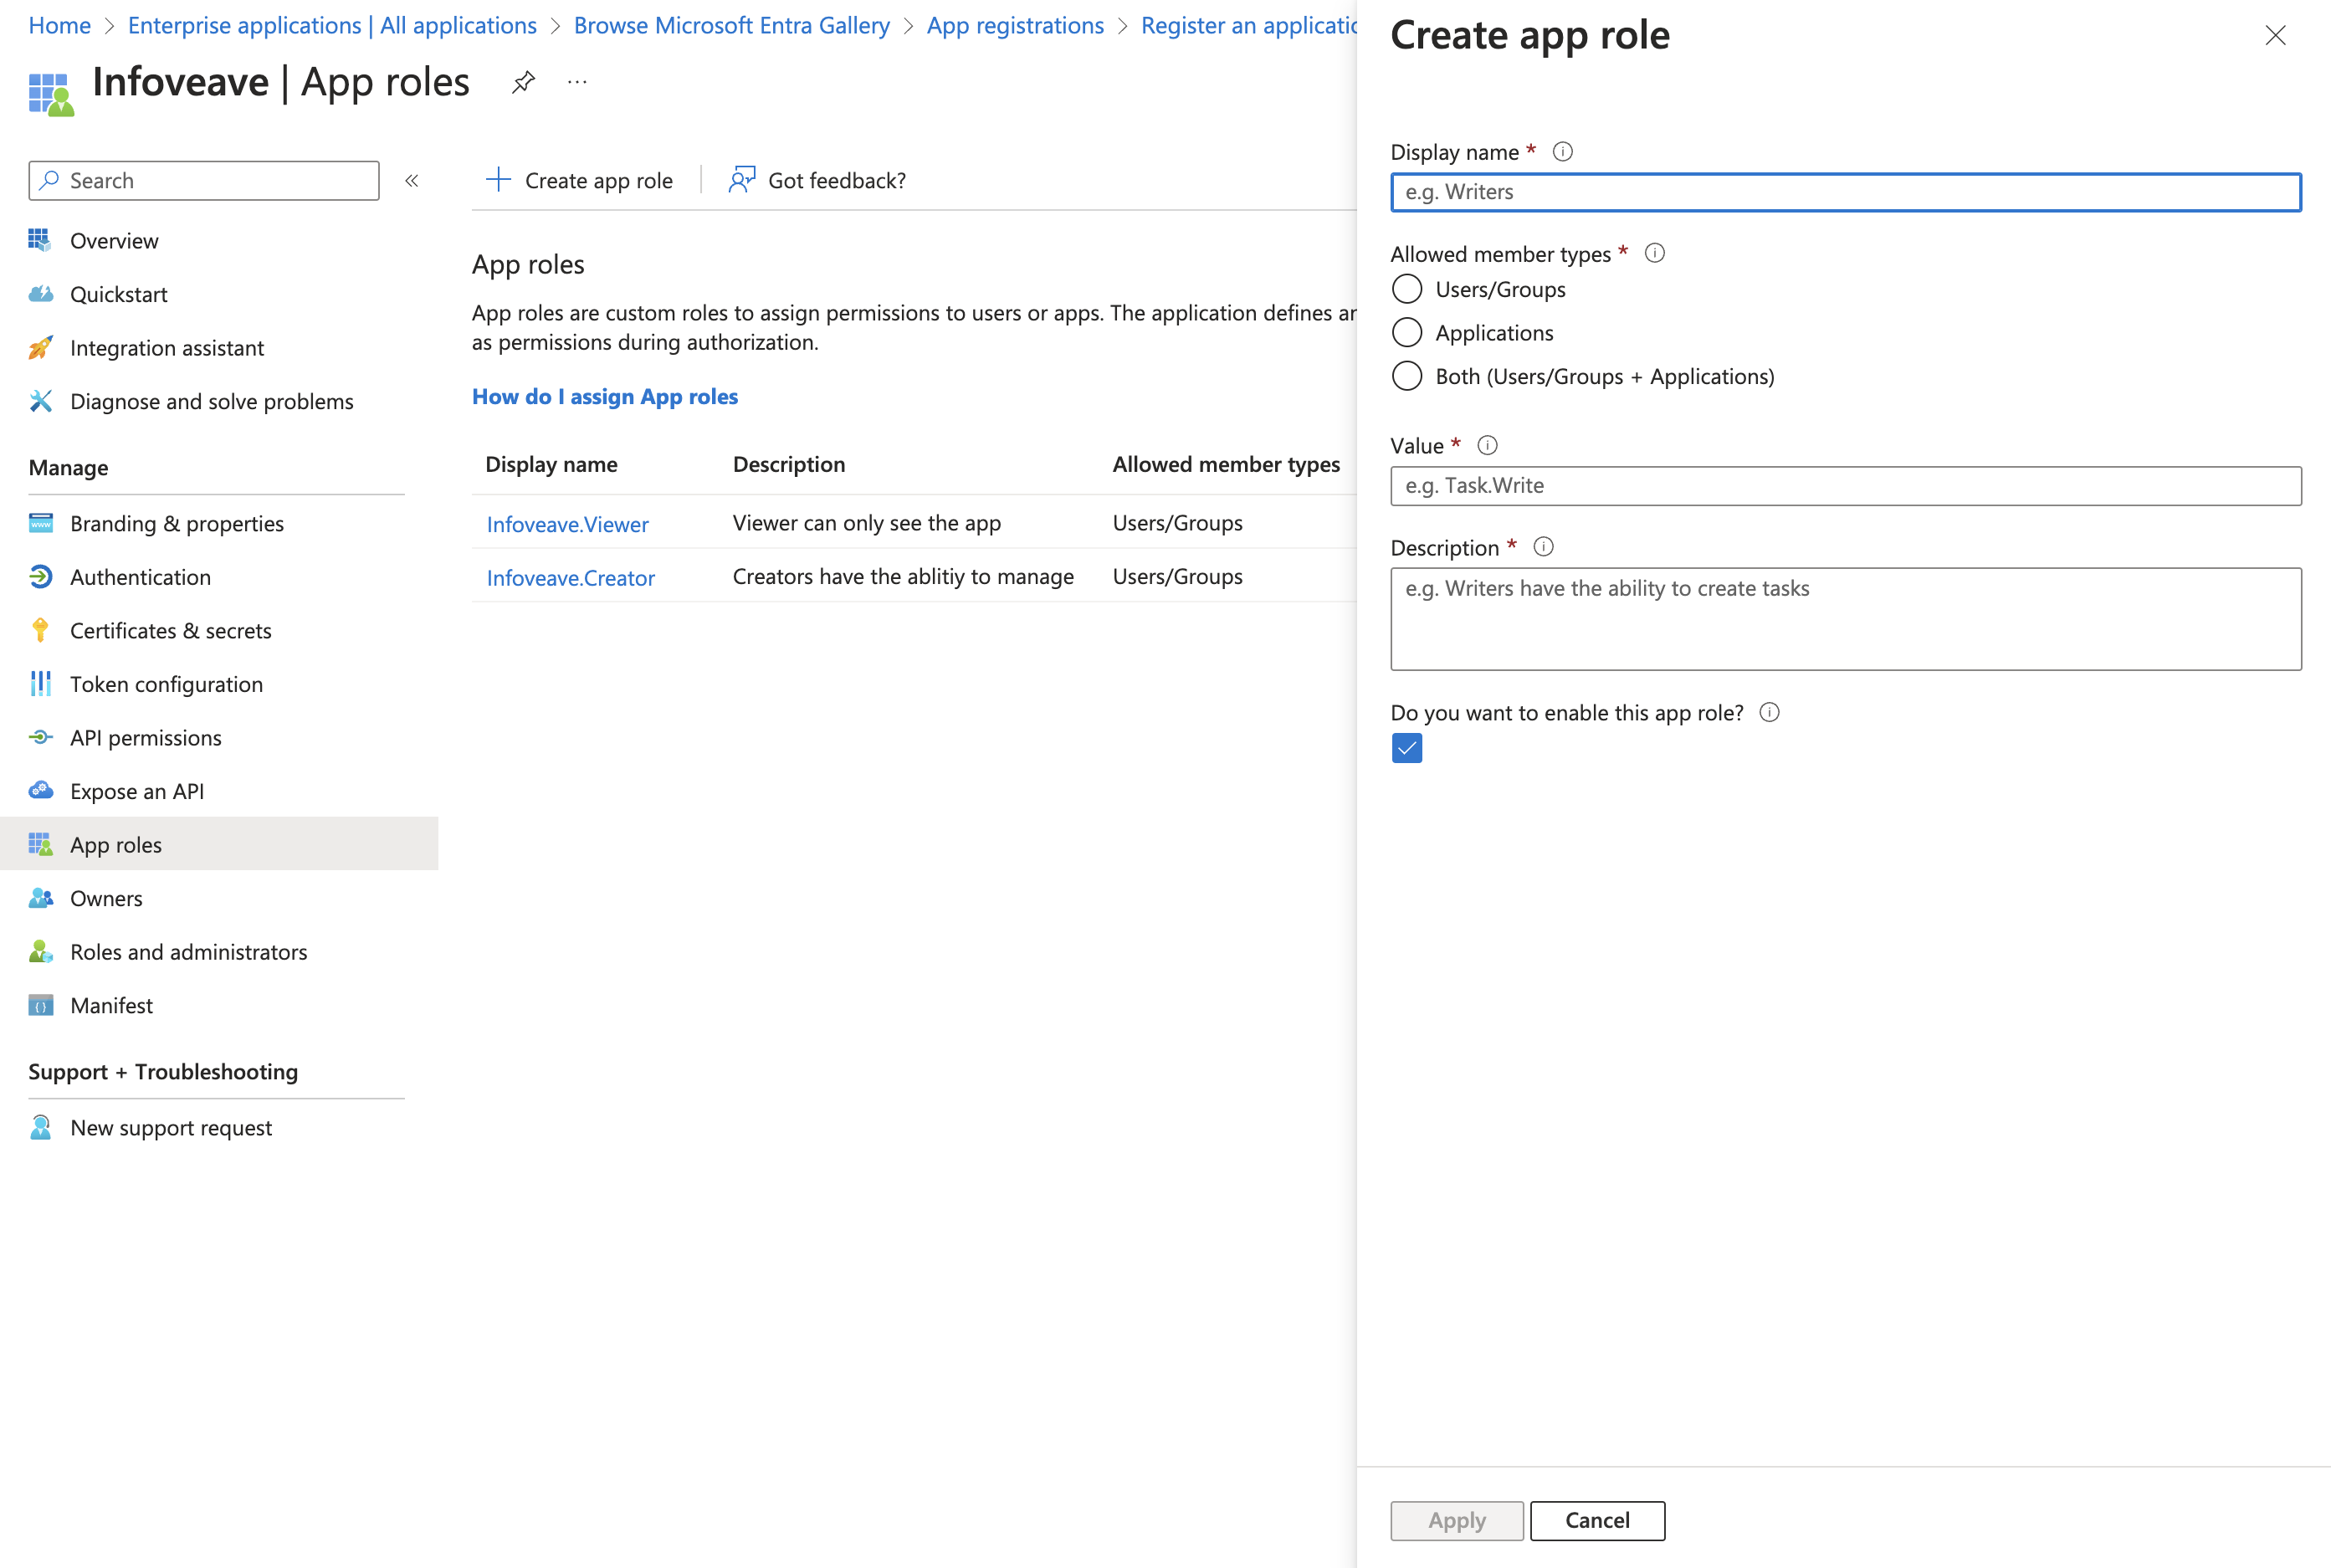
2. Name the role based in what you find easy to manage
3. Allowed Memeber types should be "Users and Groups"
4. Value should be the role name in Infoveave
5. Assign the roles to users
6. In Infoveave, go to External Authentication
7. Enable role mapping, Select `Role Name` as Role Field
8. Enter `Role` as the claim in token
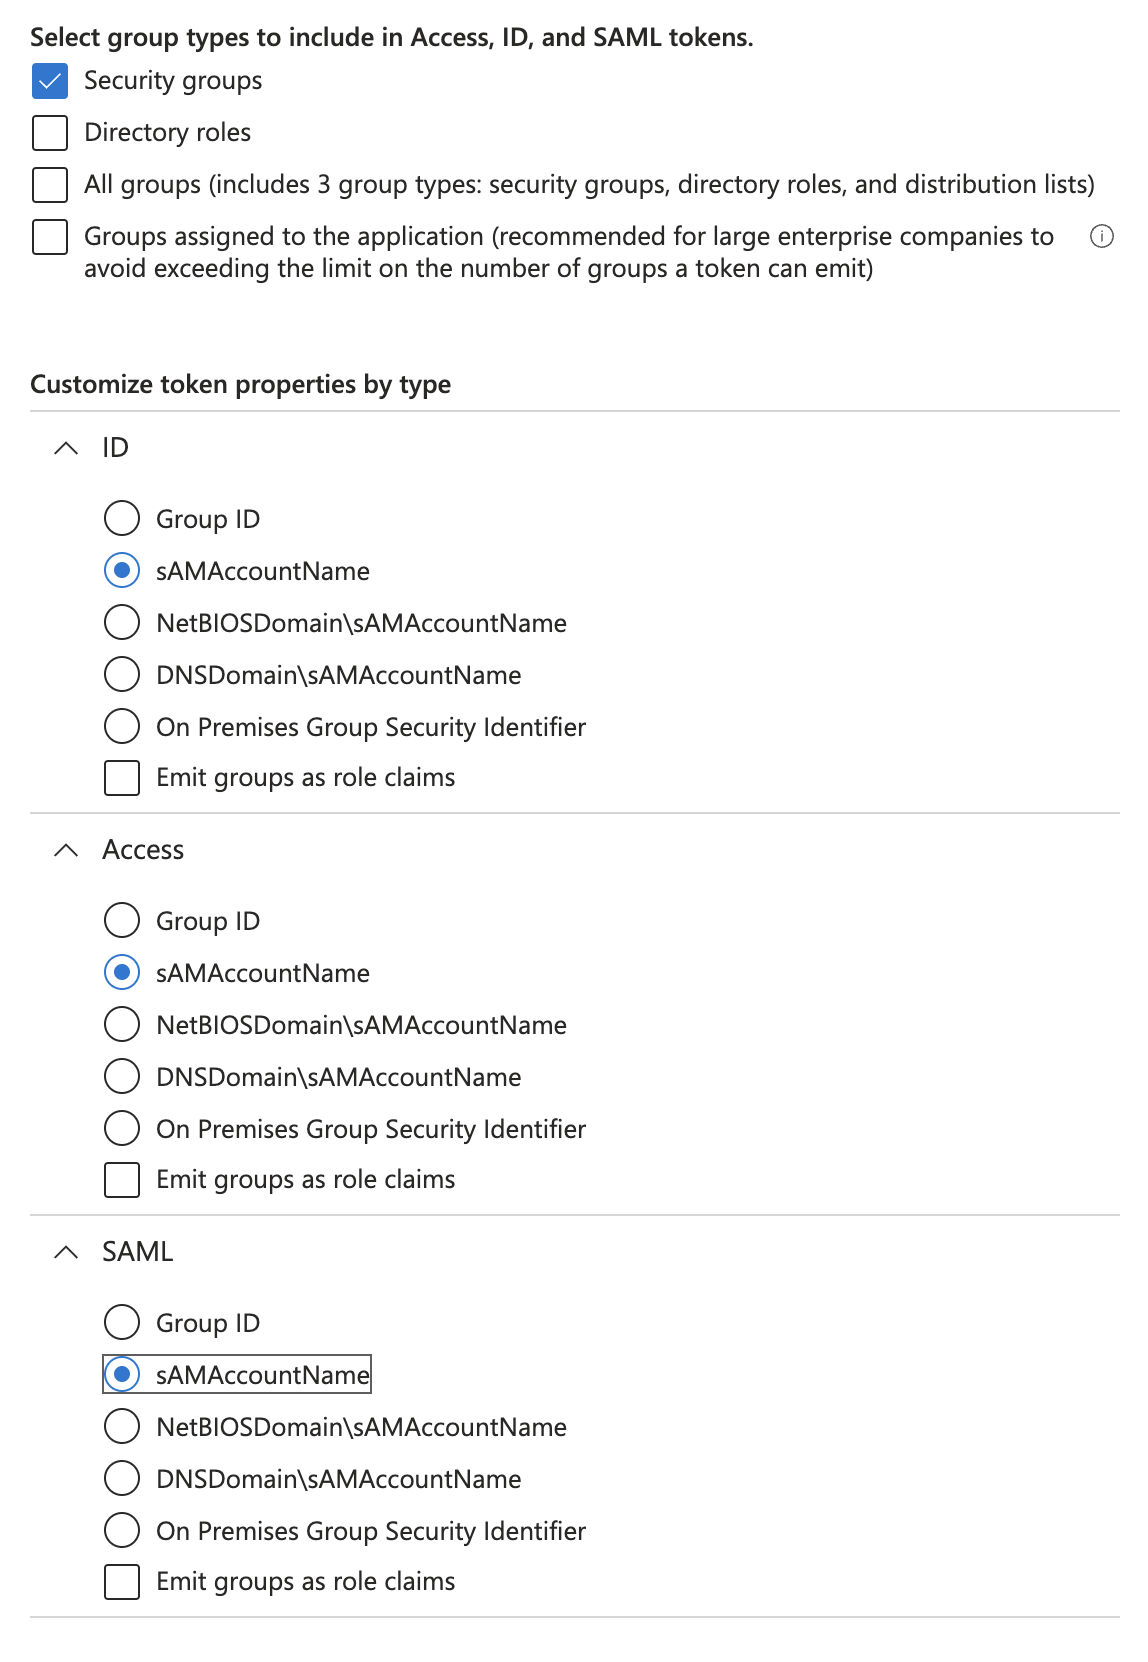
## Integrate User Context
User Context decides the user's access to the data in Infoveave.
User Context can be set based on the user's group in Microsoft Entra.
1. In Microsoft Entra, navigate to Token Configuration
2. Add Groups Claim to match the following
3. Navigate to API Permissions
4. Add the following permissions
* User.Read
* Group.Read.All (Application)
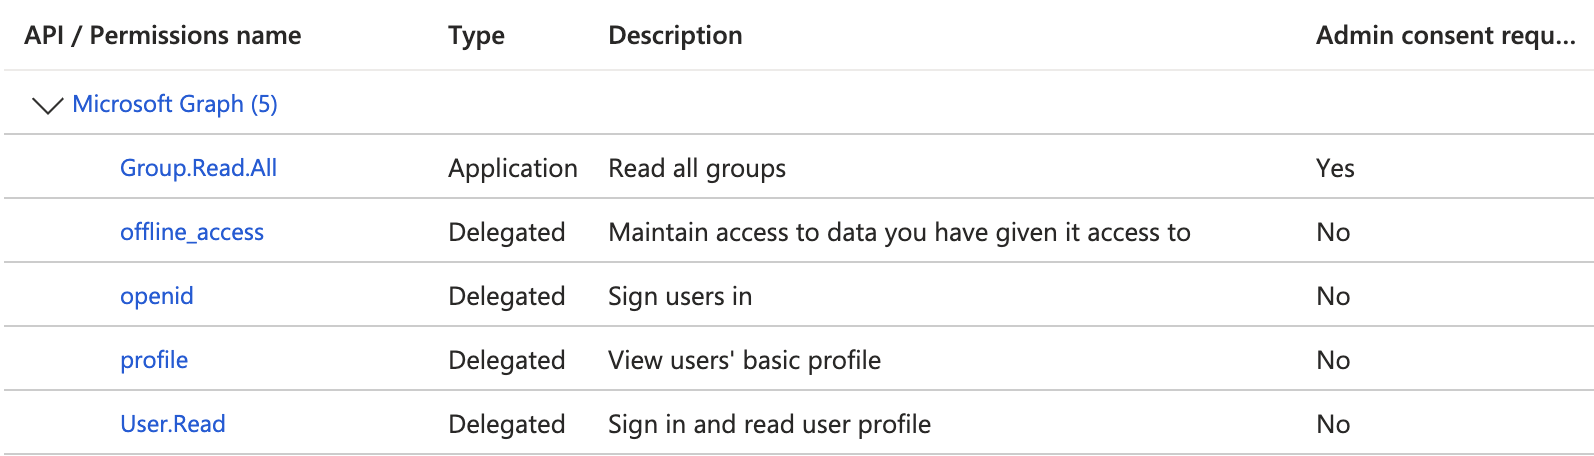
5. Grant Admin Consent
6. In Infoveave, go to External Authentication
7. Enable User Context
8. Enter `groups` as the claim in token for User Context
9. Save the configuration