---
title: Webhooks
description: Set up webhooks to receive real-time notifications and trigger actions in external apps for data uploads and workflow executions.
---
import { Aside, Steps } from '@astrojs/starlight/components';
# Webhooks
The Webhook trigger allows Workflows to be triggered by HTTP requests sent from external systems. This trigger enables seamless integration with other applications and systems, allowing workflows to be initiated based on external events or data changes. You can configure the Webhook Trigger to listen for specific HTTP requests and trigger the workflow accordingly. This trigger is useful for building automated workflows that respond to external events, such as data updates or notifications from other systems.
To set up a webhook, follow these steps
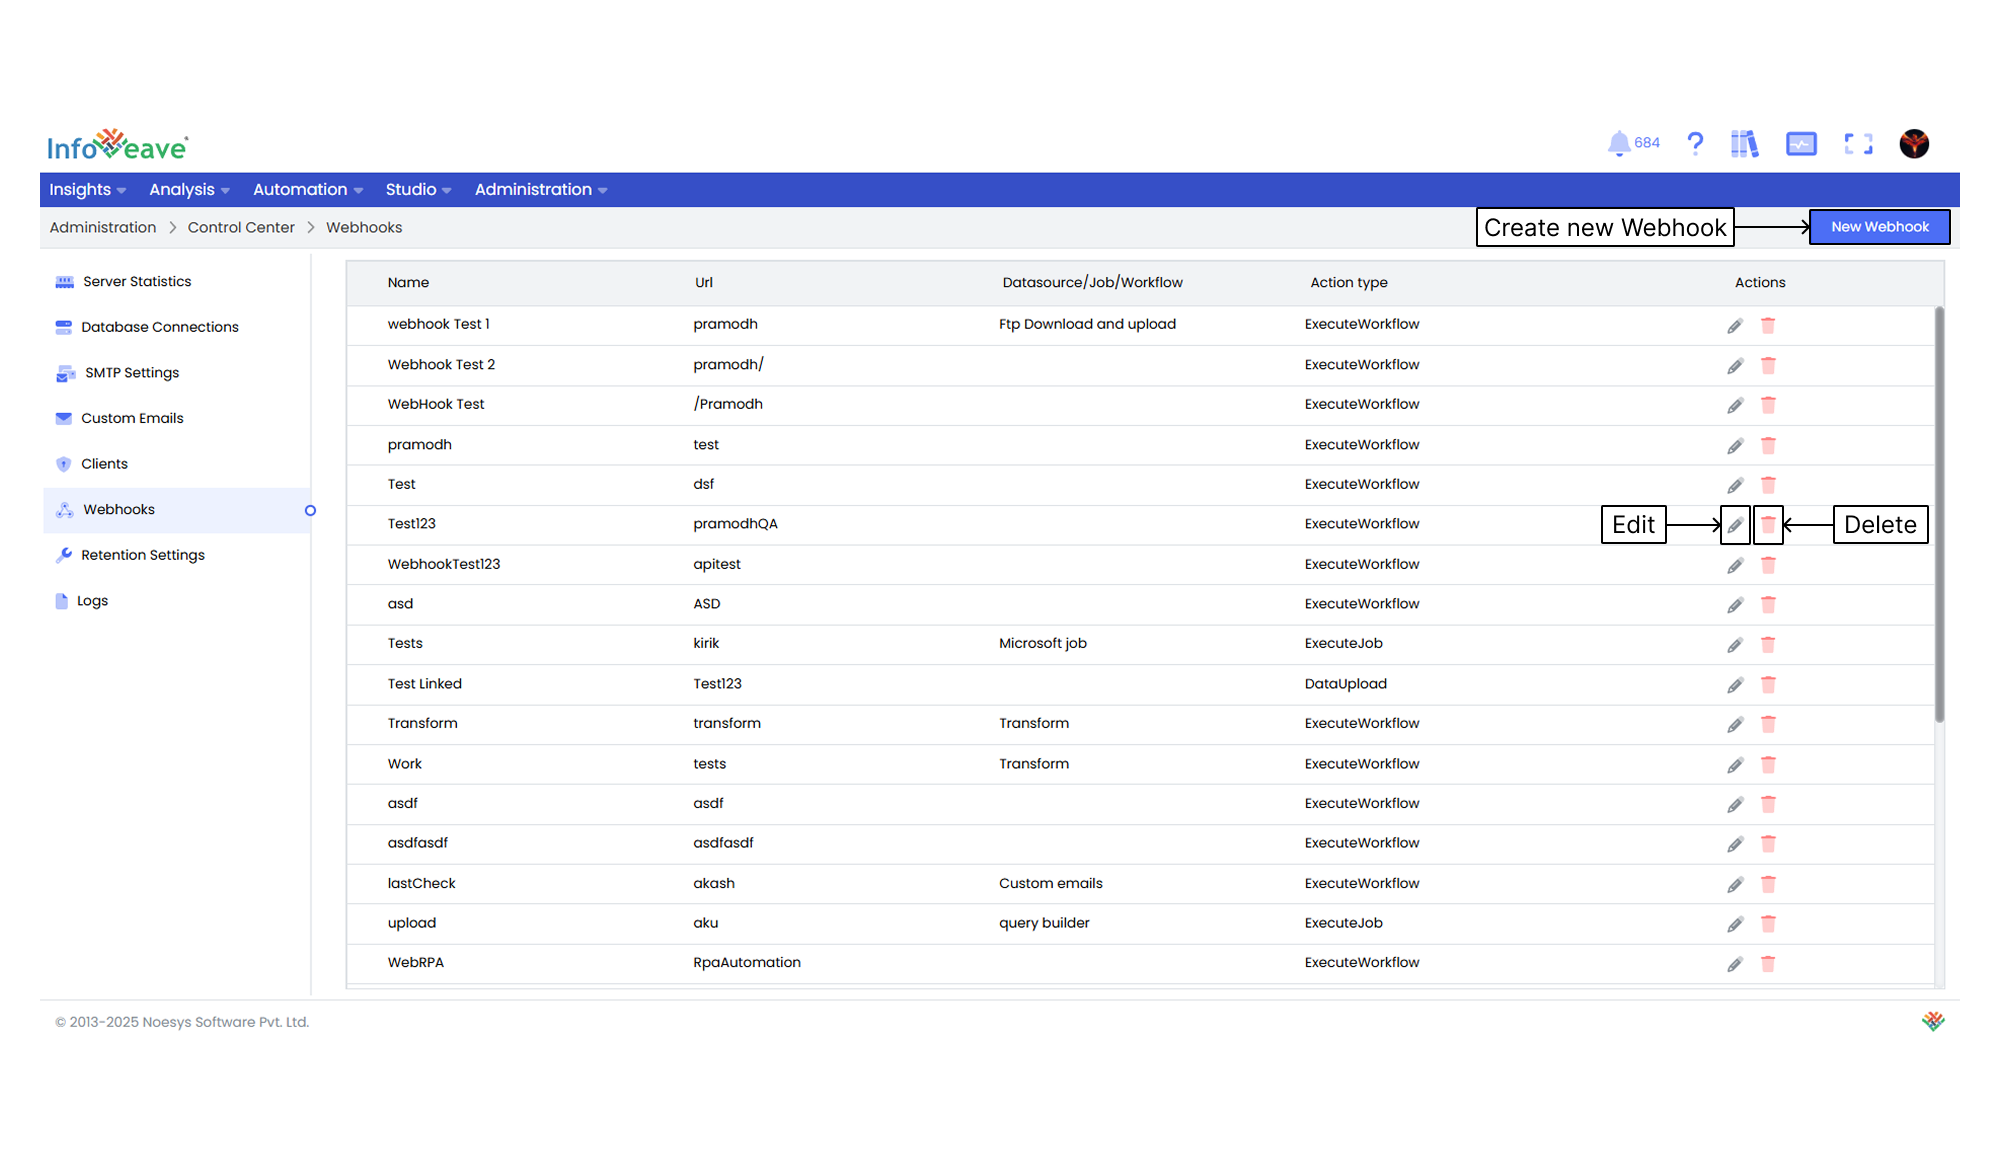
1. Navigate to **Administration Control Center**.
2. Click on **Webhooks**.
3. Click on **New Webhook** button to configure a new Webhook.
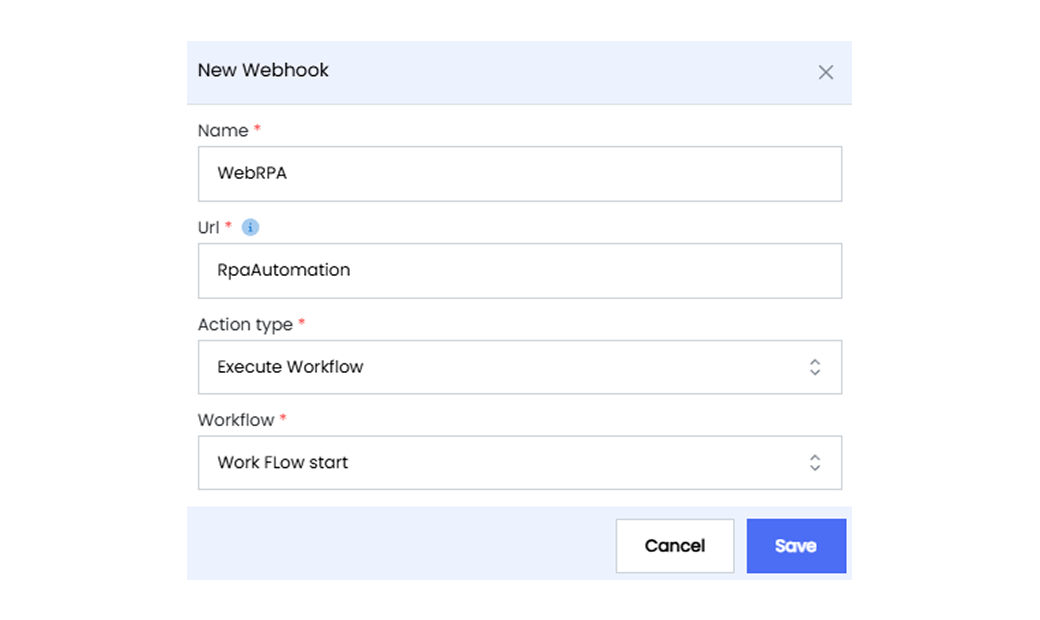
4. Enter a descriptive name for the webhook.
5. Provide the **Url** from where the webhook is triggered. This Url is the endpoint from where Infoveave will receive the trigger.
6. Choose the **Action type** that the webhook will trigger. Infoveave offers two action types
**Data Upload** This action type uploads data to the specified Datasource table when the webhook is triggered.
* If you select **Data Upload** action, select the relevant Datasource from the dropdown list.
* If you have selected the **Data Upload** action type, choose the corresponding table from the selected Datasource. This table represents the target table where new data is uploaded with the webhook trigger.
**Execute Workflow** This action type executes the specified workflow when the webhook is triggered.
* Select the Workflow from the dropdown list.
7. Click **Save** to add the new Webhook to the system.
8. To edit any Webhook, select the required Webhook, and click on **Edit** icon.
9. To delete any Webhook, select the required Webhook, and click on **Delete** icon.
To know more about webhook triggers in workflows, visit [Webhook trigger](/automation-v8/workflows/define-workflow/workflow-start#webhook-trigger)