---
title: Custom Calendars
description: Create and manage custom calendars, tailor timelines, and set financial or annual schedules for precise data analysis.
---
import { MediaPlayerComponent } from "../../../../components/video-player";
import RunScript from "../../../../components/RunScript.astro";
import { Aside, Steps } from '@astrojs/starlight/components';
# Custom Calendars
A Custom Calendar is a unique feature of Infoveave that lets you define custom calendars. This enables you to create separate timelines, a Financial Calendar, or an Annual Calendar with custom quarters, instead of the standard Gregorian calendar, for which all aggregations, filtering, and visualizations are calculated. Calendars can be customized at a weekly or monthly level.
## Creating a Custom Calendar
1. To add a Custom Calendar in Infoveave, click **Administration** **Custom Calendar**. All Custom Calendars you create appear under the **Custom Calendar** tab.
2. To add a new Custom Calendar, click **New Custom Calendar**. The dialog box appears.
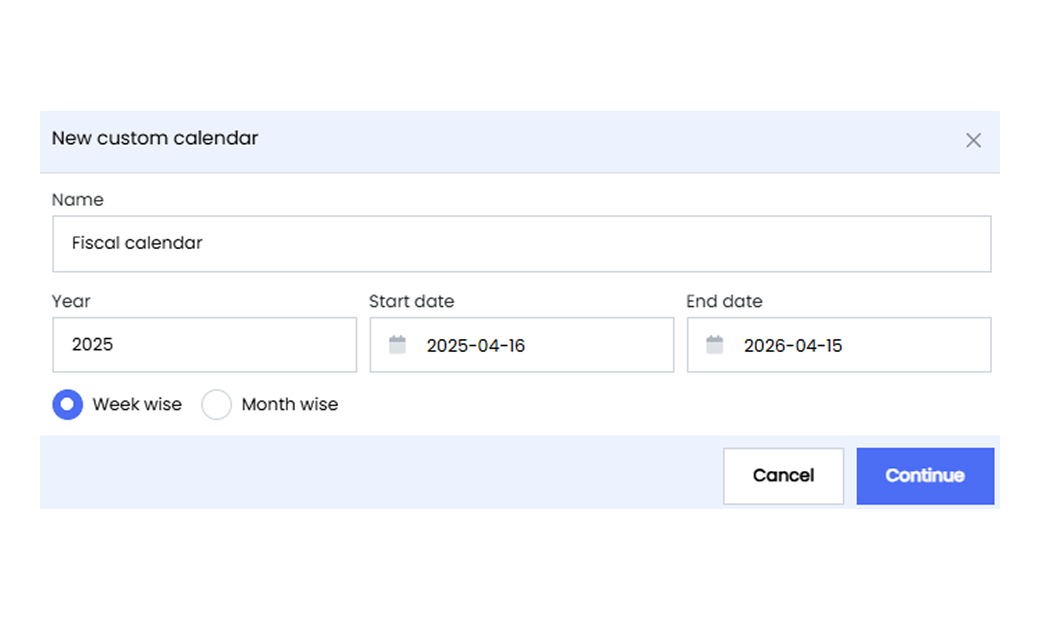
3. Fill out the necessary details for the new Custom Calendar.
* **Name** Provide a unique and descriptive name for the Custom Calendar.
* **Year** Specify the year for which you are creating the calendar.
* **Start date** Enter the start date of the Custom Calendar.
* **End date** Enter the end date of the Custom Calendar.
4. Configure the Custom Calendar on a **Week wise** or **Month wise** basis. Select the appropriate option based on how you want the calendar to be structured.
5. Click **Continue** to add the Custom Calendar to Infoveave.
6. You are redirected to configure the Custom Calendar.
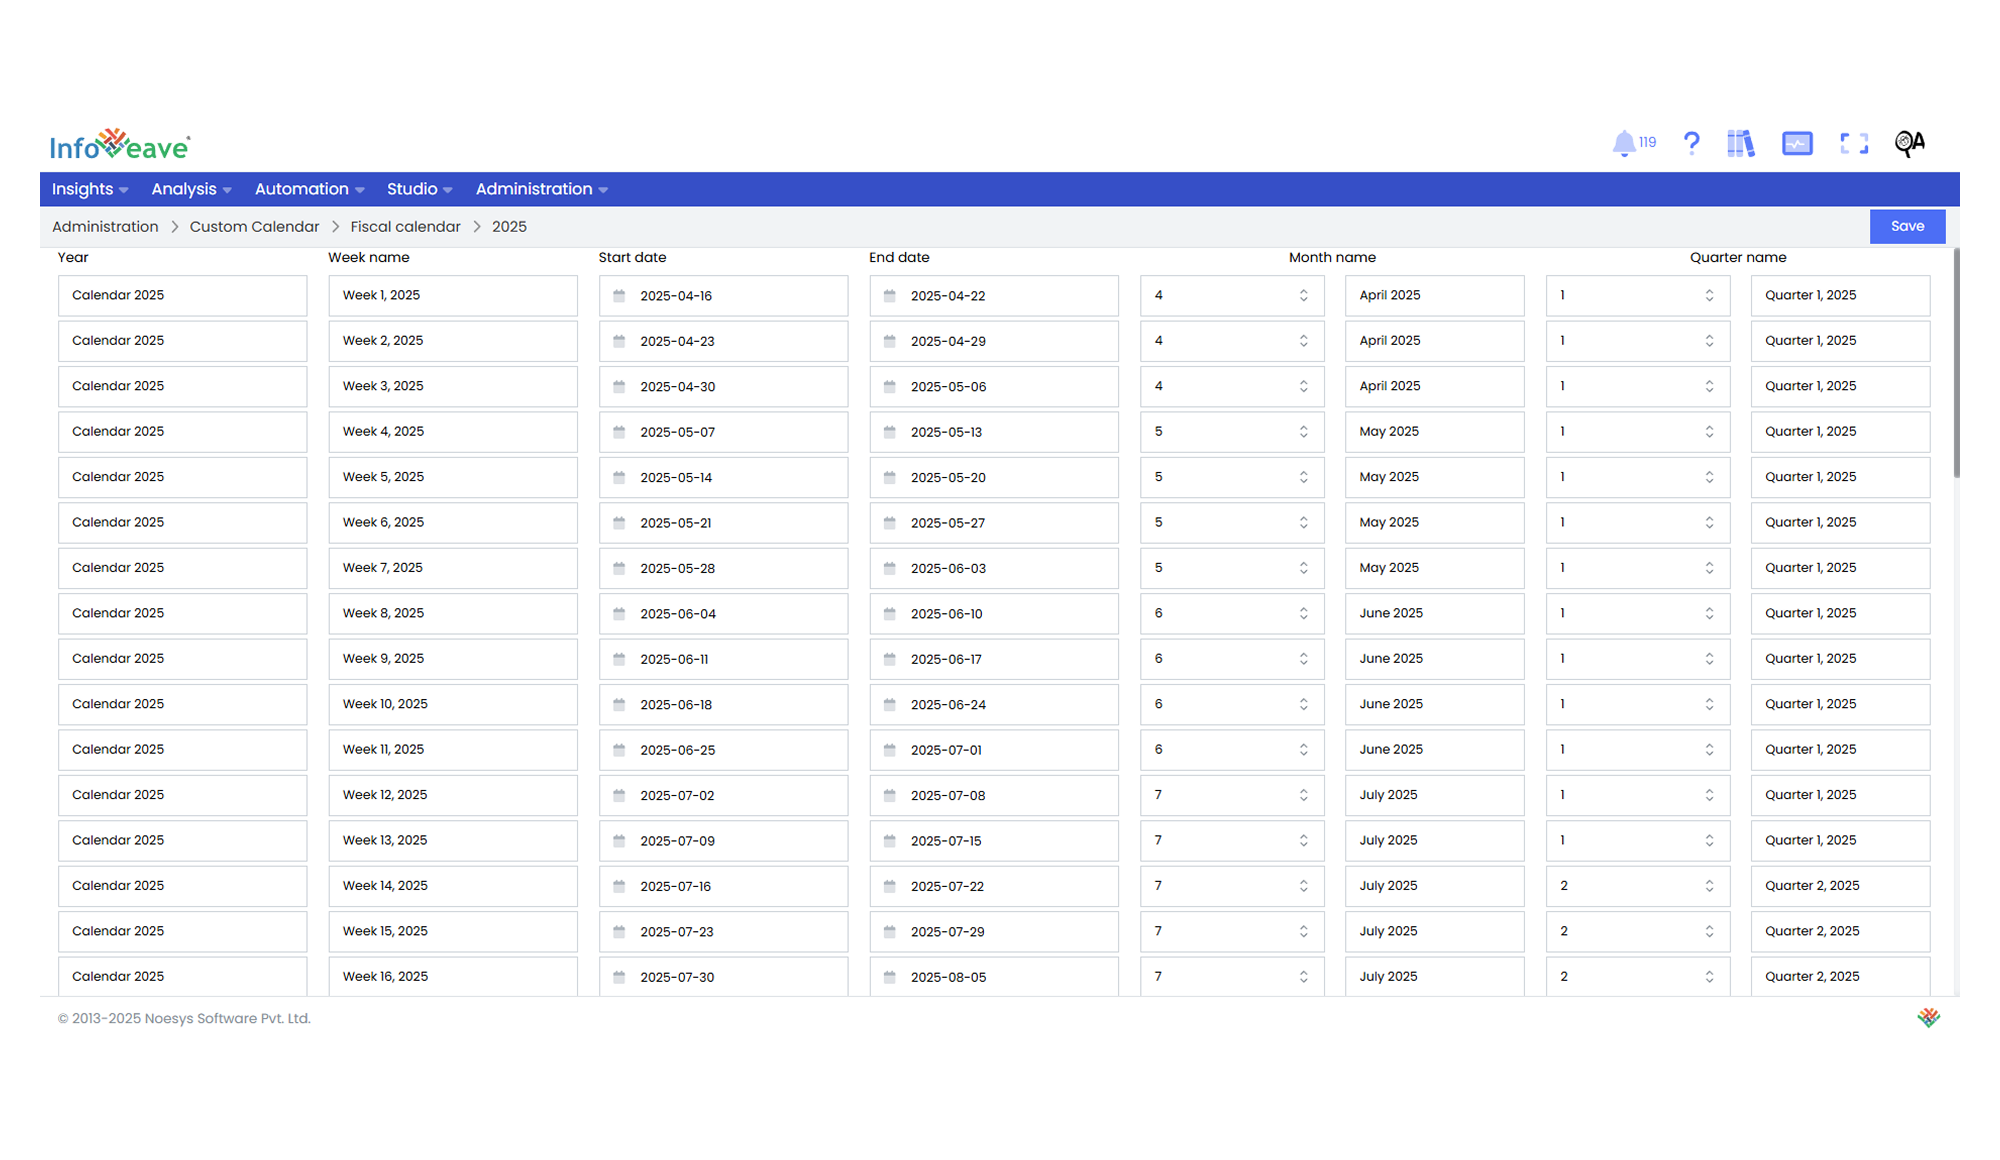
7. If you choose **Week wise**, the Custom Calendar splits into weeks.
8. If you choose **Month wise**, the Custom Calendar splits into months.
9. Depending on your needs, adjust the Custom Calendar.
* **Year** Change the year name associated with the Custom Calendar.
* **Start date** Adjust the starting date of the Custom Calendar.
* **End date** Modify the ending date of the Custom Calendar.
* Update **Month/Week**, **Month/Week Name**, **Quarter**, and **Quarter Name** fields to reflect the naming conventions you prefer.
10. Click **Save** to save your preferences.
## Editing a Custom Calendar
Edit a Custom Calendar to ensure that it reflects and meets your evolving requirements.
To modify a Custom Calendar in Infoveave, follow these steps.
1. Navigate to **Administration** **Custom Calendar**.
2. Locate the specific Custom Calendar you want to edit.
3. Click the **Edit** icon associated with the Custom Calendar.
4. Depending on your needs, adjust the Custom Calendar.
* **Year** Add the year associated with the new Custom Calendar.
* **Start date** Adjust the starting date of the Custom Calendar.
* **End date** Modify the ending date of the Custom Calendar.
* Configure the Custom Calendar on a **Week wise** or **Month wise** basis.
5. Click **Save** to save your edits.
## Deleting a Custom Calendar
To delete a Custom Calendar in Infoveave, follow these simple steps.
1. Navigate to **Administration** **Custom Calendar**.
2. Find the Custom Calendar you want to delete.
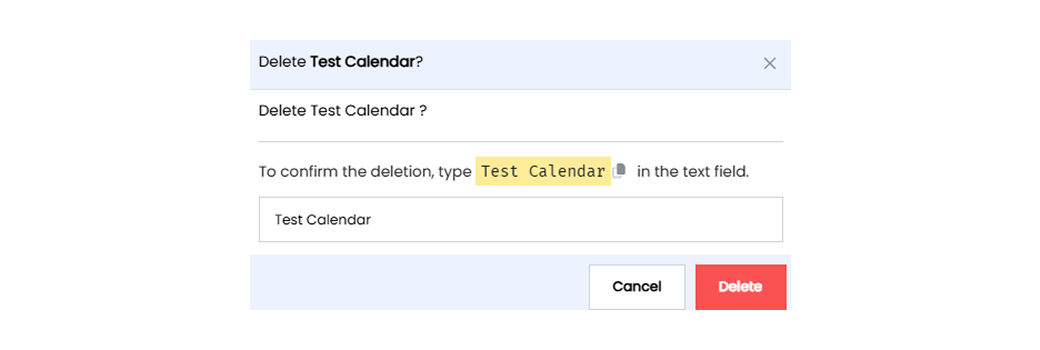
3. Click the **Delete** icon.
4. Type the specified text from the warning message in the provided text field.
5. Alternatively, copy the text from the icon and paste it in the text field.
6. Once you enter the correct text, click **Delete**.