---
title: Clients
description: Create and manage secure client tokens for API authentication, ensuring authorized access to external applications and services.
---
import { Aside, Steps } from '@astrojs/starlight/components';
# Clients
A client in Infoveave is used to authenticate external applications or services when accessing Infoveave’s APIs securely. By creating a client, you allow authorized applications to interact with data in Infoveave.
Here is a step by step guide to configuring a client
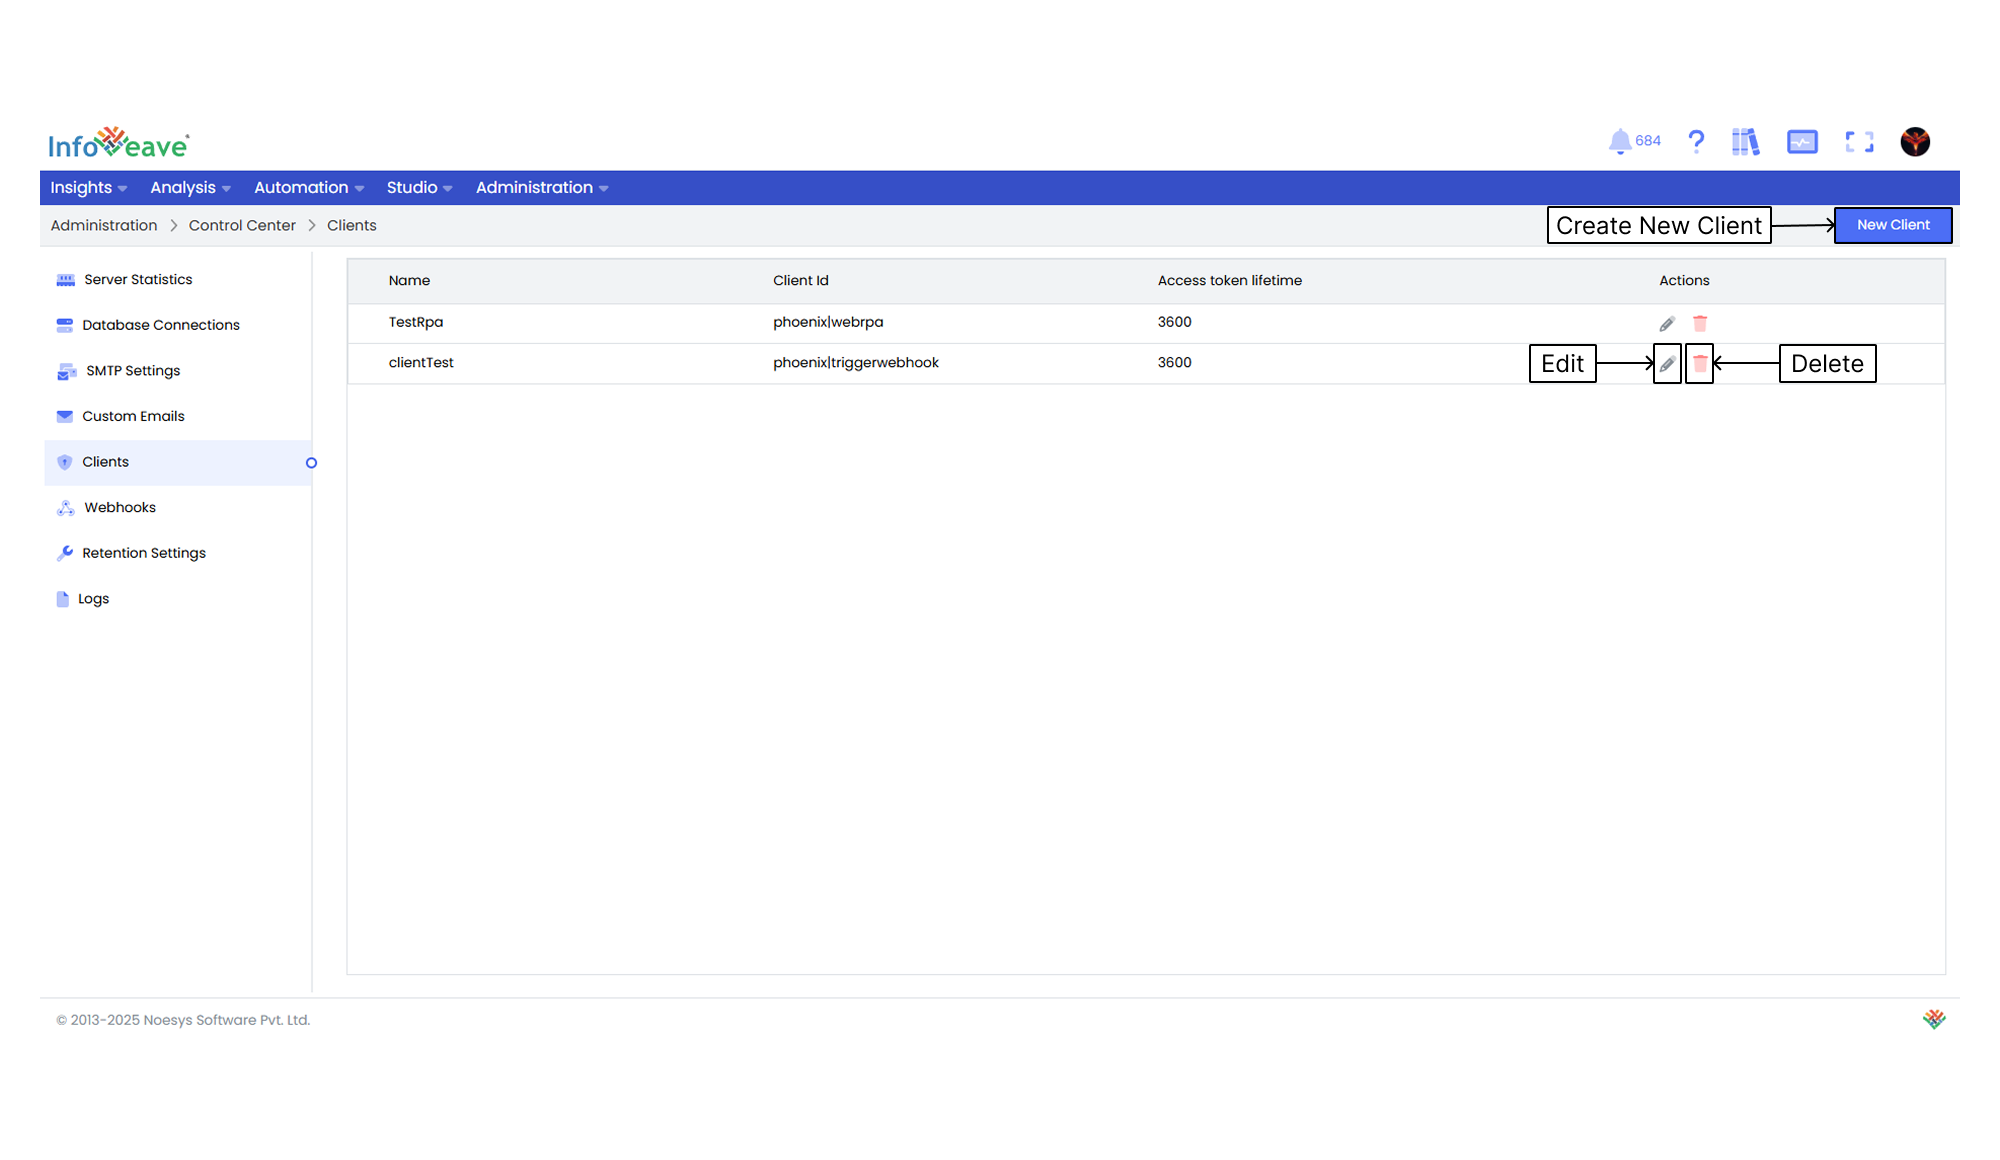
1. Navigate to **Administration Control Center**.
2. Click on **Clients**.
1. Click on the **New Client** button to configure a new client.
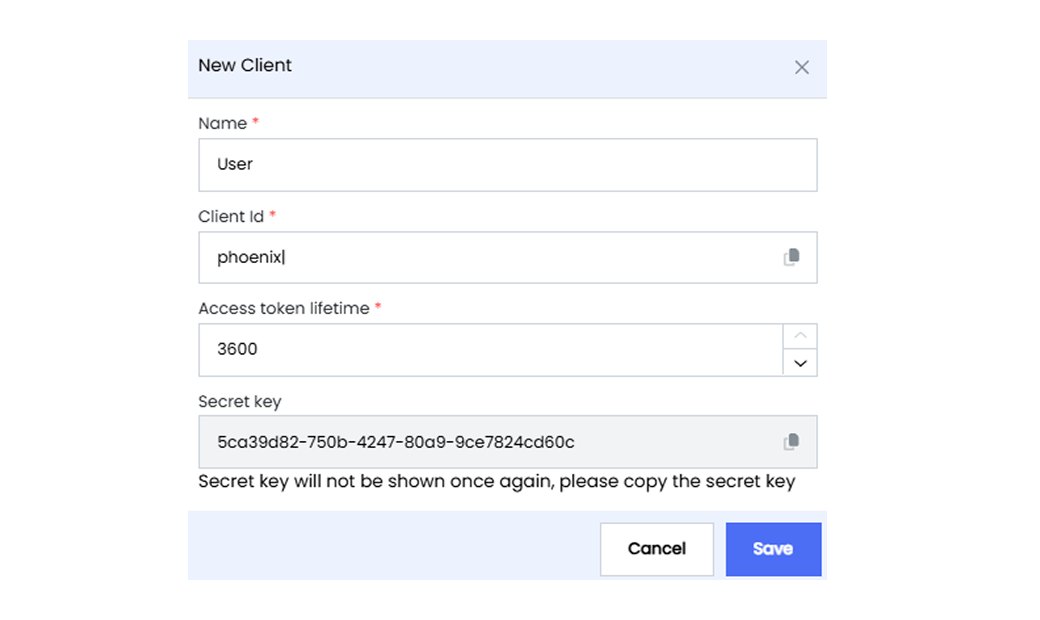
2. Enter a **Name** for the client.
3. Provide a unique **Client Id**. The client Id serves as a unique identifier for the external application. It is used during the authentication process.
4. Specify the lifetime duration of the access token in seconds in **Access token lifetime**. The access token is the key used to authenticate the external application’s requests. After the specified duration, the token expires and requires renewal.
5. The **Secret key** is used to sign and validate the client. This ensures that only authorized parties can use it.
6. Click **Save** to add the new client to the system.
7. To edit any client, select the required client and click on **Edit** icon.
8. To delete any client, select the required client and click on **Delete** icon.
## Using the Client
1. Open **Postman** or any other URL triggering tool.
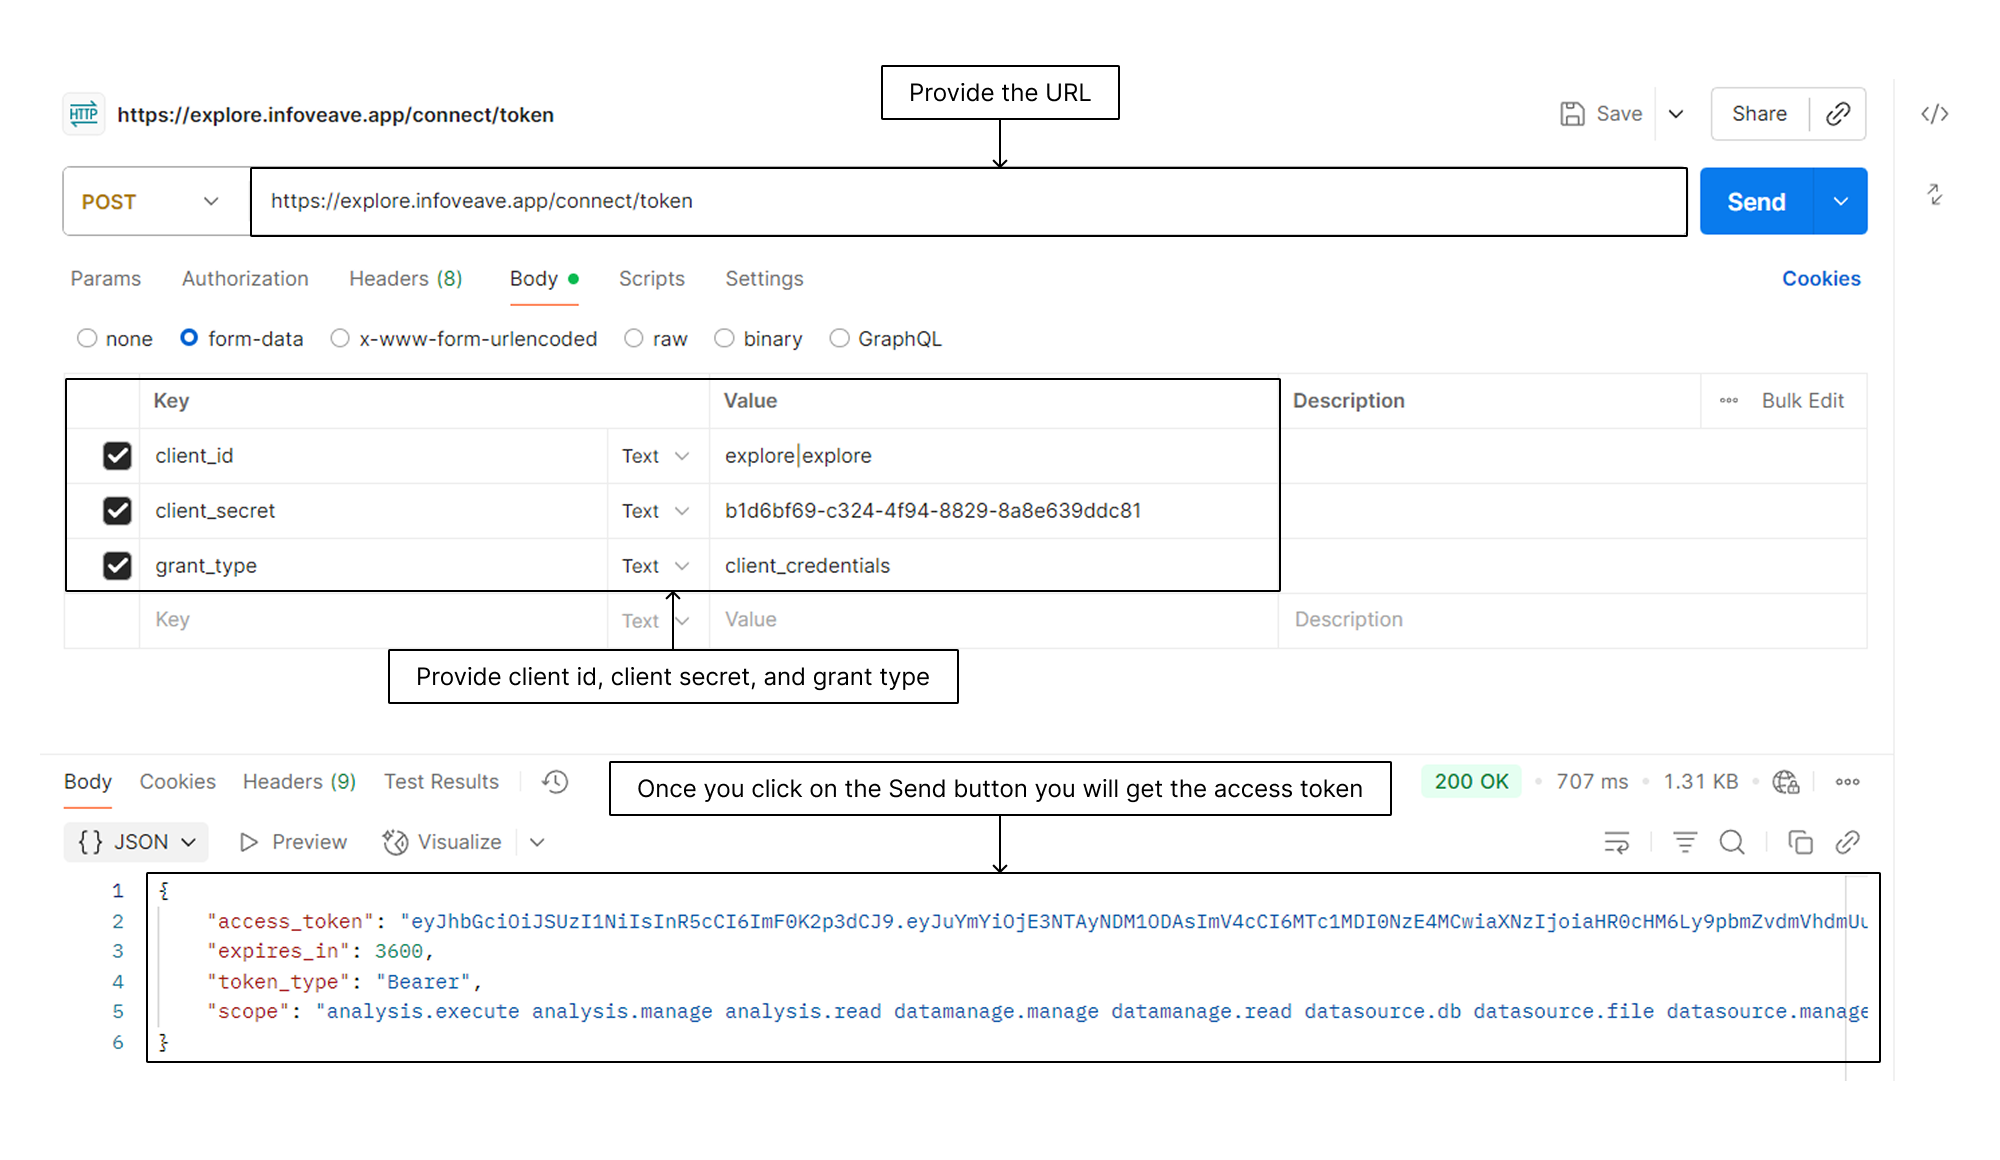
2. Select the **POST** request.
3. Provide the url - **https://your_tenant/connect/token**.
4. Enter the Client Id, Client secret, and grant type under the key and value section.
5. Click on the **Send** button.
6. You receive the access token.