---
title: Address Book
description: Manage and organize contact information in Address Book with customizable templates, dimension items, and easy upload options.
---
# Address Book
import { Aside, Steps } from '@astrojs/starlight/components';
The Address Book allows you to manage and organize contact information efficiently using the defined classes. It stores key elements such as dimensions, dimension items, groups, and email addresses. This structure enables targeted communication, allowing you to send reports to specific recipients based on predefined grouping and filtering criteria. The Address Book enhances automation and ensures that the right information reaches the right audience without manual intervention.
## Creating an Address Book
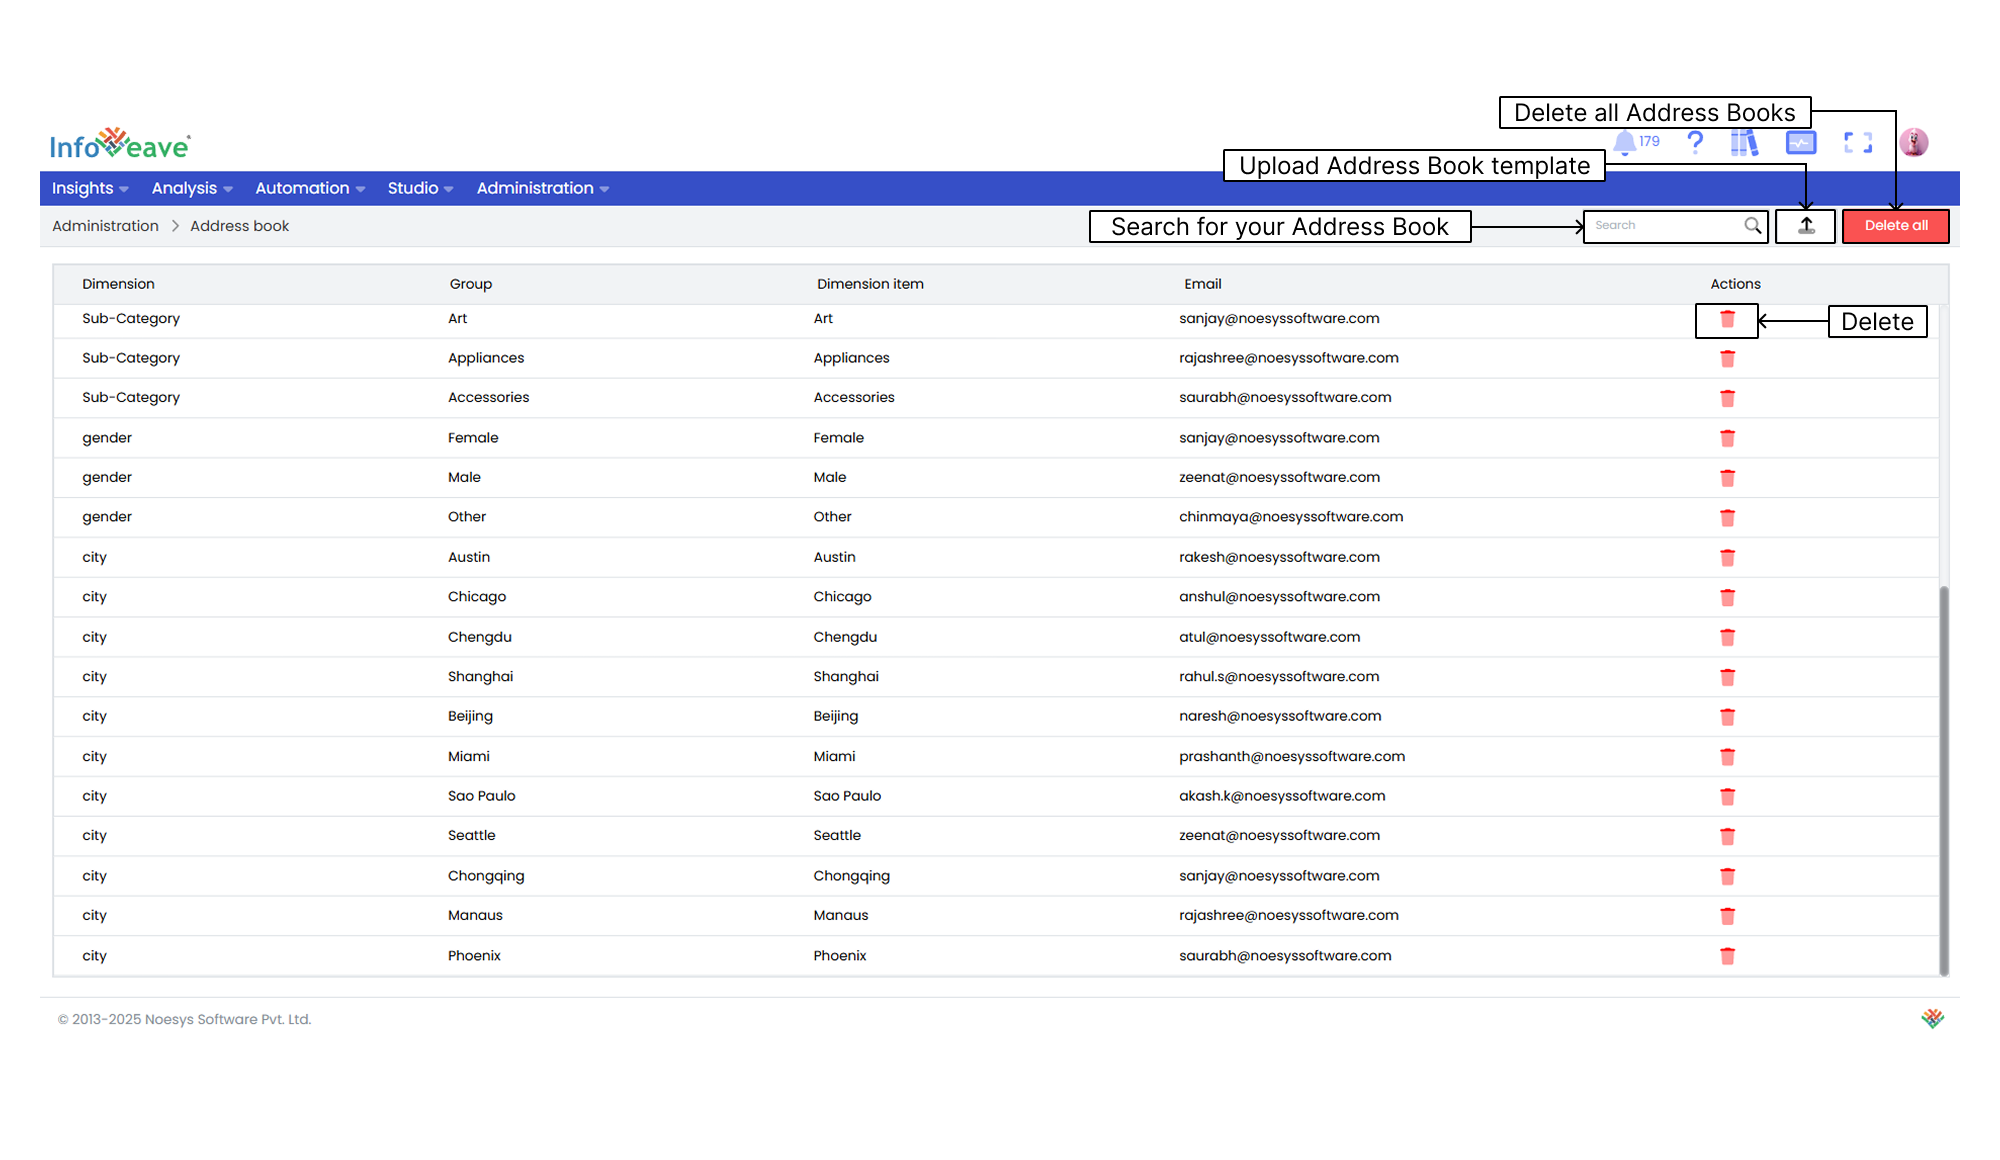
1. To add an Address Book in Infoveave, click on **Administration** then click on **Address Book**. All Address Books created by you are displayed under **Address Book**.
2. To add a new Address Book template, click on the **Upload** button.
3. A dialog opens. Click on the **Download Address book template** button to download the template.

4. Update the downloaded Address Book template.
* Within the template, you find columns for **Dimension**, **Group**, **Dimension Item**, and **Email**.
* **Dimension** Select the dimension from the Datasource provided in your report.
* **Group** Select the unique group from the Datasource provided in your report.
* **Dimension Item** Select the dimension item from the Datasource provided in your report.
* **Email** Enter the email address to which you want to send an email.
* Fill in this template with the contact information you want to include in the Address Book.
* Ensure that each entry corresponds to the appropriate dimension item within the Datasource.
5. Upload the Address Book template from your local folder using the file picker option in Infoveave.
6. If you want to delete all Address Book records, click on **Delete all**.
## Using the Address Book
1. Navigate to **Studio Reports**.
2. Select your **Report**.
3. Click on the **Email** icon.
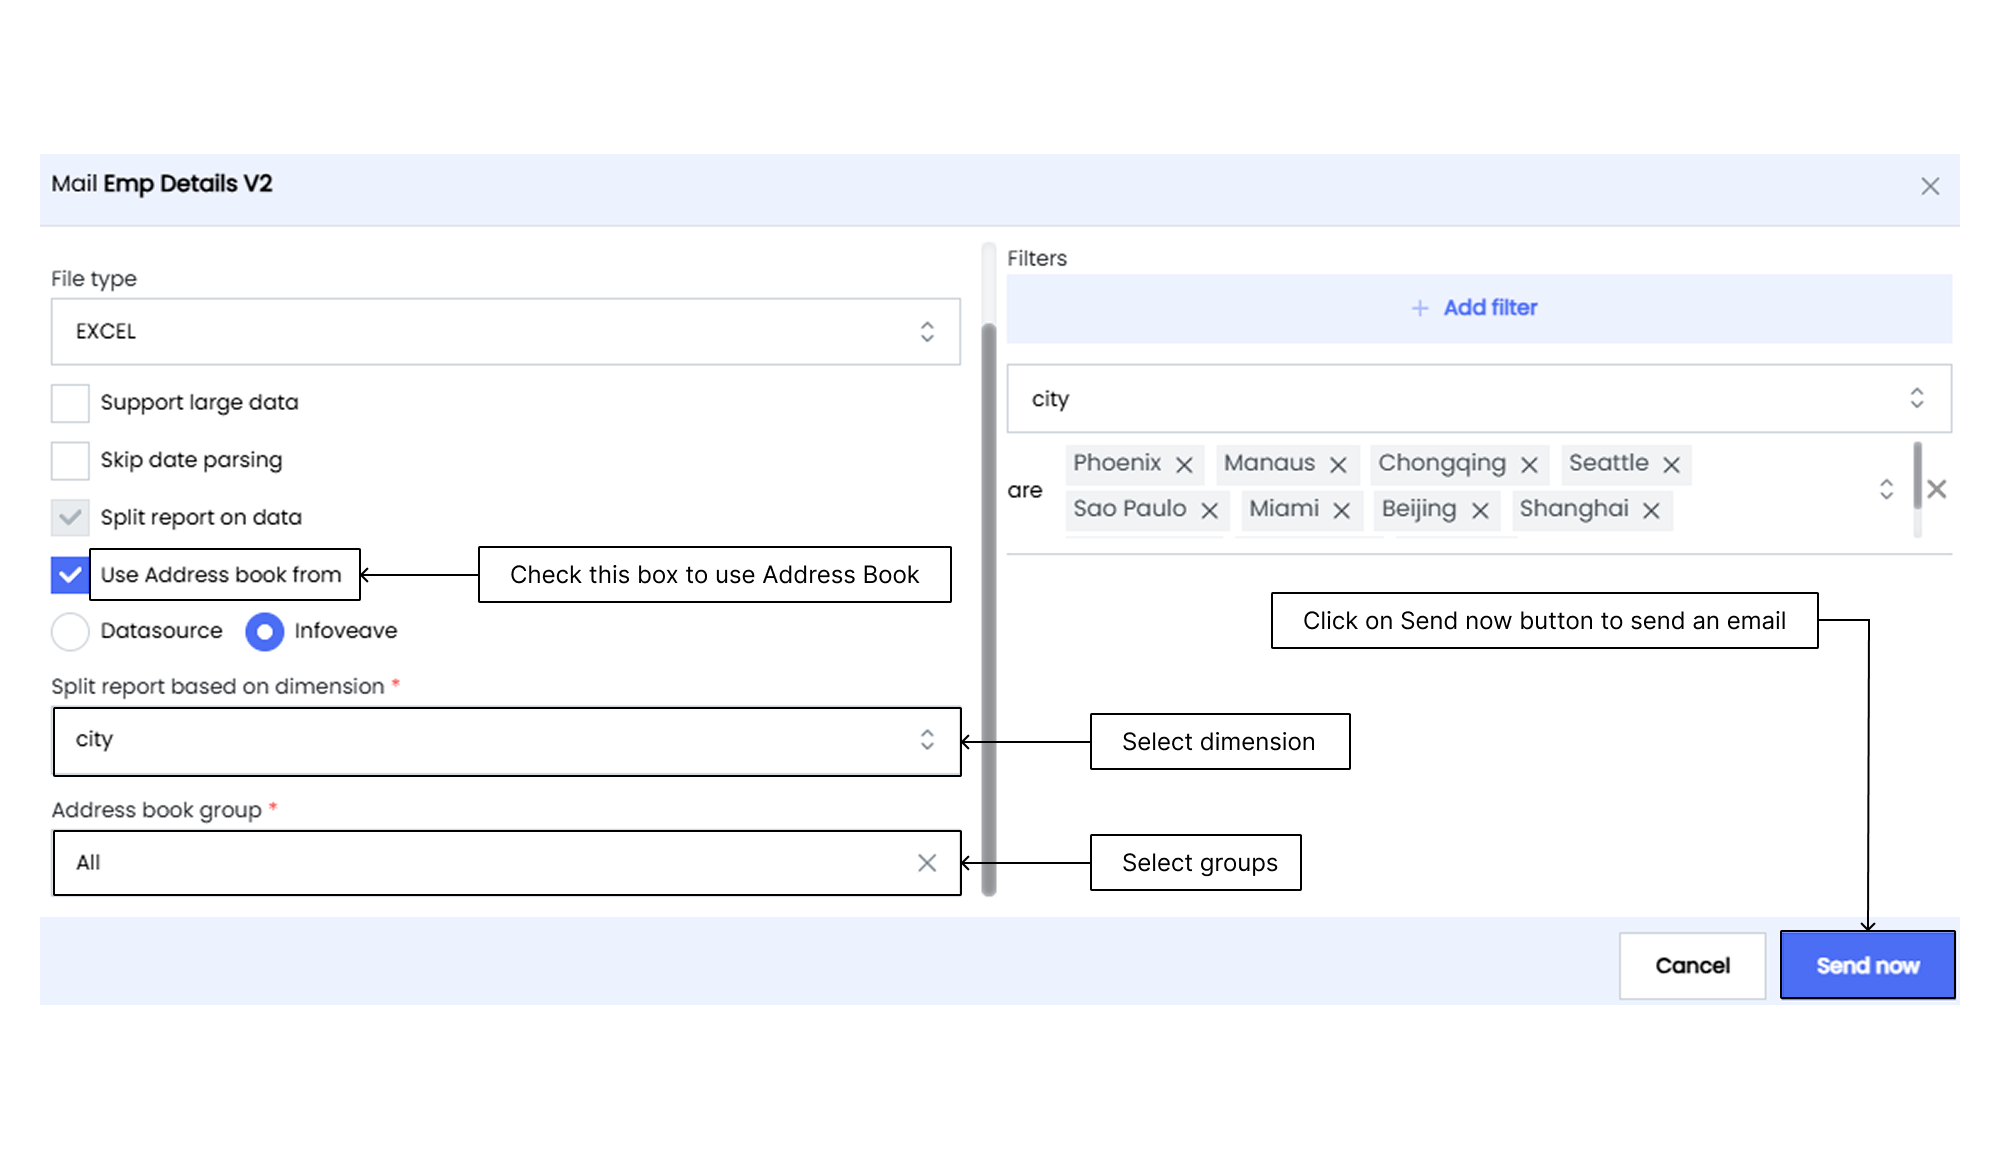
4. Check the box for **Use Address book from**.
5. Click on the **Infoveave** radio button to use the Address Book.
6. Select the **Dimension** from the dropdown list that you created in the **Address Book**.
7. Select the **Group**.
8. Click on **+ Add filter** if required.
9. Click on the **Send now** button.
10. You receive a notification once the email is sent.
11. Check your email.