---
title: Custom Emails
description: Streamline data uploads and automate workflow triggering in Infoveave with custom emails for efficient, tailored workflow management.
---
import { Aside, Steps } from '@astrojs/starlight/components';
# Custom Emails
Custom emails are email addresses that can trigger data uploads or execute workflows. Infoveave triggers a specified action type when an email notification is received from the custom email address.
To know more about email triggers in workflows, visit [Emailhook trigger](/automation-v8/workflows/define-workflow/workflow-start#emailhook-trigger)
To setup a custom email follow these steps.
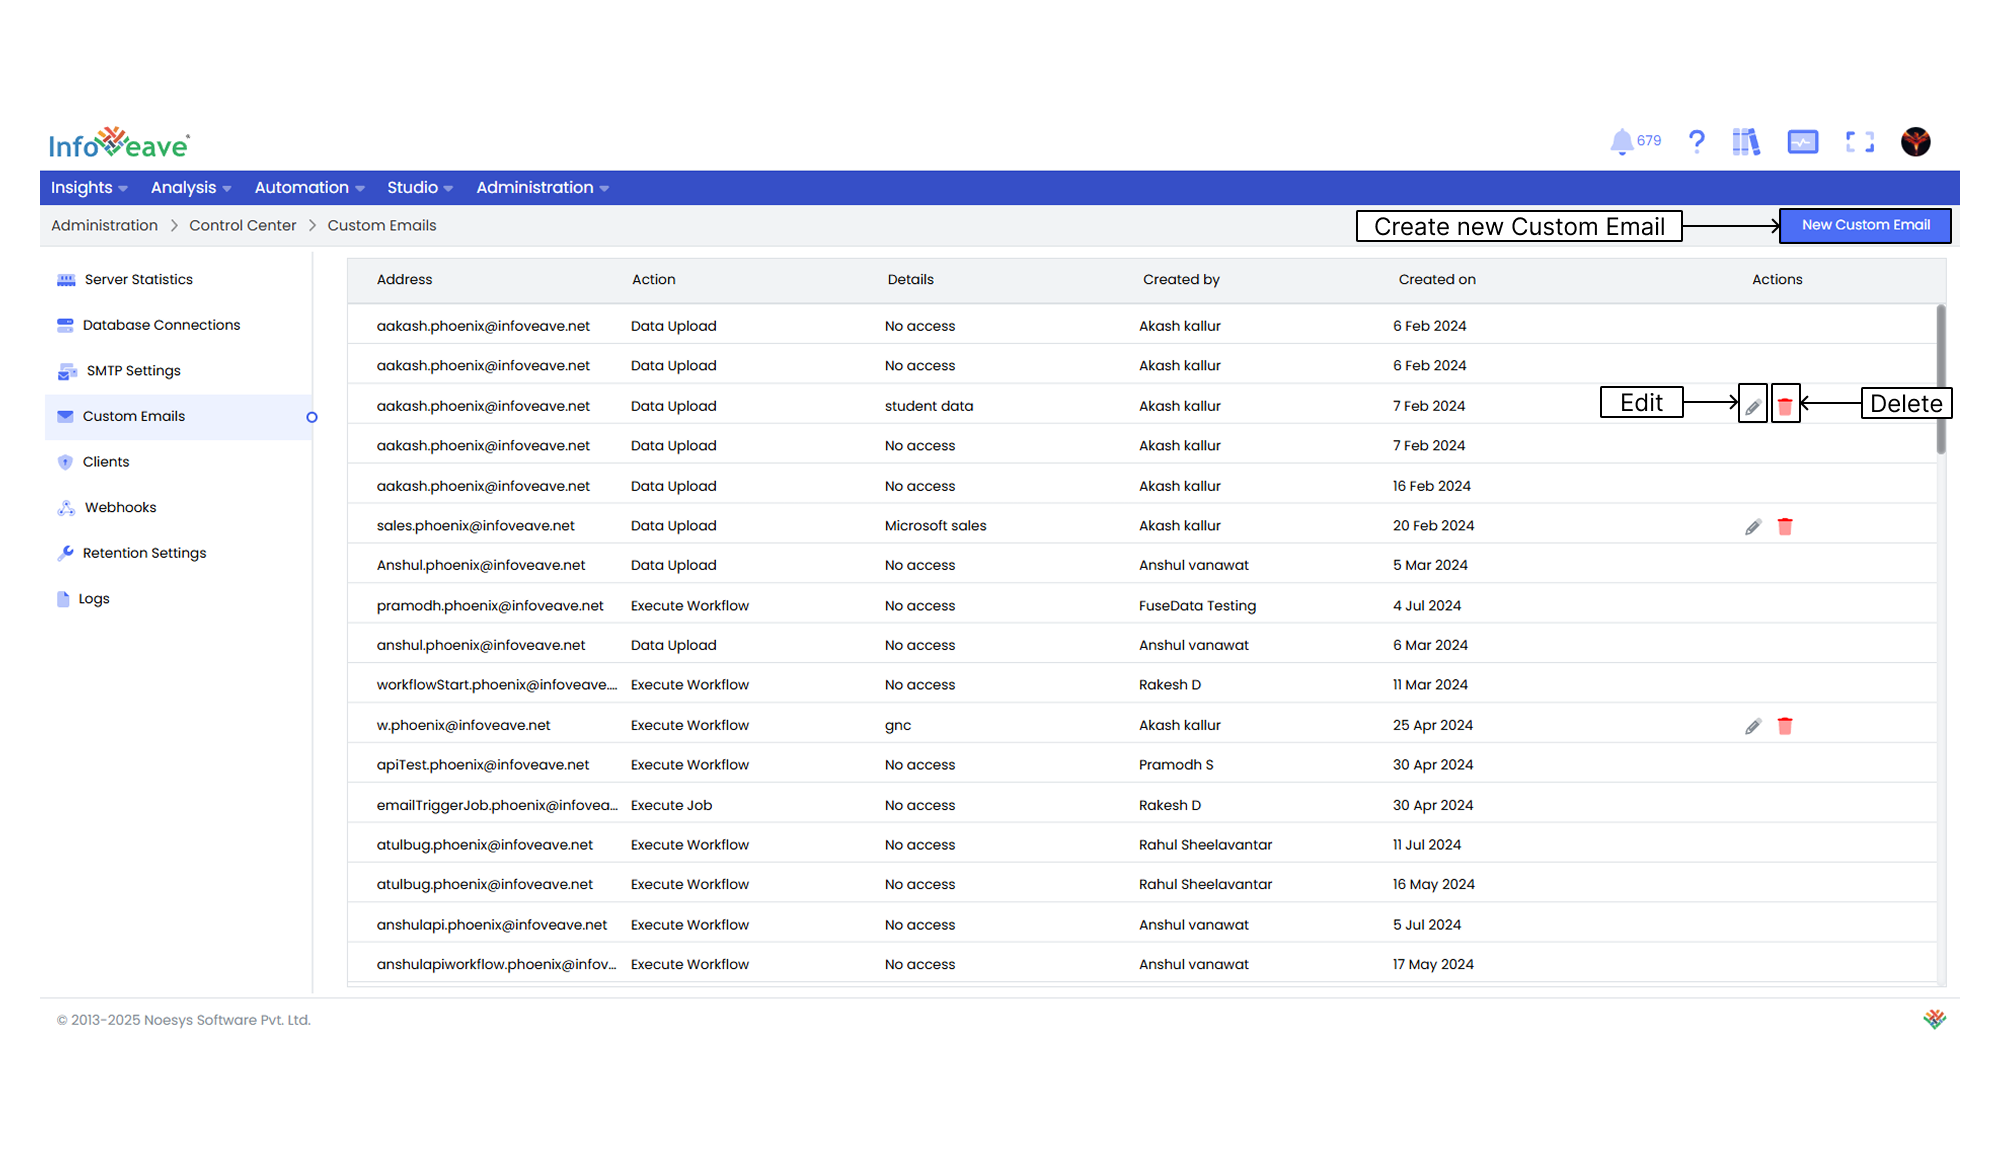
1. Navigate to **Administration Control Center**.
2. Click on **Custom Emails**.
3. Click on the **New Custom Email** button to set up a new custom email. The New Custom Email dialog box appears.
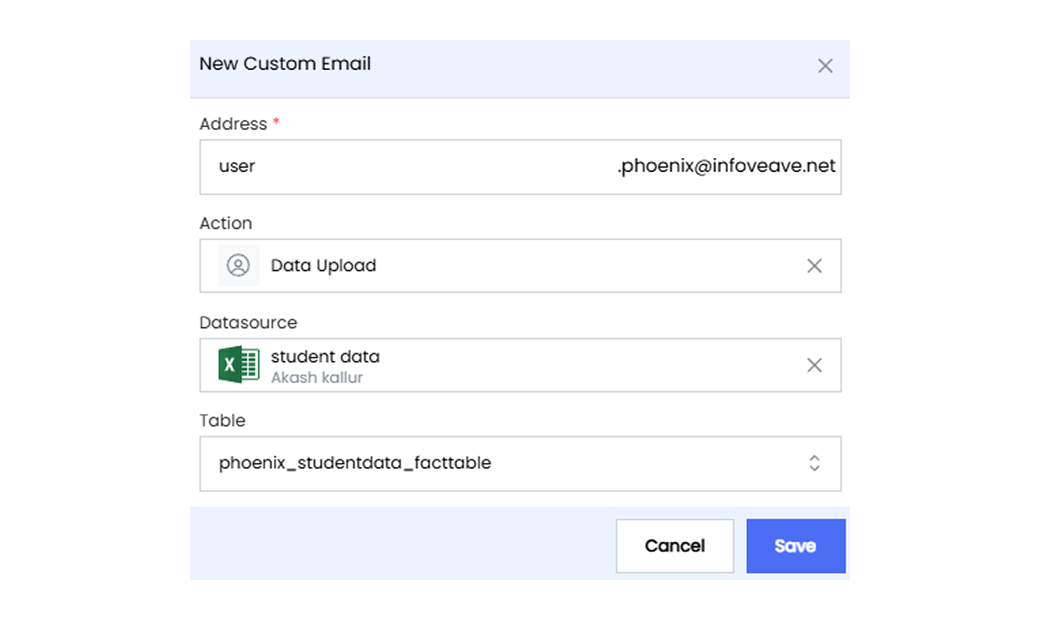
4. Enter the custom email address.
5. From the drop-down, pick the action to be performed.
* **Data Upload** If you pick Data Upload, choose the Datasource from the drop-down.
* **Execute Workflow** If you pick Workflow execution, select the workflow from the drop-down list.
6. Click **Save** to add the new custom email to the system.
7. To edit any custom email, select the required custom email and click on the **Edit** icon.
8. To delete any custom email, select the required custom email and click on the **Delete** icon.