---
title: Database Connections
description: Manage and configure database connections Control Center for optimized data retrieval, secure access, and efficient database integration.
---
import { Aside, Steps } from '@astrojs/starlight/components';
# Database Connections
The **Database Connections** option helps you effectively manage and configure your database connections within the Infoveave Control Center. This ensures that your data retrieval and analysis processes are optimized and aligned with your requirements.
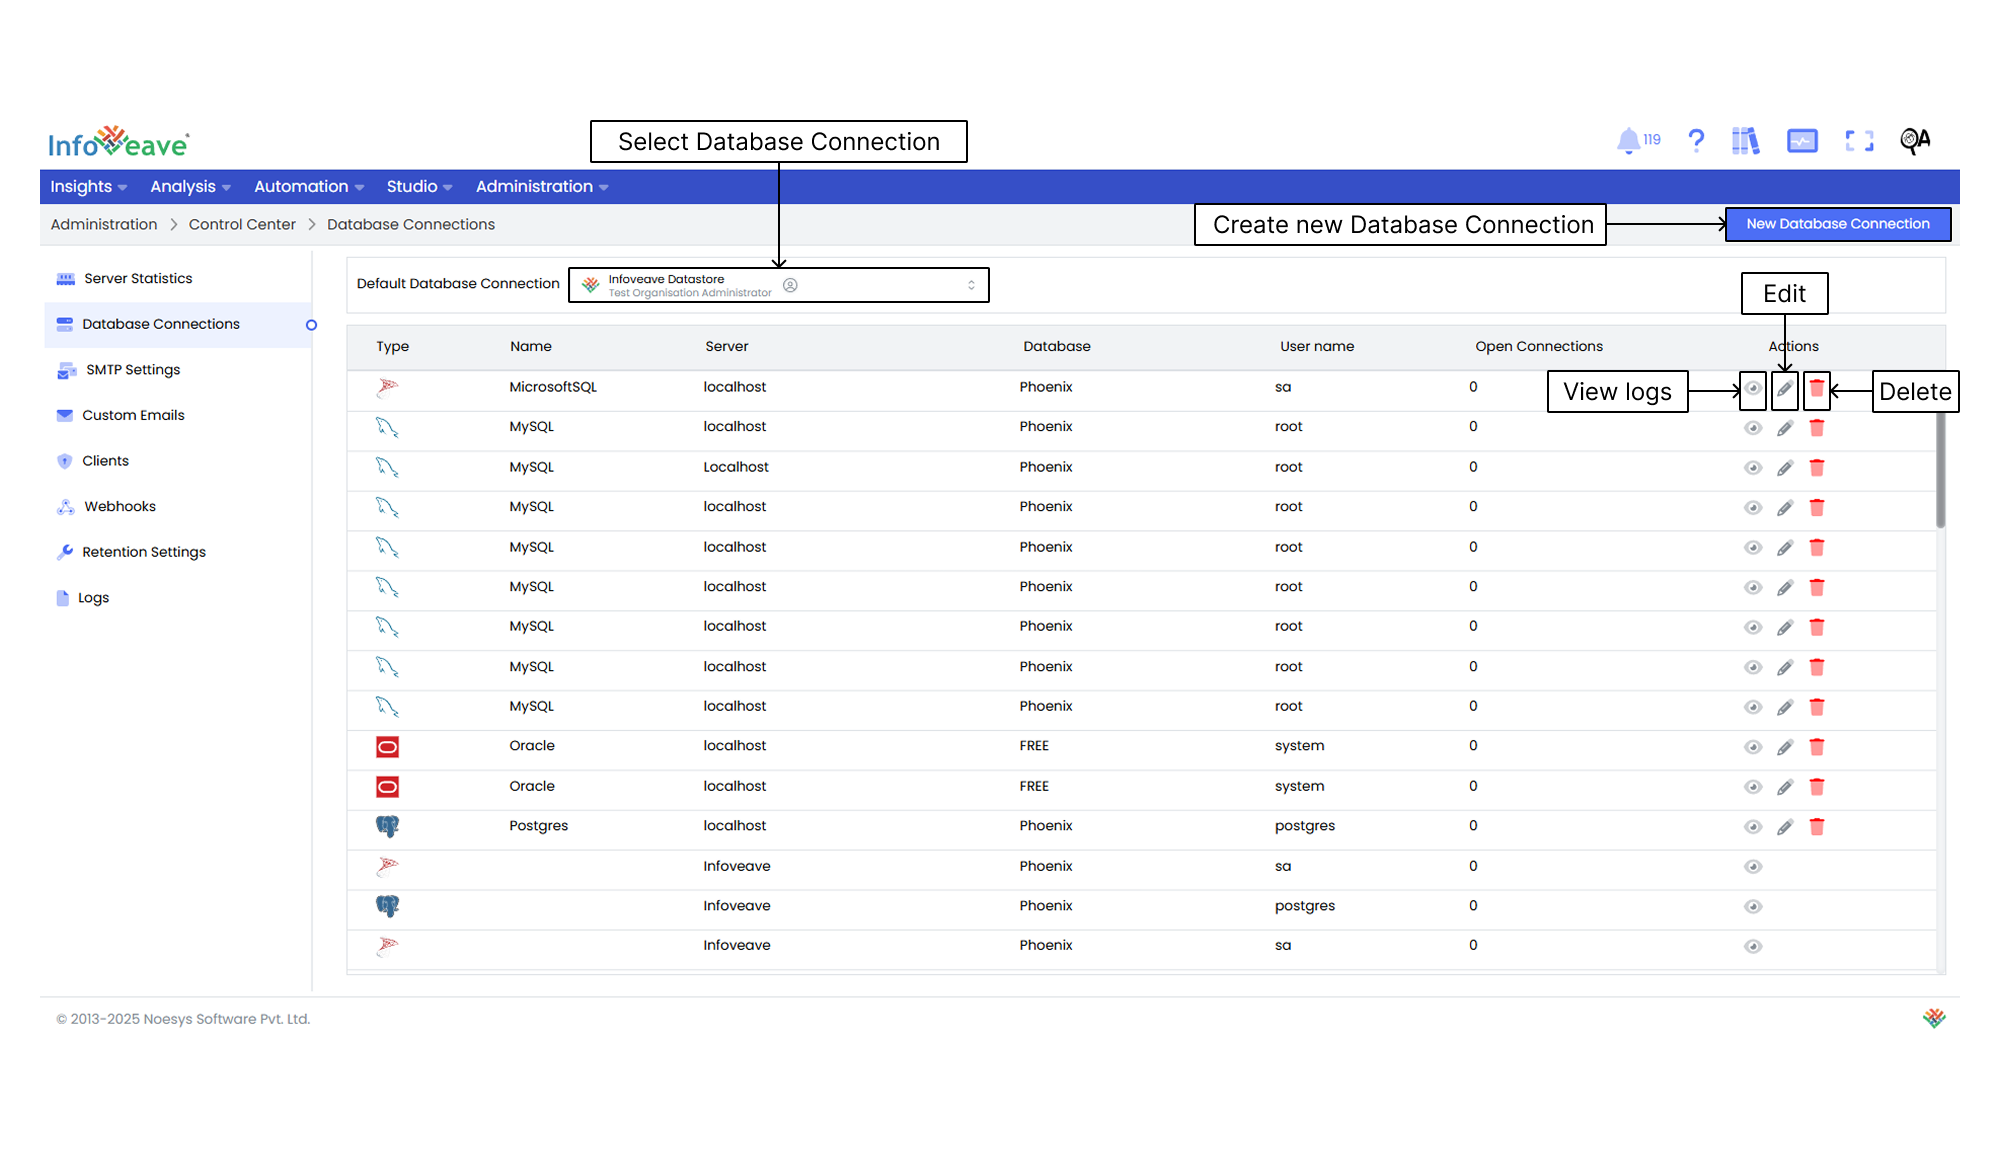
Here are the steps to create a new database connection.
1. Navigate to **Administration Control Center**.
2. Click on **Database Connections**.
1. To establish a new database connection, click on the **New Database Connection** button.
2. Provide the following information.
* **Name** Assign a descriptive name to this database connection for easy identification.
* **Database** Specify the name of the database you want Infoveave to connect to.
* **Type** Choose the appropriate database type from the available options. The database type determines how Infoveave communicates and interacts with the database engine. Select from options such as Microsoft SQL, Amazon Redshift, ClickHouse, MariaDB, MySQL, Oracle, Percona, or Postgres.
* **User name** Enter the username associated with the chosen database. This is the credential Infoveave uses to authenticate and access the database. Make sure the username is correct and has the necessary permissions to interact with the database.
* **Server** Provide the server address or hostname where the database is located. This could be an IP address or a domain name. Ensure that you input the server information accurately to establish a successful connection.
* **Password** Input the corresponding password for the provided username. The password is a crucial security element, so ensure that you input it correctly. Consider using a strong, unique password for your database connections.
* **Port** Specify the port number for the database connection. Each database type often has a default port assigned to it. However, you can customize this port based on your database configuration.
3. To add the database connection, click **Save**.
4. To edit any database connection, select the required database connection and click on the **Edit** icon.
5. To delete any database connection, select the required database connection and click on the **Delete** icon.
6. To view any database connection, select the required database connection and click on the **View logs** icon.