---
title: Introducing Connections
description: Explore connection types - cloud, database, email, execute, and file transfer. Learn setup and configuration for seamless integration.
---
import { Aside, Steps } from '@astrojs/starlight/components';
# Introducing Connections
Connections in Infoveave let you establish links to various services and databases. They enable seamless data communication and workflow automation. Each connection type serves a specific purpose. You can use these connections for various workflow activities. This enhances the flexibility and functionality of Infoveave for Datasource management and automation.
Here is a summary of the available connection types.
* **AI** Includes Claude, Gemini and OpenAI.
* **Cloud Services** Includes API connections for communicating data between different software systems or applications.
* **Database** Enable you to connect to a variety of databases such as Amazon Redshift, ClickHouse, Databricks, MariaDB, Microsoft SQL, MySQL, Oracle, Percona, Postgres and SQLite.
* **Email** Allow you to retrieve emails from a server or send emails through an email server.
* **Execute** Includes connections like SSIS ETL for connecting to different SQL Server Integration Services.
* **File transfer** Enable you to connect to cloud storage services such as AWS S3 and Azure, as well as servers using FTP or SFTP for file transfer operations.
## Creating a Connection
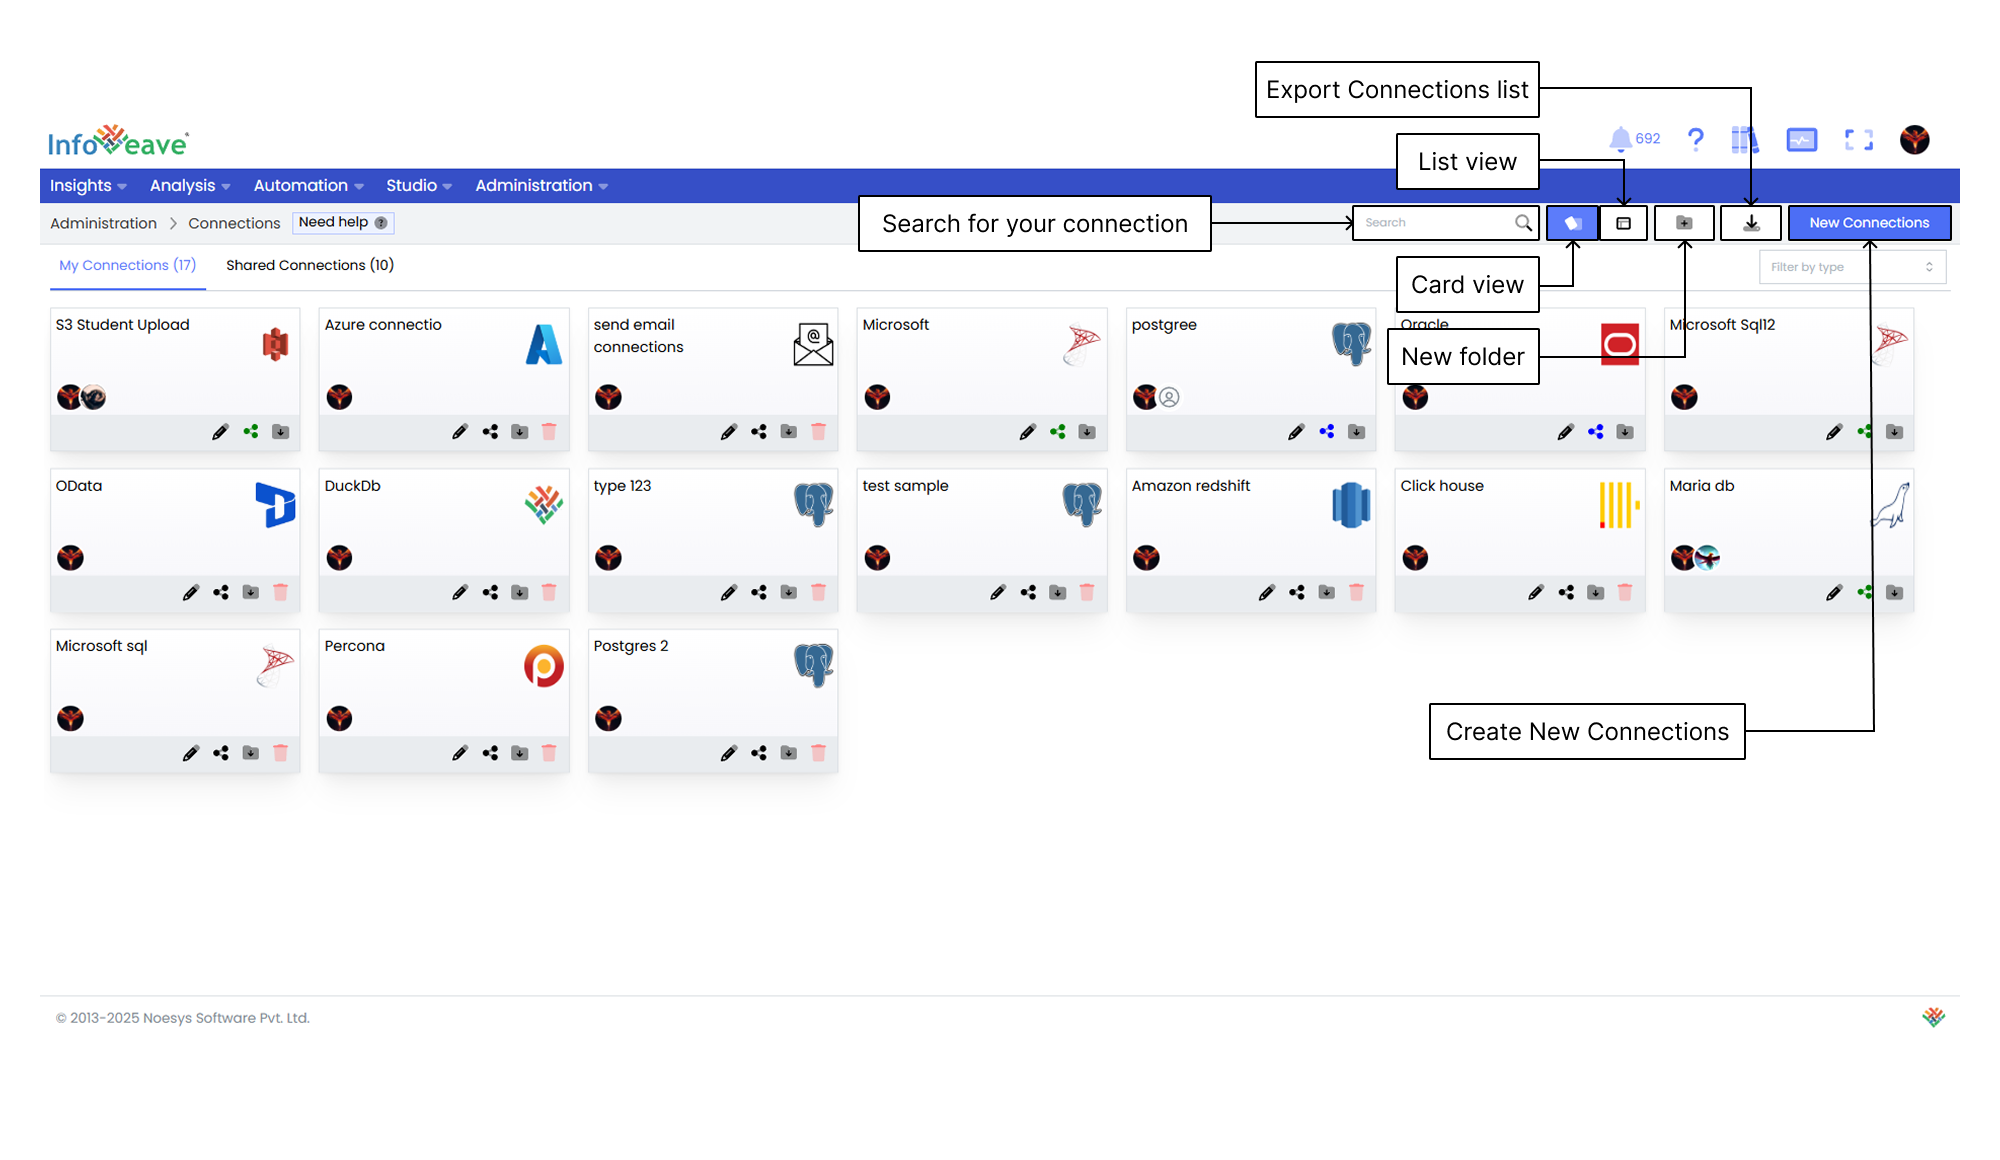
1. To establish a new connection in Infoveave, click on **Administration** **Connections**. All connections created by you or shared with you will be displayed under the tabs **My Connections** and **Shared Connections** respectively.
2. Click on **New Connections** to create a new database connection. You will be redirected to the connections page to select the connection type.
3. Select the required connection type from the list of available options.
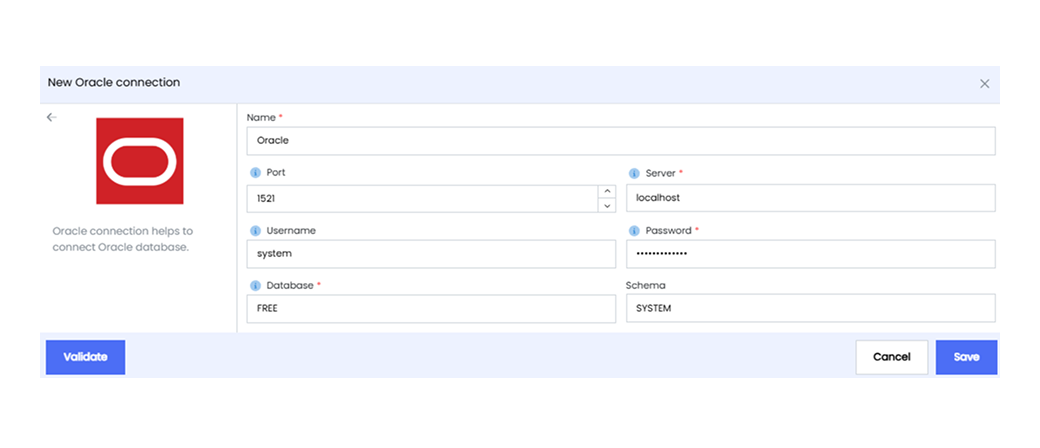
4. Provide the following information.
* **Name** Assign a descriptive name to this database connection for easy identification.
* **Database** Choose the appropriate database type from the available options. The database type determines how Infoveave communicates and interacts with the database engine. Select from options such as Microsoft SQL, Amazon Redshift, ClickHouse, MariaDB, MySQL, Oracle, Percona or Postgres.
* **Username** Enter the username associated with the chosen database. This is the credential Infoveave uses to authenticate and access the database. Ensure the username is correct and has the necessary permissions to interact with the database.
* **Server** Provide the server address or hostname where the database is located. This could be an IP address or a domain name. Ensure that you accurately input the server information to establish a successful connection.
* **Password** Input the corresponding password for the provided username. The password is a crucial security element. Ensure that you input it correctly. Consider using strong and unique passwords for your database connections.
* **Port** Specify the port number for the database connection. Each database type often has a default port assigned to it. However, you can customize this port as needed based on your database configuration.
* **Schema** A schema is a logical structure that defines the organization of data in a database including tables, fields, relationships and other elements. It acts as a blueprint that outlines how data is stored and accessed.
5. Click **Validate** to validate the connection.
6. Click **Save** to save the connection created.