---
title: Managing Connections
description: Efficiently manage your Infoveave connections - edit, share, organize, add descriptions, and delete with ease. Full control over connections.
---
# Managing Connections
import { Aside, Steps } from '@astrojs/starlight/components';
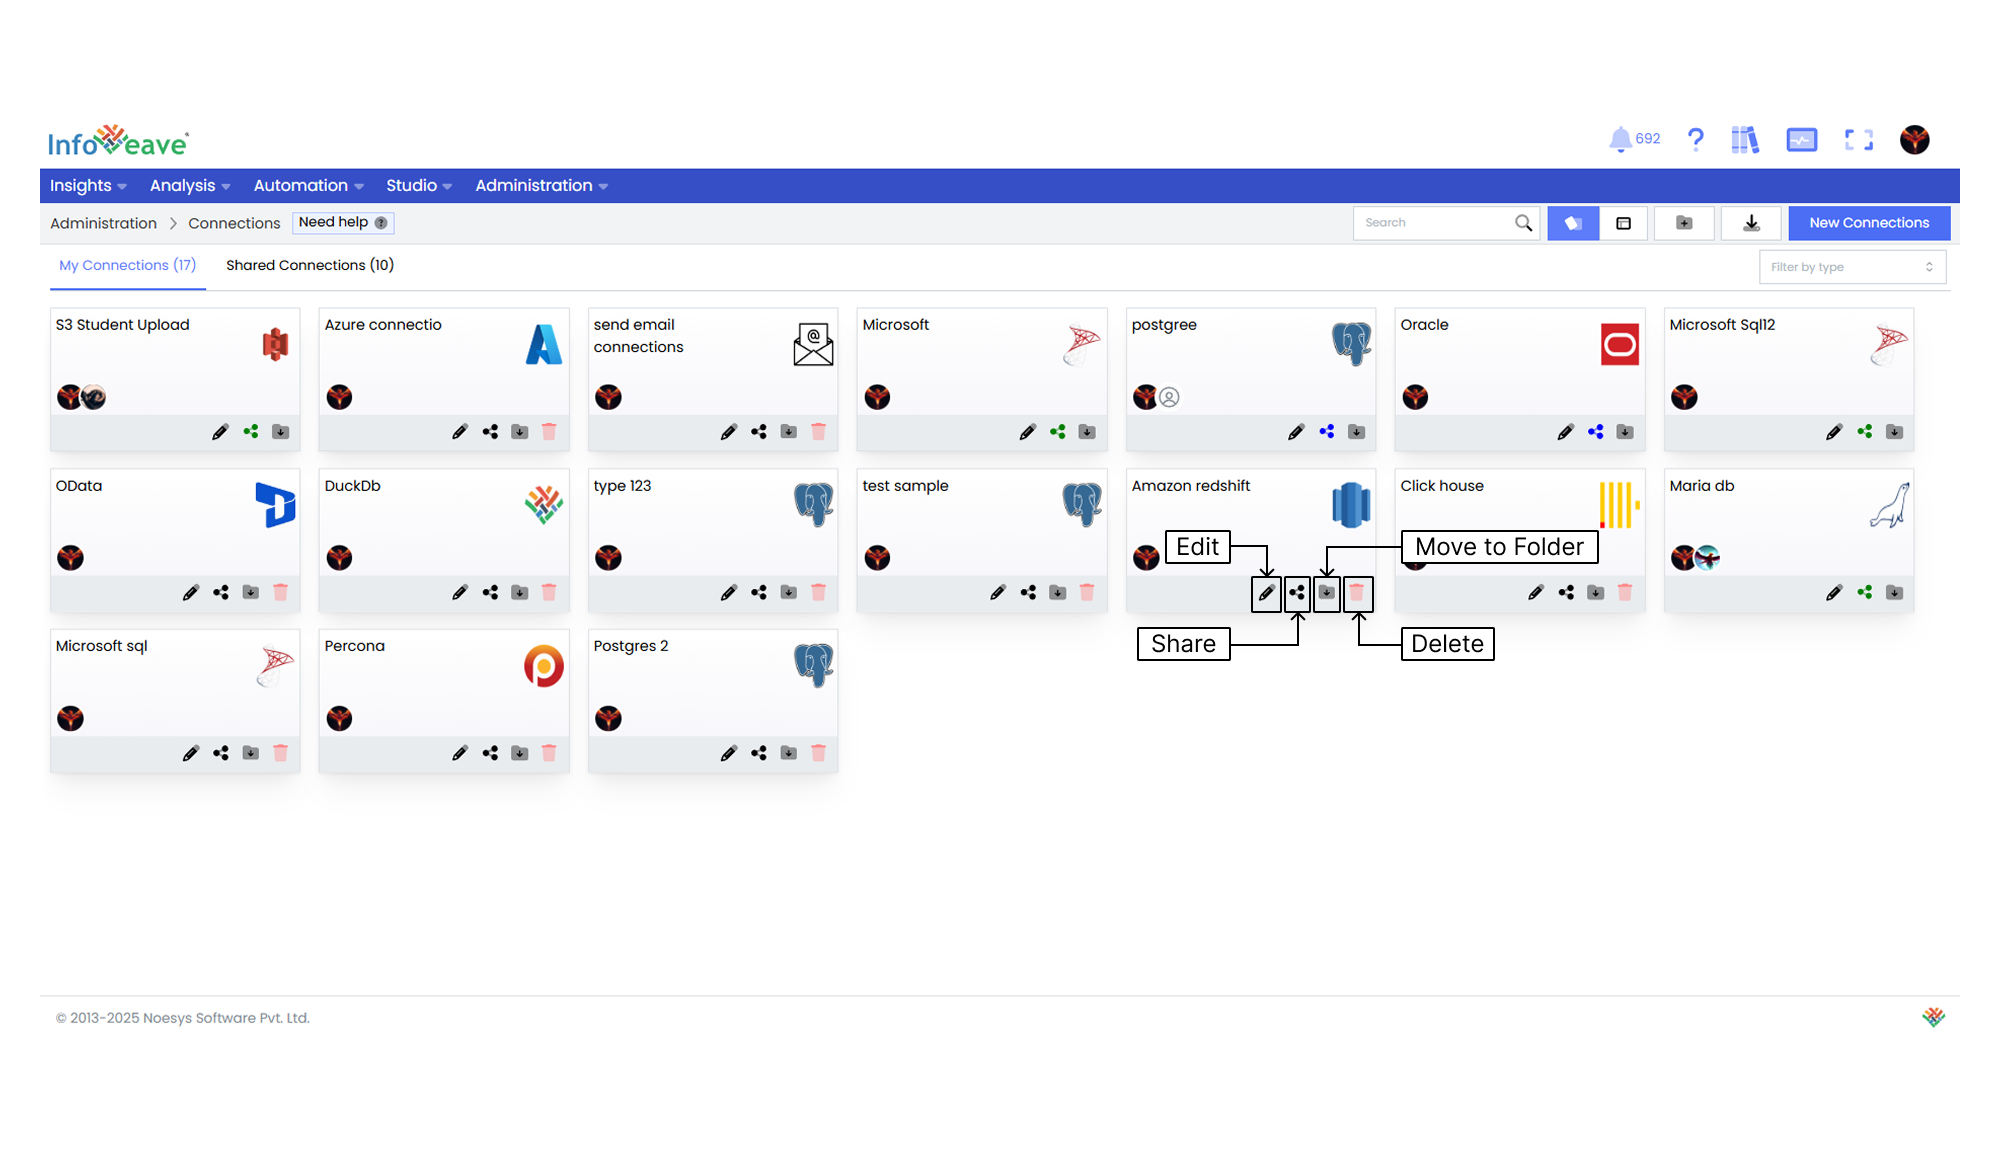
Manage all your Connections in one place. Edit existing ones, share them, organize them into folders, add descriptions, and delete Connections when they are no longer needed. This comprehensive management system ensures that you have full control over your Connections.
## Editing a Connection
To edit a Connection in Infoveave.
1. Navigate to **Administration Connections**.
2. Locate the Connection you want to edit.
3. Click on the **Edit** icon associated with the Connection.
4. Modify the required fields based on the type of Connection created.
5. Click **Save** to apply all the changes made to the Connection.
## Sharing a Connection
You can share your Connection with other users or roles in Infoveave. Follow these steps to share your Connection.
1. Navigate to **Administration Connections**.
2. Locate the Connection you want to share.
3. Click on the **Share** icon to share the Connection with the team or role.
4. Choose the sharing method. Select between the available options. Share with User or Share with Role.
5. If you choose Share with User, select the user or users you want to share the Connection with.
6. If you want to share the Targets and Thresholds with all users, select the **Share with Everyone** option.
7. If you choose Share with Role, pick the roles you want to share the Connection with from the share dialogue box.
8. To remove a specific user or role from the shared list, uncheck the corresponding checkbox.
9. Click **Save** to share your Connection with the selected users or roles.
## Moving to a Folder
To organize your Connection under a folder.
1. Navigate to **Administration Connections**.
2. Select the Connection you want to move by clicking on the **Move to Folder** icon.
3. Choose the desired folder from the dropdown menu.
4. Click the **Save** button to finalize the move.
## Deleting a Connection
To delete a Connection in Infoveave, follow these simple steps.
1. Navigate to **Administration Connections**.
2. Find the Connection you want to delete.
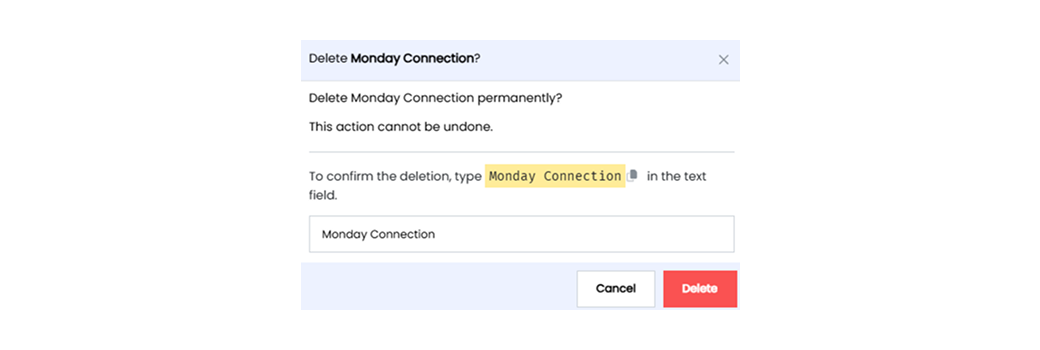
3. Click on the **Delete** icon .
4. Type the specified text from the warning message in the provided text field.
5. Alternatively, you can copy the text from the icon and paste it in the text field.
6. Once you have entered the correct text, click on **Delete**.