---
title: Users
description: Manage users including creating, editing, unlocking, resetting passwords, and assigning roles within the Administration module.
---
import { Aside, Steps } from '@astrojs/starlight/components';
import { MediaPlayerComponent } from "../../../../components/video-player";
import RunScript from "../../../../components/RunScript.astro";
# Users
Manage Infoveave users using the **Infoveave Administration** module. You can create or add new users, unlock and reset users, and add or delete users.
## Creating a User
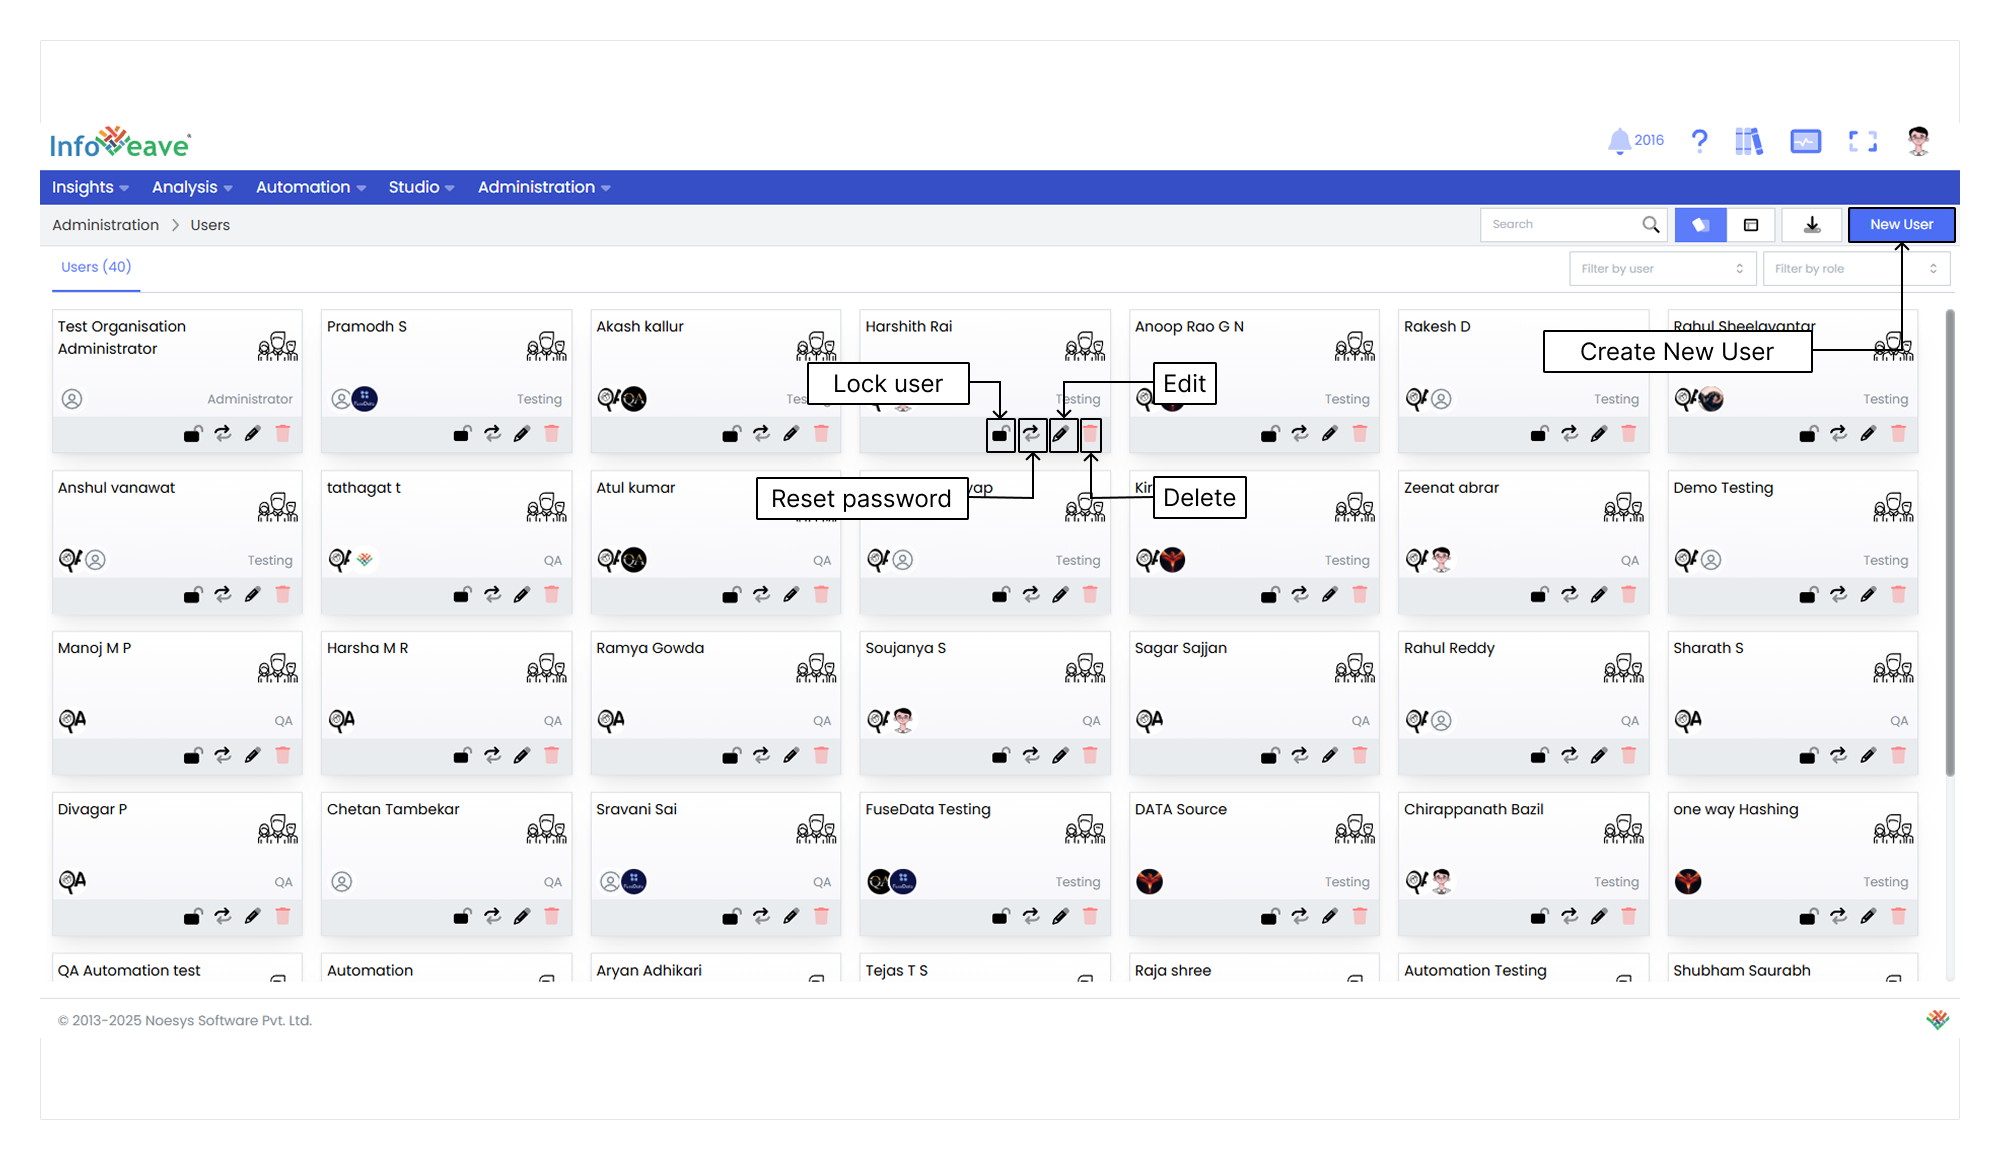
1. To add a user in Infoveave, click on **Administration** **Users**. All users created by you will be displayed under the **Users** tab.
2. Click on **New User** to create a user.
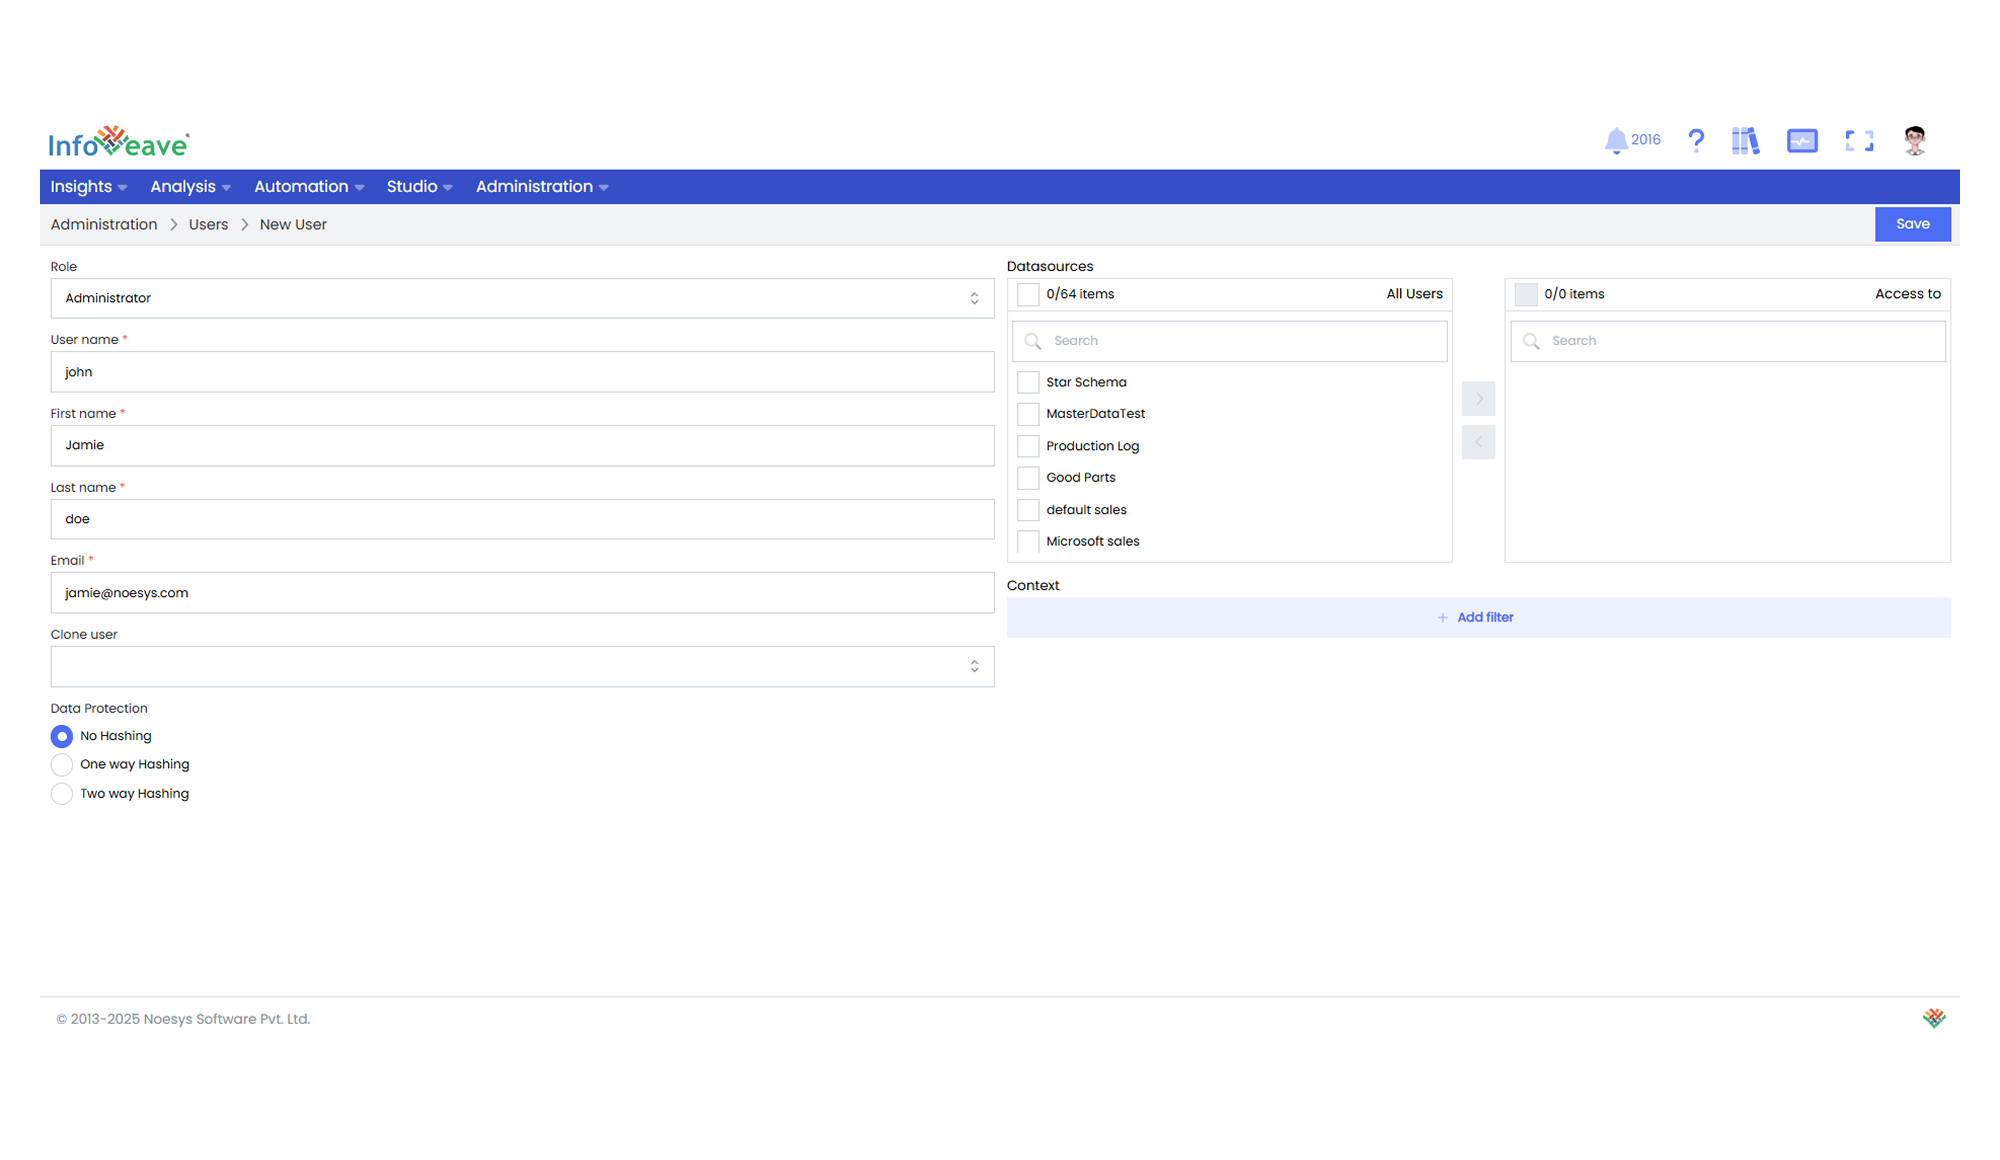
3. Select the appropriate **Role** for the new user.
In the **SAAS version** of Infoveave, there are two primary roles available
* **Creator** This role is designed for users who require access to various features for creating, managing, and analyzing data. These features include designing Infoboards, generating reports, and performing analysis.
* **Viewer** The Viewer role is intended for users who need to access and view data, Infoboards, and reports. These users do not require the full set of features available to Studio users.
In the **Enterprise version** of Infoveave, the system administrator has the flexibility to create custom roles based on the specific features required for different roles within the organization.
4. Enter the user’s credentials and information in the following fields
* **User name** Provide a unique username for the new user.
* **First name** Enter the user’s first name.
* **Last name** Enter the user’s last name.
* **Email** Input the user’s email address.
5. Use the **Clone user** feature to replicate the roles and permissions of an existing user to the new user if required.
6. For **Data Protection**, you have three options.
**No Hashing** If you select No Hashing, anyone can access the data.
**One way Hashing** If a user is one way hashed, that particular user cannot access the hashed data.
**Two way Hashing** If a user is two way hashed, that particular user can access the data only if they have the credentials.
6. Select the Datasources from the available list that you want the new user to access.
* Click the icon to share the selected Datasource with the user.
* To remove a specific Datasource from the shared list, choose the Datasource and click the icon.
7. Apply dimension filters to control what data the new user can see if required.
* Click on **+Add filter** and choose a **Dimension** from the shared Datasources under **Context**.
* Select the conditional filter **is, is not, in, or not in**.
* Select the specific **Value** for the conditional filter.
8. Click on the **Save** button to create the new user account with the assigned role, Datasource access, and dimension filters.
## Locking or Unlocking a User
Infoveave allows you to lock or unlock users. This feature helps you prevent a user from accessing Infoveave for particular reasons. If a user attempts to log in multiple times with an incorrect password, their account may become locked as a security precaution. The **Unlock user** option in Infoveave allows you to manage and clear such locked account activities.
To lock or unlock a user in Infoveave, follow these steps.
1. Navigate to **Administration** **Users**.
2. Find the specific user that you want to lock or unlock.
3. To lock or unlock a user, click on the **Lock/Unlock** / icon associated with the user.
## Resetting a User Password
Infoveave allows users to reset passwords, ensuring the security and accessibility of user accounts. Here are the steps to reset a user’s password in Infoveave.
1. Navigate to **Administration** **Users**.
2. Locate the specific user whose password you want to reset.
3. Click on the **Reset password** option associated with the user.
## Editing a User
Edit users to ensure that their details reflect and meet your evolving requirements.
To modify a user in Infoveave, follow these steps.
1. Navigate to **Administration** **Users**.
2. Find the specific user that you want to edit.
3. Click on the **Edit** icon associated with the user.
4. After making the necessary modifications, click on the **Save** button to save your edit.
## Deleting a User
To delete a user in Infoveave, follow these simple steps.
1. Navigate to **Administration** **Users**.
2. Find the user you want to delete.
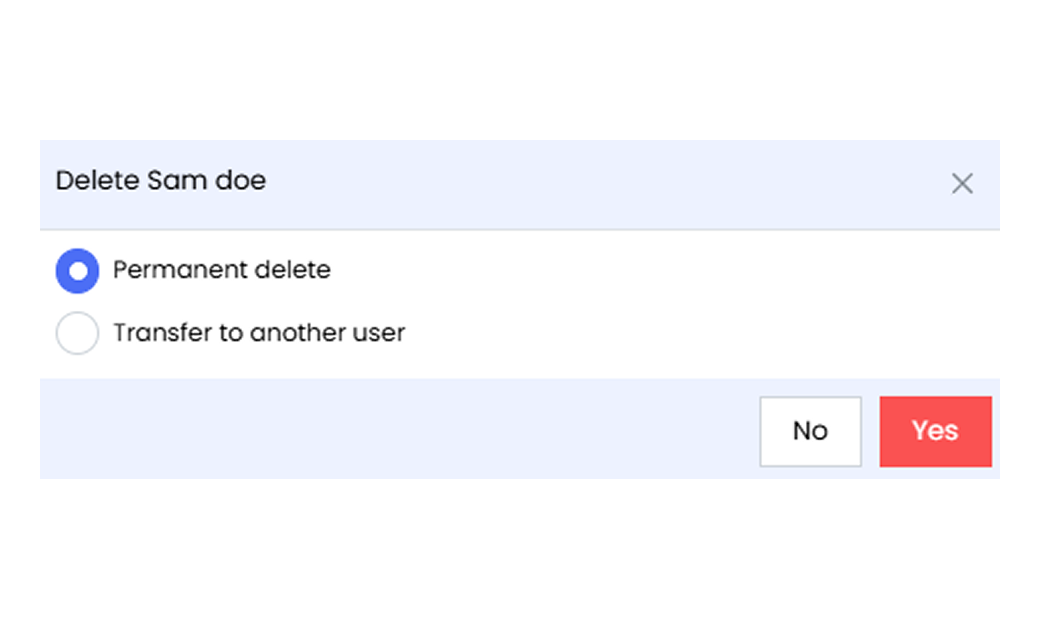
3. Choose the deletion method.
4. Decide whether you want to permanently delete the user or transfer their content to another user.
**Permanent delete**
* Select the **Permanently delete** option.
* Confirm the deletion by clicking **Yes**.
* The user’s account and associated content will be permanently removed from Infoveave.
**Transfer to another user**
* Select the **Transfer to another user** option.
* A drop-down menu will appear, allowing you to select the user to whom the content should be transferred. Choose the appropriate user from the list.
* Click **Yes** to confirm.
* The user’s content will be transferred to the selected user, and then the original user’s account will be deleted.