---
title: Roles
description: Manage and customize roles in Infoveave, control user access, and define permissions with ease in the Administration module.
---
import { Aside, Steps } from '@astrojs/starlight/components';
# Roles
Infoveave Roles allow you to create custom roles, control access to features in detail, and tailor user privileges based on your organization’s needs.
## Creating a Role
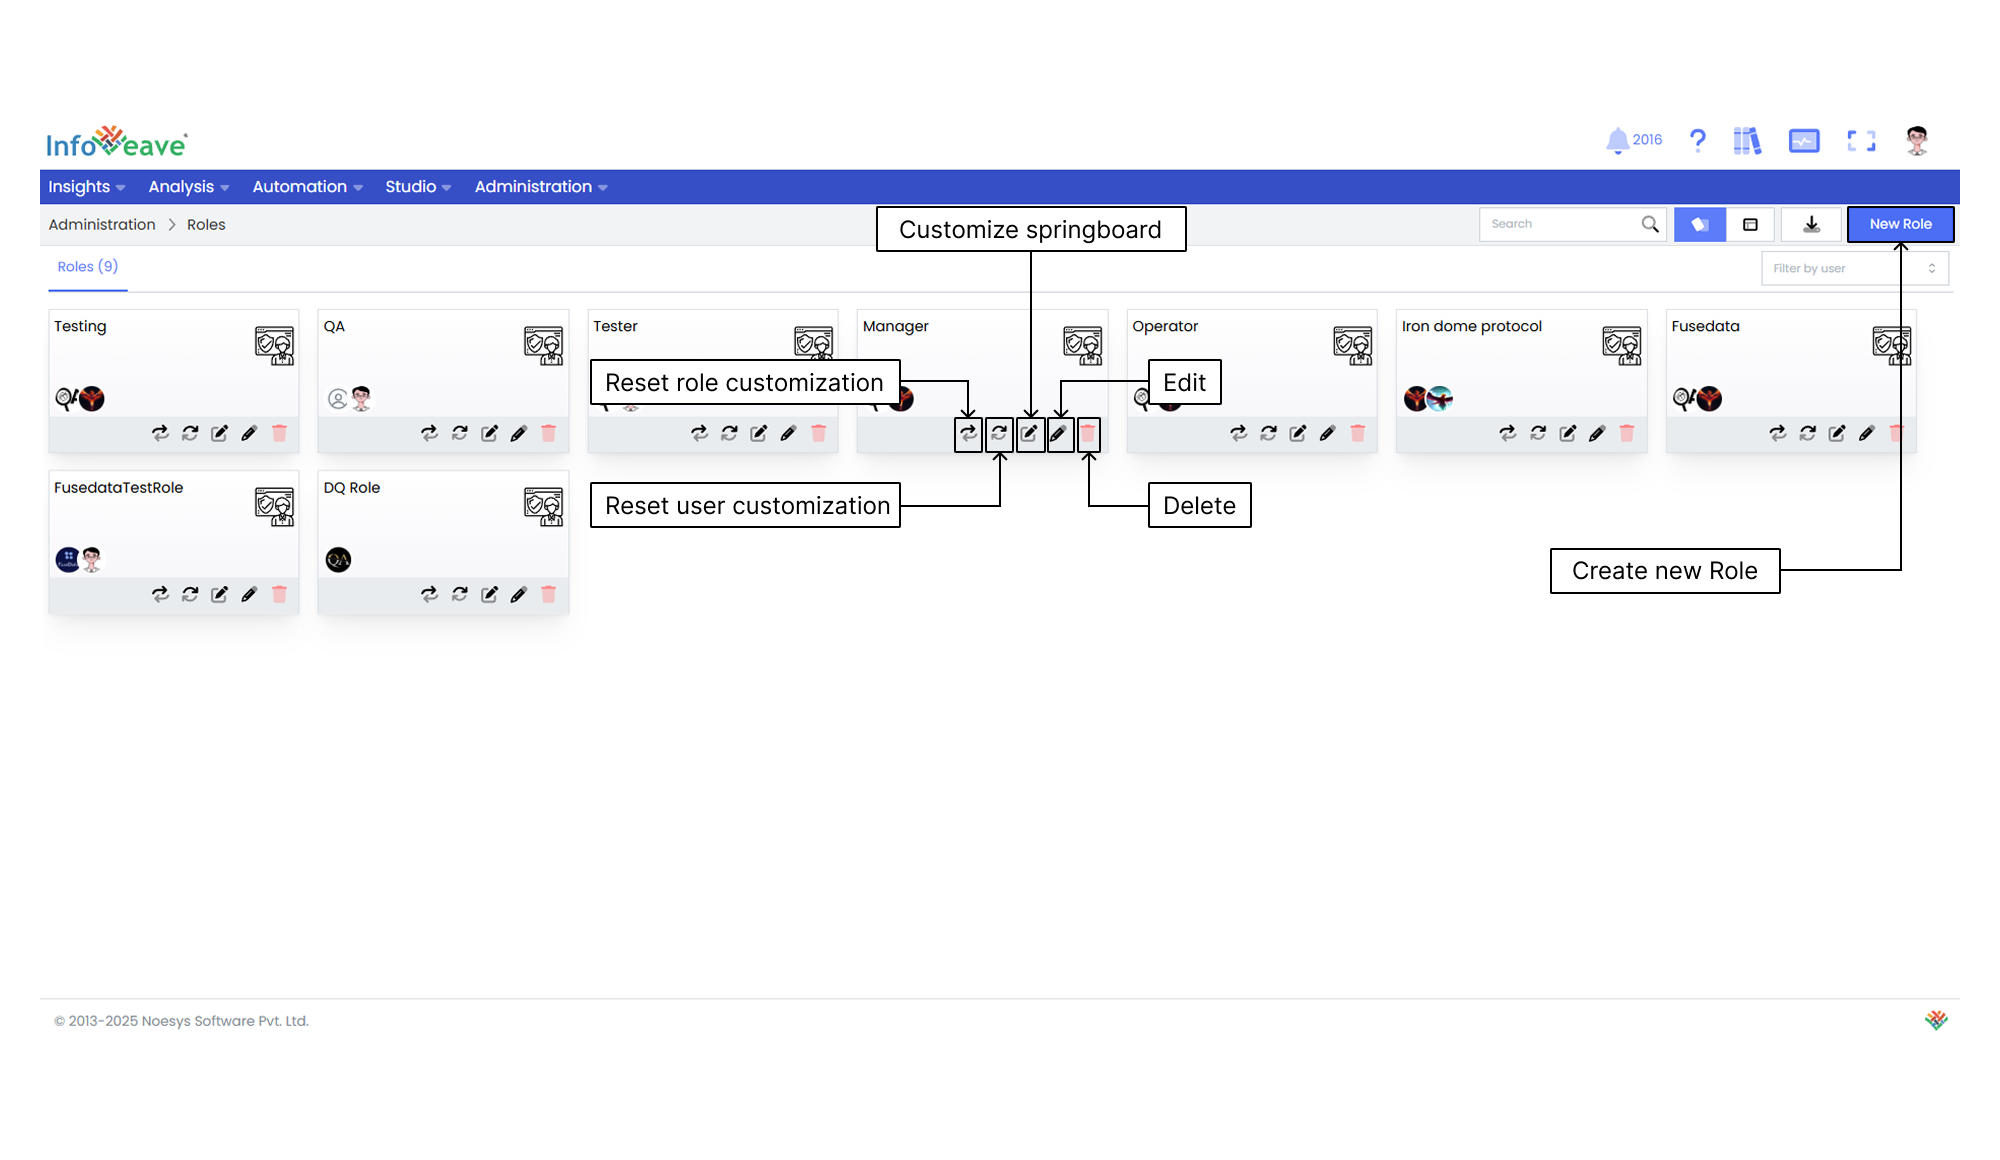
1. To add a role in Infoveave, click on **Administration** **Roles**. All roles created by you are displayed under the **Roles** tab.
2. To create a new custom role, click on the **New Role** button. A custom role configuration page appears, where you can customize role settings according to your requirements.
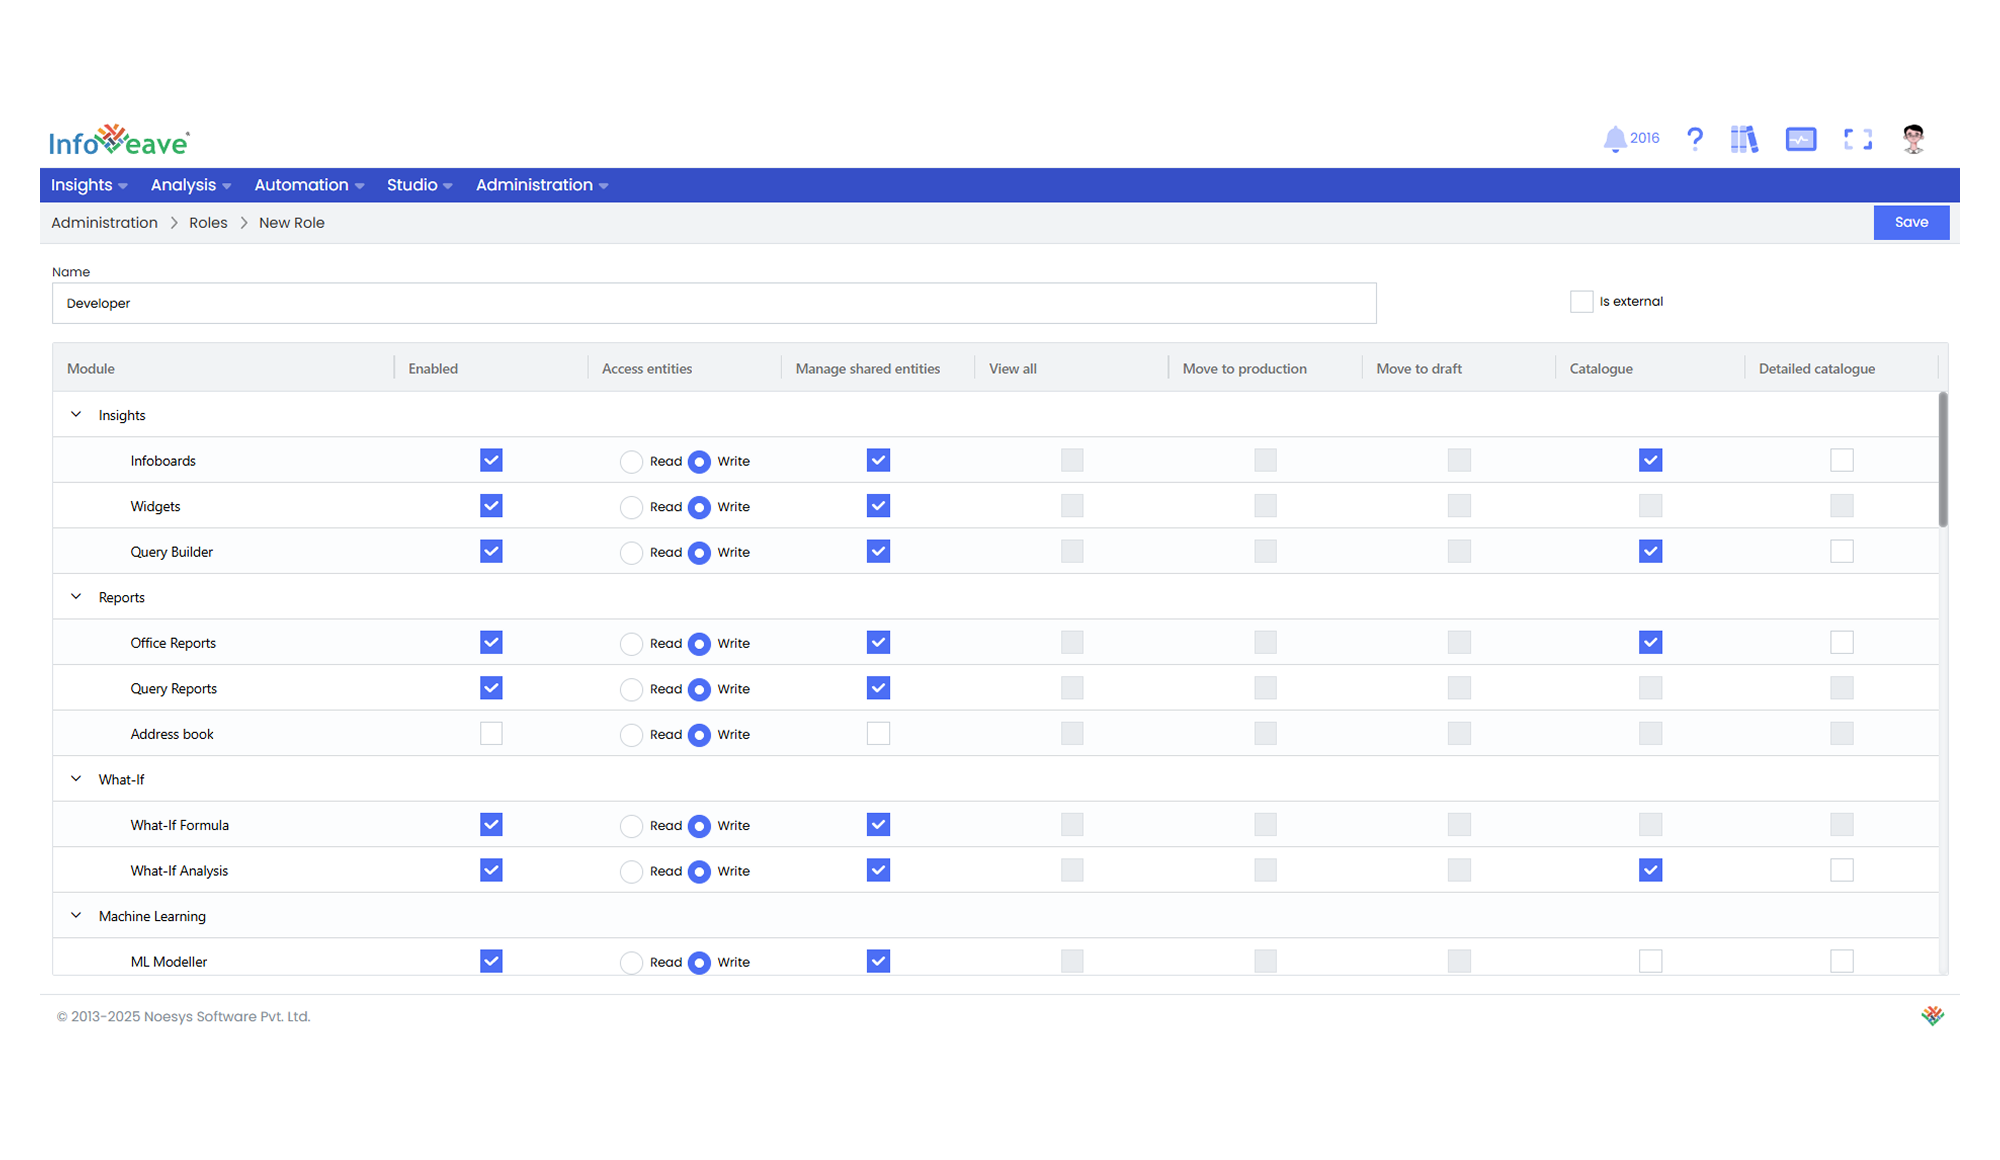
3. Assign a **Name** to the new custom role.
4. Use the **Is external** checkbox to designate the role as external if needed. If a role is marked as **Is external**, users with this role will not have access to the catalogues, public folders and workflow statistics.
5. Start customizing role access using the checkbox options.
* In the customization section, you find various options such as Insight, Reports, What If, Machine Learning, Process Automation, Studio, Administration, and Datasources.
* Check the boxes next to the sections that you want the custom role to have access to.
* By selecting these options, you define the user’s level of access within these sections.
6. After configuring all aspects of the custom role, click **Save** to save your settings.
## Editing a Role
Edit roles to ensure that they reflect and meet your evolving requirements.
To modify a role in Infoveave, follow these steps.
1. Navigate to **Administration** **Roles**.
2. Find the specific role that you want to edit.
3. Click on the **Edit** icon associated with the role.
4. Click on the **Save** button to save your edits after making the necessary modifications.
## Deleting a Role
To delete a role in Infoveave, follow these steps.
1. Navigate to **Administration** **Roles**.
2. Find the role you want to delete.
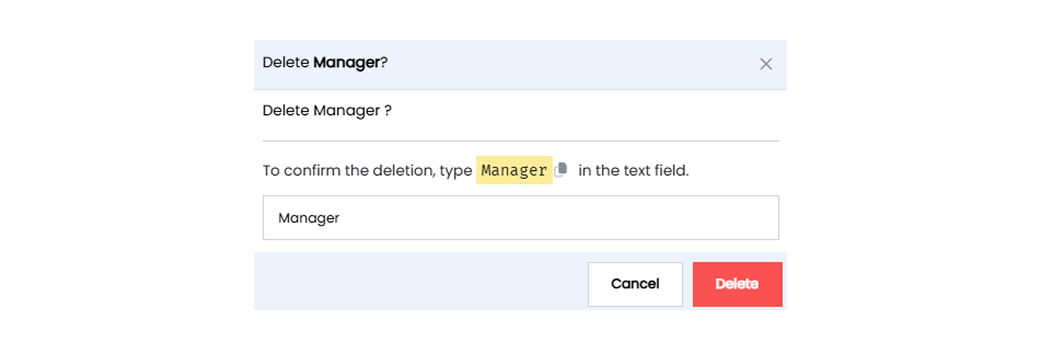
3. Click on the **Delete** icon.
4. Type the specified text from the warning message in the provided text field.
5. Alternatively, you can copy the text from the icon and paste it into the text field.
6. Once you have entered the correct text, click on **Delete**.