---
title: Introducing NGauge Forms
description: Efficiently manage and update file-based datasources in Infoveave with customizable NGauge forms for real-time data interaction.
---
import { Aside, Steps } from '@astrojs/starlight/components';
# Introducing NGauge Forms
**Infoveave's NGauge Forms** module provides a streamlined approach to data collection and workflow automation. It empowers users to create customized, web-based forms for various data entry needs, eliminating the inefficiencies of manual processes and paper-based systems.
With NGauge Forms, you can easily design forms tailored to specific requirements, incorporating various field types, validation rules, and conditional logic. This ensures data accuracy and consistency from the point of entry. The intuitive drag-and-drop interface makes form creation accessible to users of all technical skill levels.
Data collected through Ngauge Forms seamlessly integrates with other Infoveave modules, enabling real-time analysis and reporting. You can trigger automated workflows based on form submissions, routing information to the appropriate stakeholders and streamlining processes. This integration reduces manual effort, accelerates decision-making, and improves overall operational efficiency. Ngauge Forms is a powerful tool for organizations seeking to digitize their data collection processes and optimize workflows across various departments.
## Creating an NGauge Form
Efficiently update your data entries individually or in bulk by selecting the required Datasource. This process initiates the direct modification of master data in Infoveave, offering flexibility and precision in data updates.
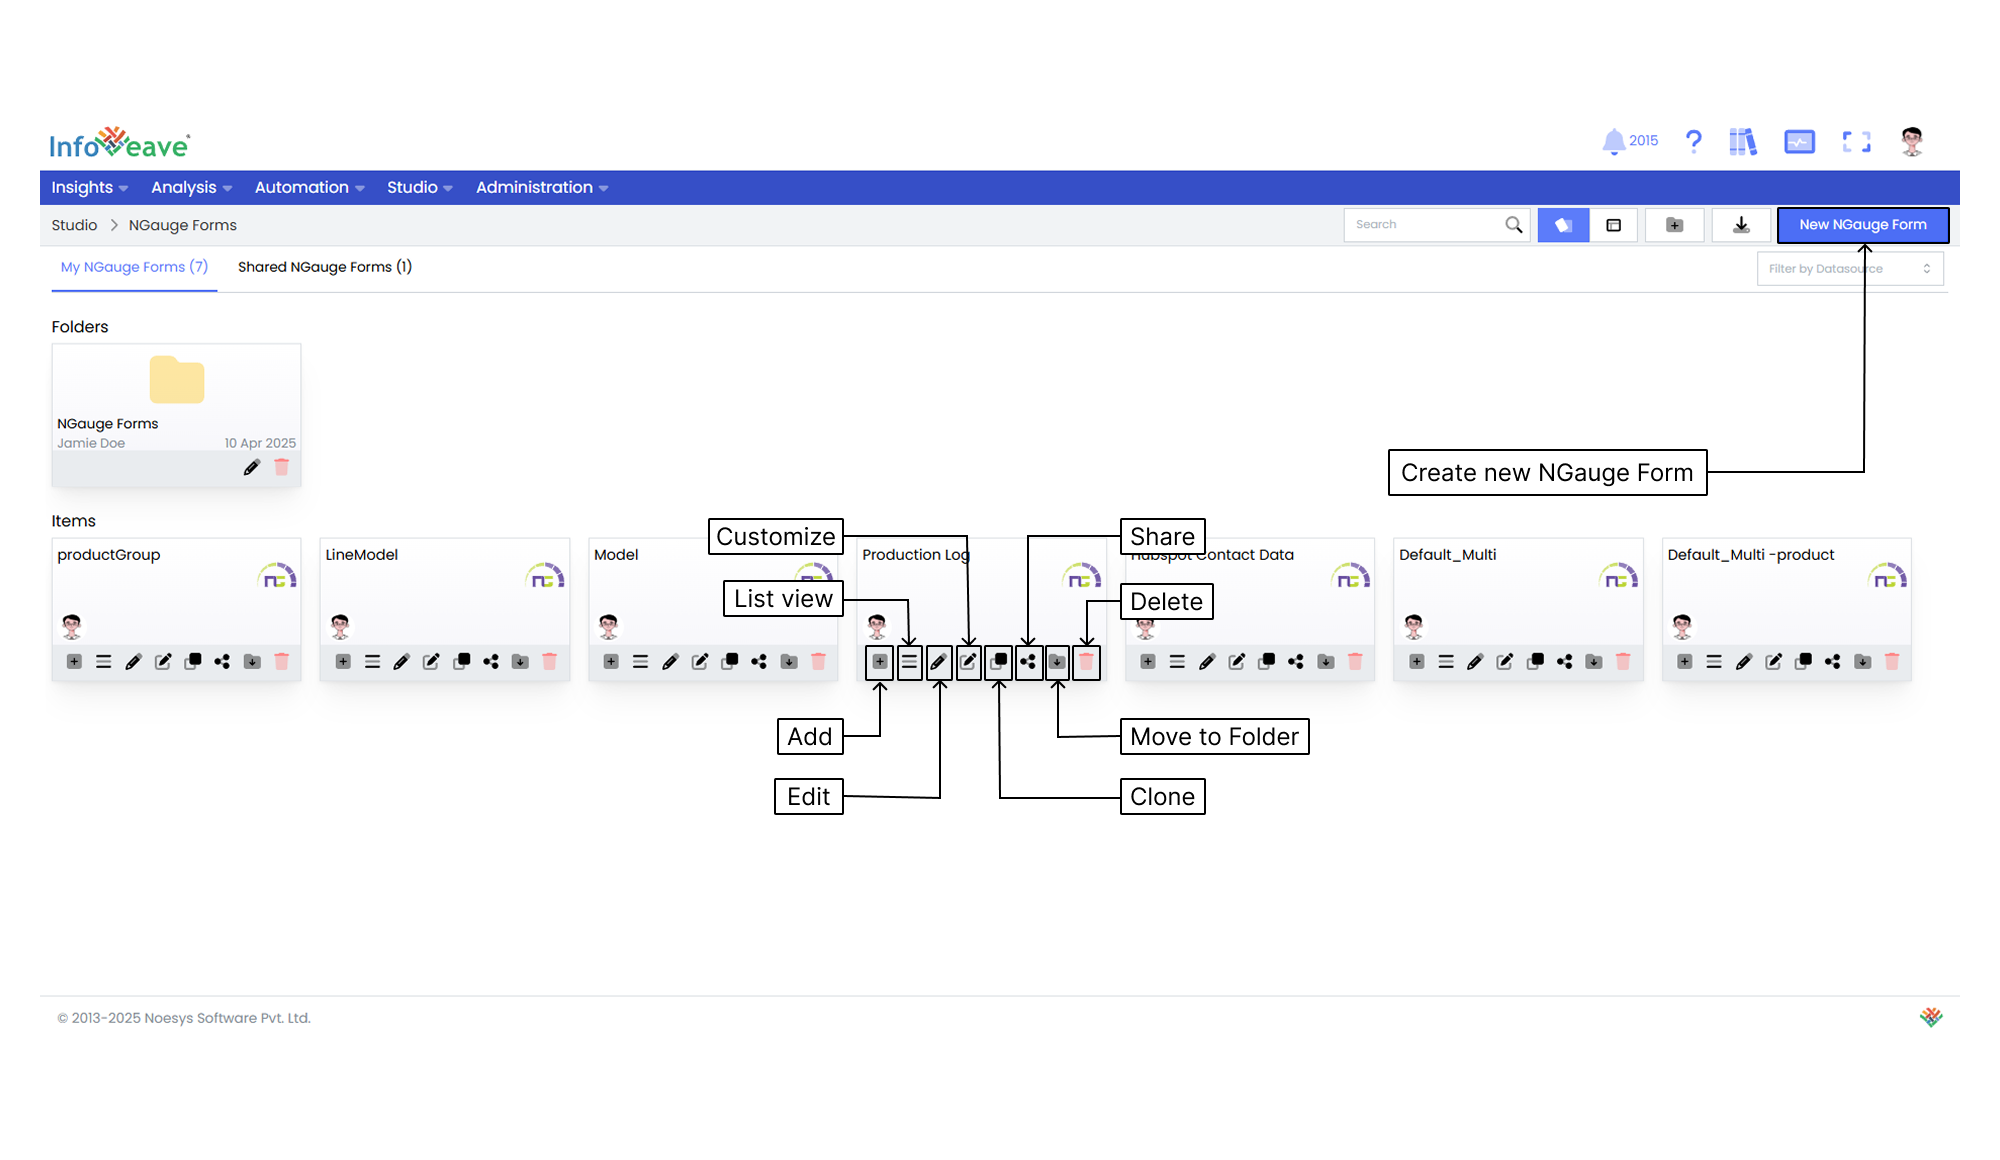
1. To create an NGauge form in Infoveave using an existing Datasource, click on **Studio** **NGauge Forms**. All NGauge forms created by you or shared with you are displayed under the tabs **My NGauge Forms** and **Shared NGauge Forms** respectively.
2. To build a new form, click on **New NGauge Form**.
3. Select the **Datasource** you want to use from the drop-down. The **Table** and **Primary Key** will be auto-selected.
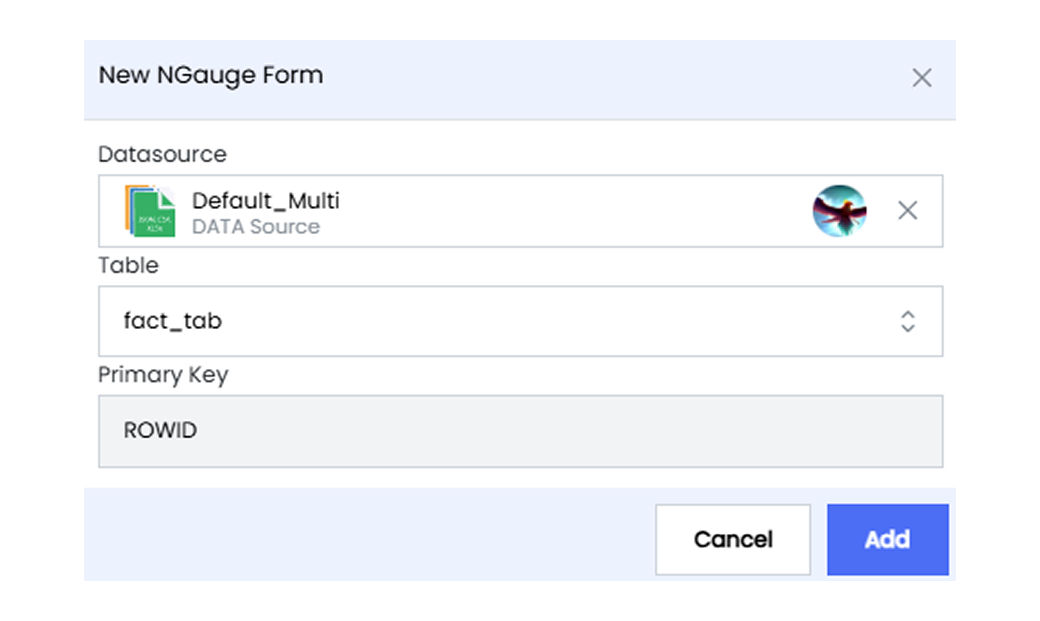
4. Click on the **Add** button to start configuring the NGauge form.
## Configuring the NGauge Form
Configure the NGauge form in Infoveave for efficient and personalized data interaction. Tailor its functionality to meet your specific data management needs.
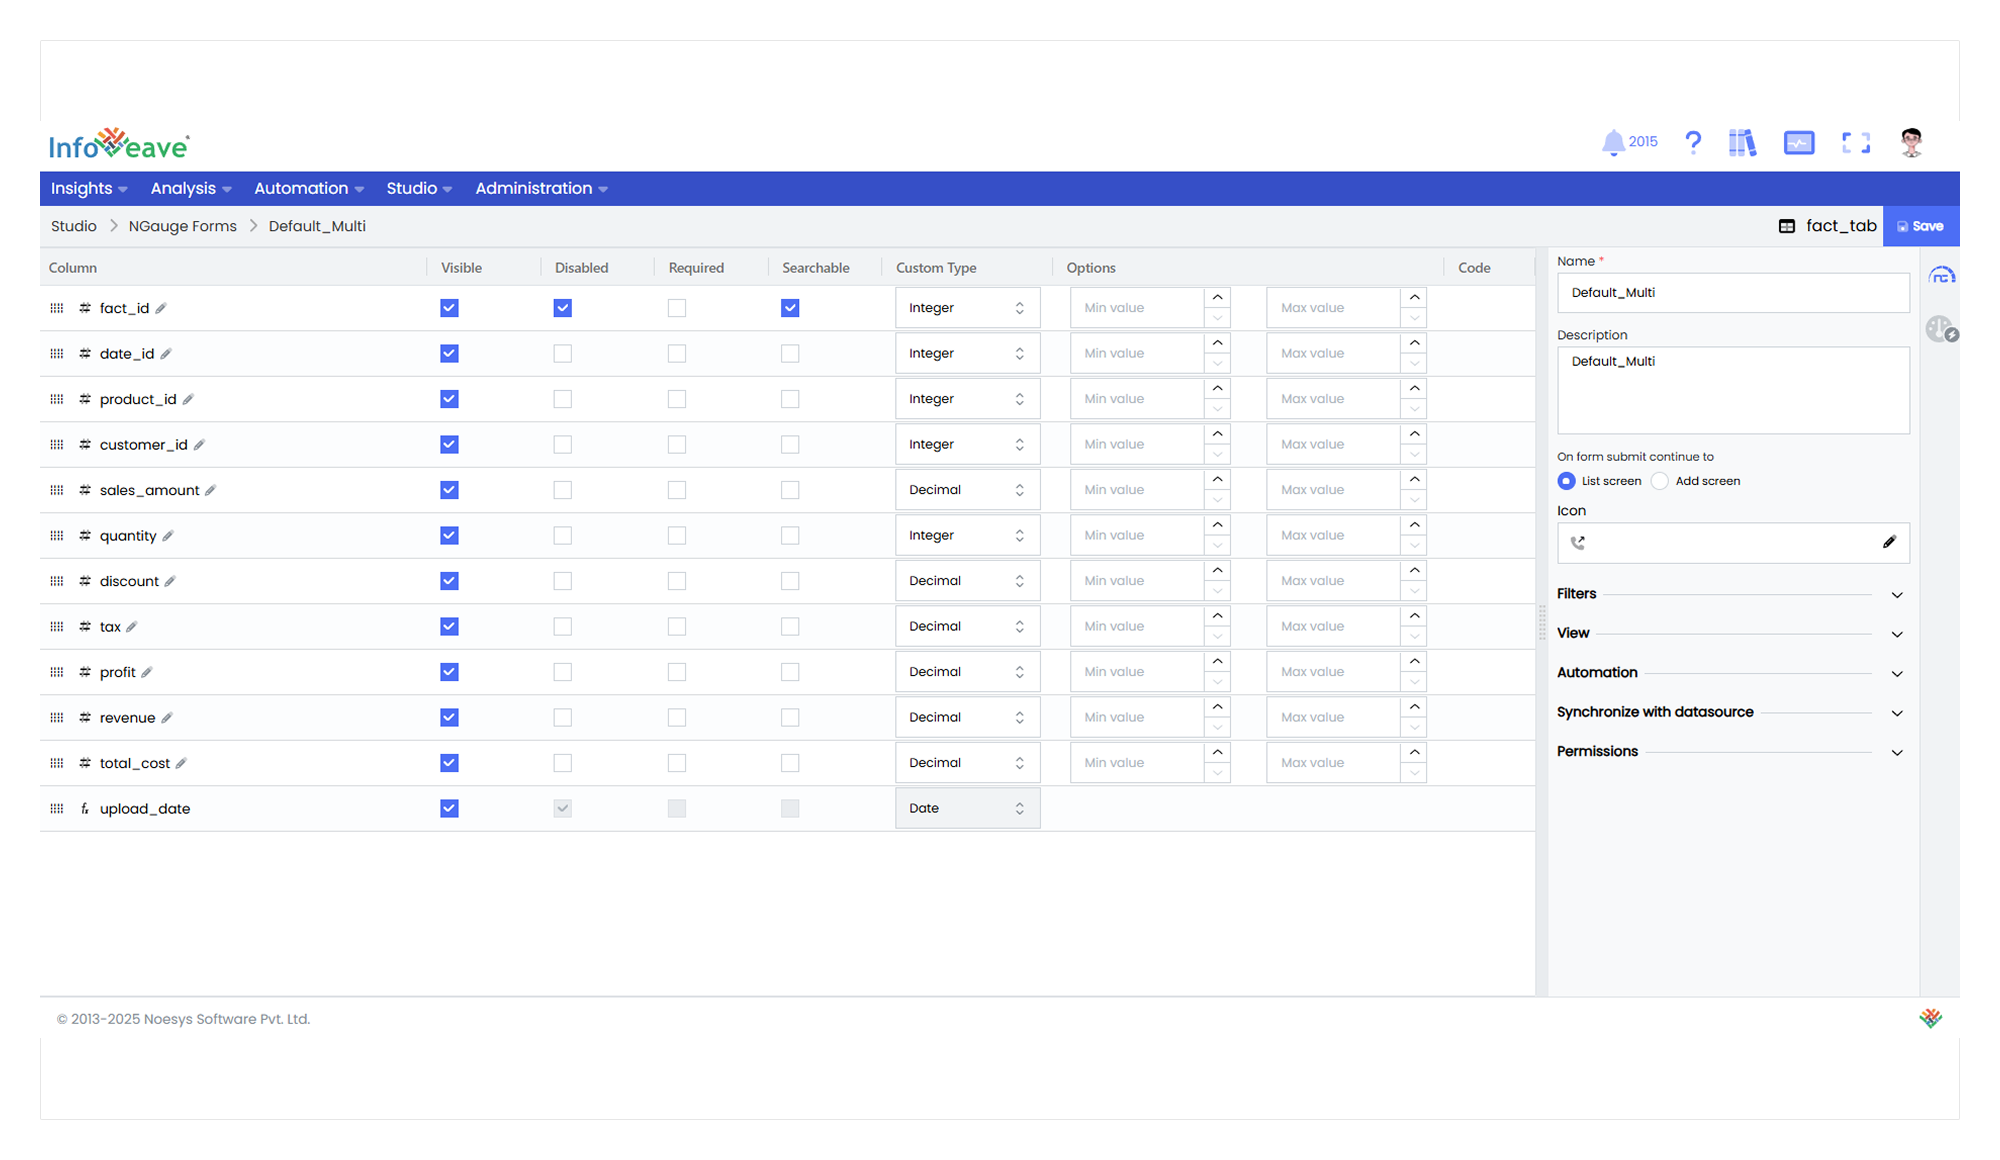
1. Provide a **Name** and **Description** for the NGauge form.
2. Upon form submission, select the screen to navigate to. You can choose either the **List screen** or the **Add screen**.
3. Choose an icon to represent the NGauge form.
4. Check the **Use advanced filters** checkbox if you want to enable advanced options. You must also check the Search checkbox for this.
5. Check the **Load only when filters applied** checkbox if you want to load data only when filters are applied. This requires the **Use advanced filters** checkbox to be checked. This feature improves performance when dealing with large datasets.
6. Under the **View** option, you can add a new view.
7. Choose the workflow from the drop-down list under **Automation** and click **Add** to include it in the NGauge form.
8. If you have deleted any column from the Datasource and want to sync it in your NGauge form, click on **Synchronize with datasource**.
9. Under the **Form configuration** tab, select the row editor type from the available options of New Screen and Pop-up. This helps define how new rows can be added to the Datasource.
10. Click on **Permissions** to define the default permissions for the NGauge form.
11. Check the required options you want to offer in the NGauge form.
* **Add** Enable this option to allow users to add new entries to the NGauge form.
* **Edit** Allow users to edit existing entries within the NGauge form.
* **Delete** Permit users to delete individual entries from the form.
* **Delete All** Grant users the ability to delete all entries present in the NGauge form.
* **Download** Provide users with the option to download associated data or reports.
* **Data Upload** Enable users to upload data into the NGauge form from external sources.
* **Save** Allow users to submit the form data for further processing.
* **Make form readonly** Make the form read-only if you want to restrict user editing.
12. Click on **Save** to save the default permissions.
## Customizing an NGauge Form Layout
Customize the NGauge form layout to create a user-centric, efficient, and adaptable last-mile form. This enhances data management, reporting, and overall productivity.
To customize the NGauge form in Infoveave, follow these steps.
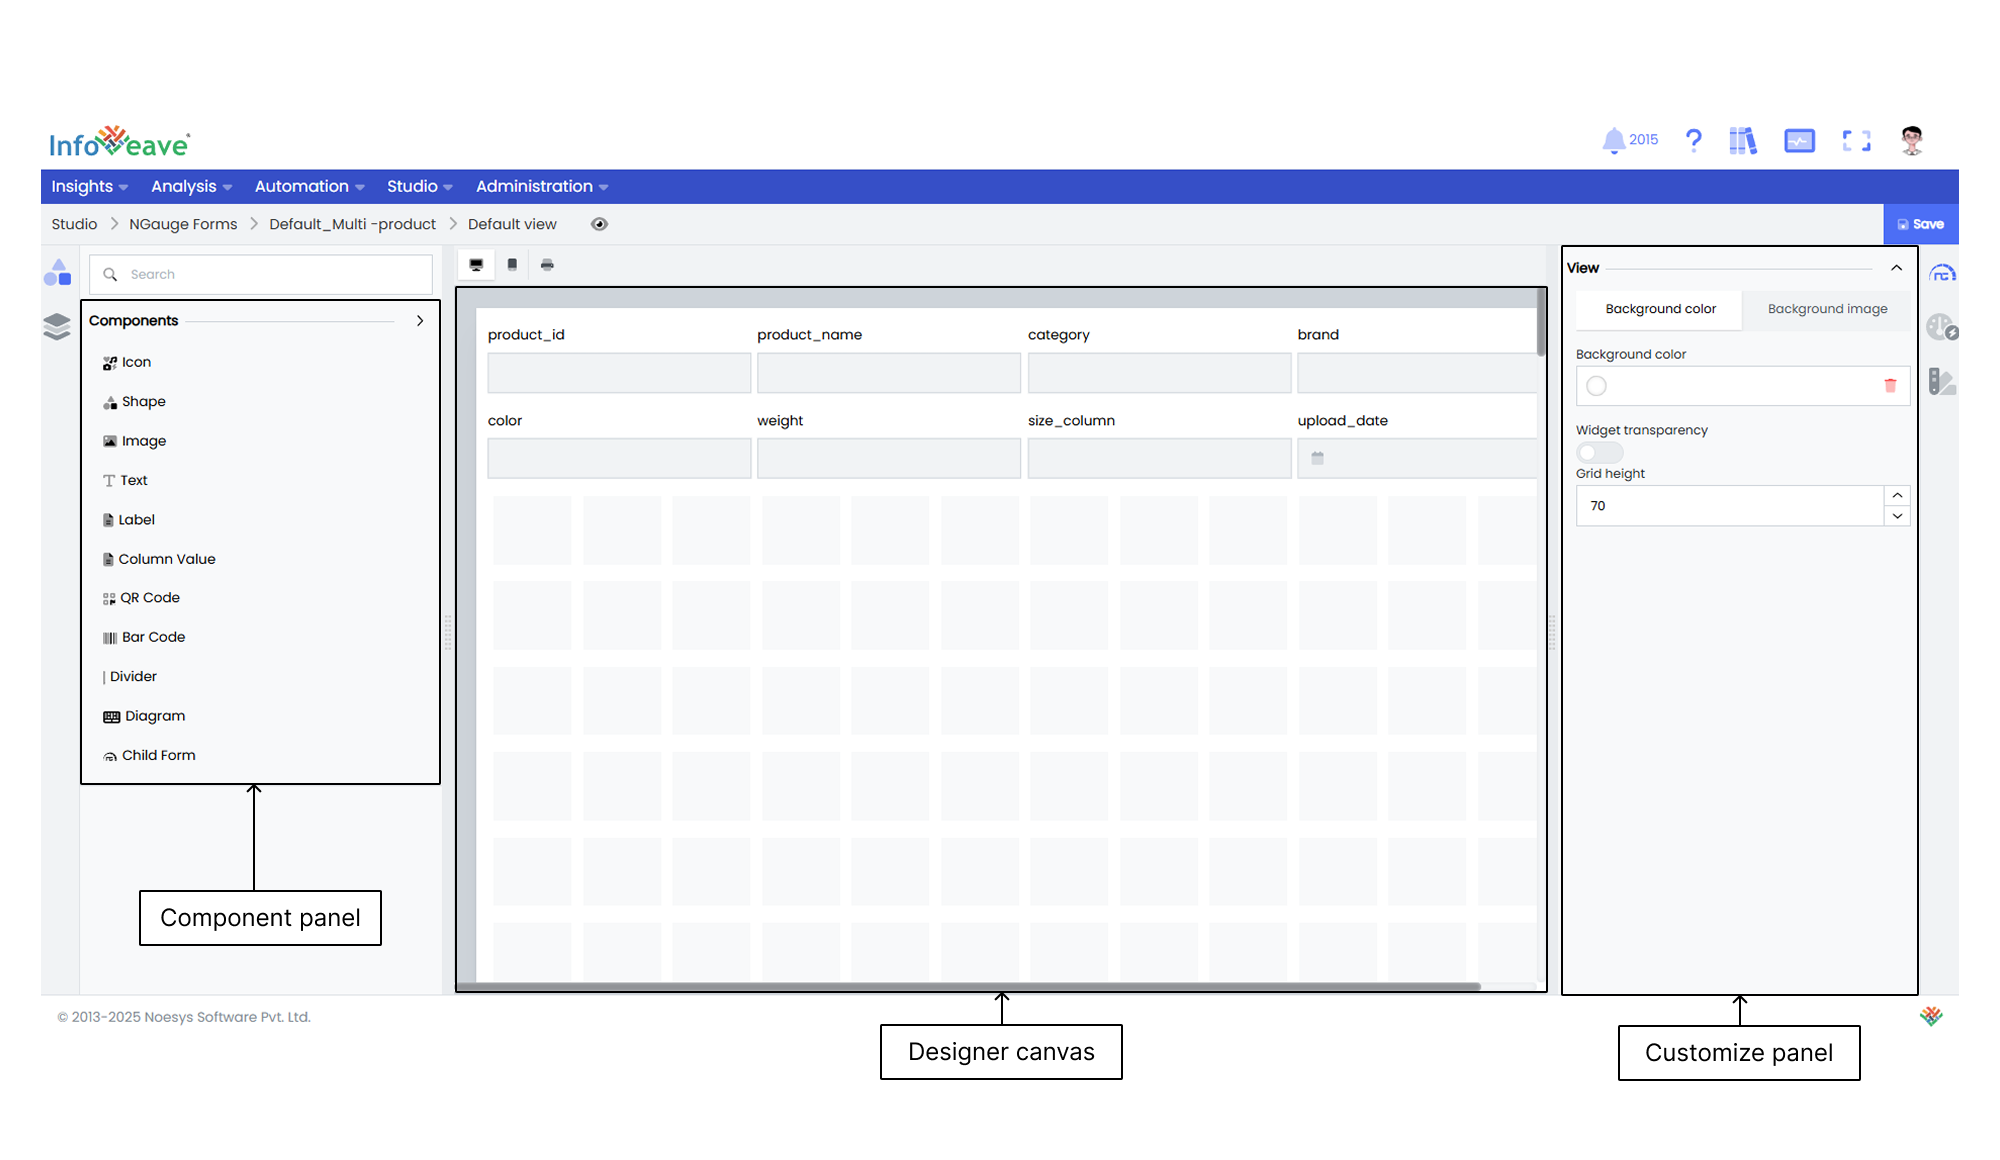
1. Click on the **Customize** icon on the required NGauge form to access the NGauge designer. In the designer, you will find all the selected columns arranged as a grid.
2. Look for the desired component (Icon, Shape, Image, Text, Child Form) in the component library.
3. Drag and drop these elements onto the canvas.
4. Click and drag components to the desired location.
5. Select the component you want to resize.
6. Click and drag the small circles around the edges or corners of the element to resize it.
7. Use the customization options under **View** to modify the component.
8. To delete a component, select it on the Designer canvas and click the Delete option.
9. Use the Save option to preserve your work and ensure easy access for future edits.
## Creating a Child NGauge Form
Child NGauge forms are NGauge forms linked to a parent NGauge form based on a parent-child relationship.
Follow these steps to configure the child NGauge form in Infoveave.
1. Create an NGauge form (parent form) with the master Datasource in Infoveave.
2. Identify and assign a field as a key column in the parent NGauge form when configuring the parent NGauge form. This identifier can be a unique field associated with the parent form. The assigned key column links the parent form to the child form.
3. Create another NGauge form (child form) using the Child Datasource (Datasource contributing to the master Datasource) in Infoveave.
4. Identify and assign a field as the same key column as in the parent NGauge form.
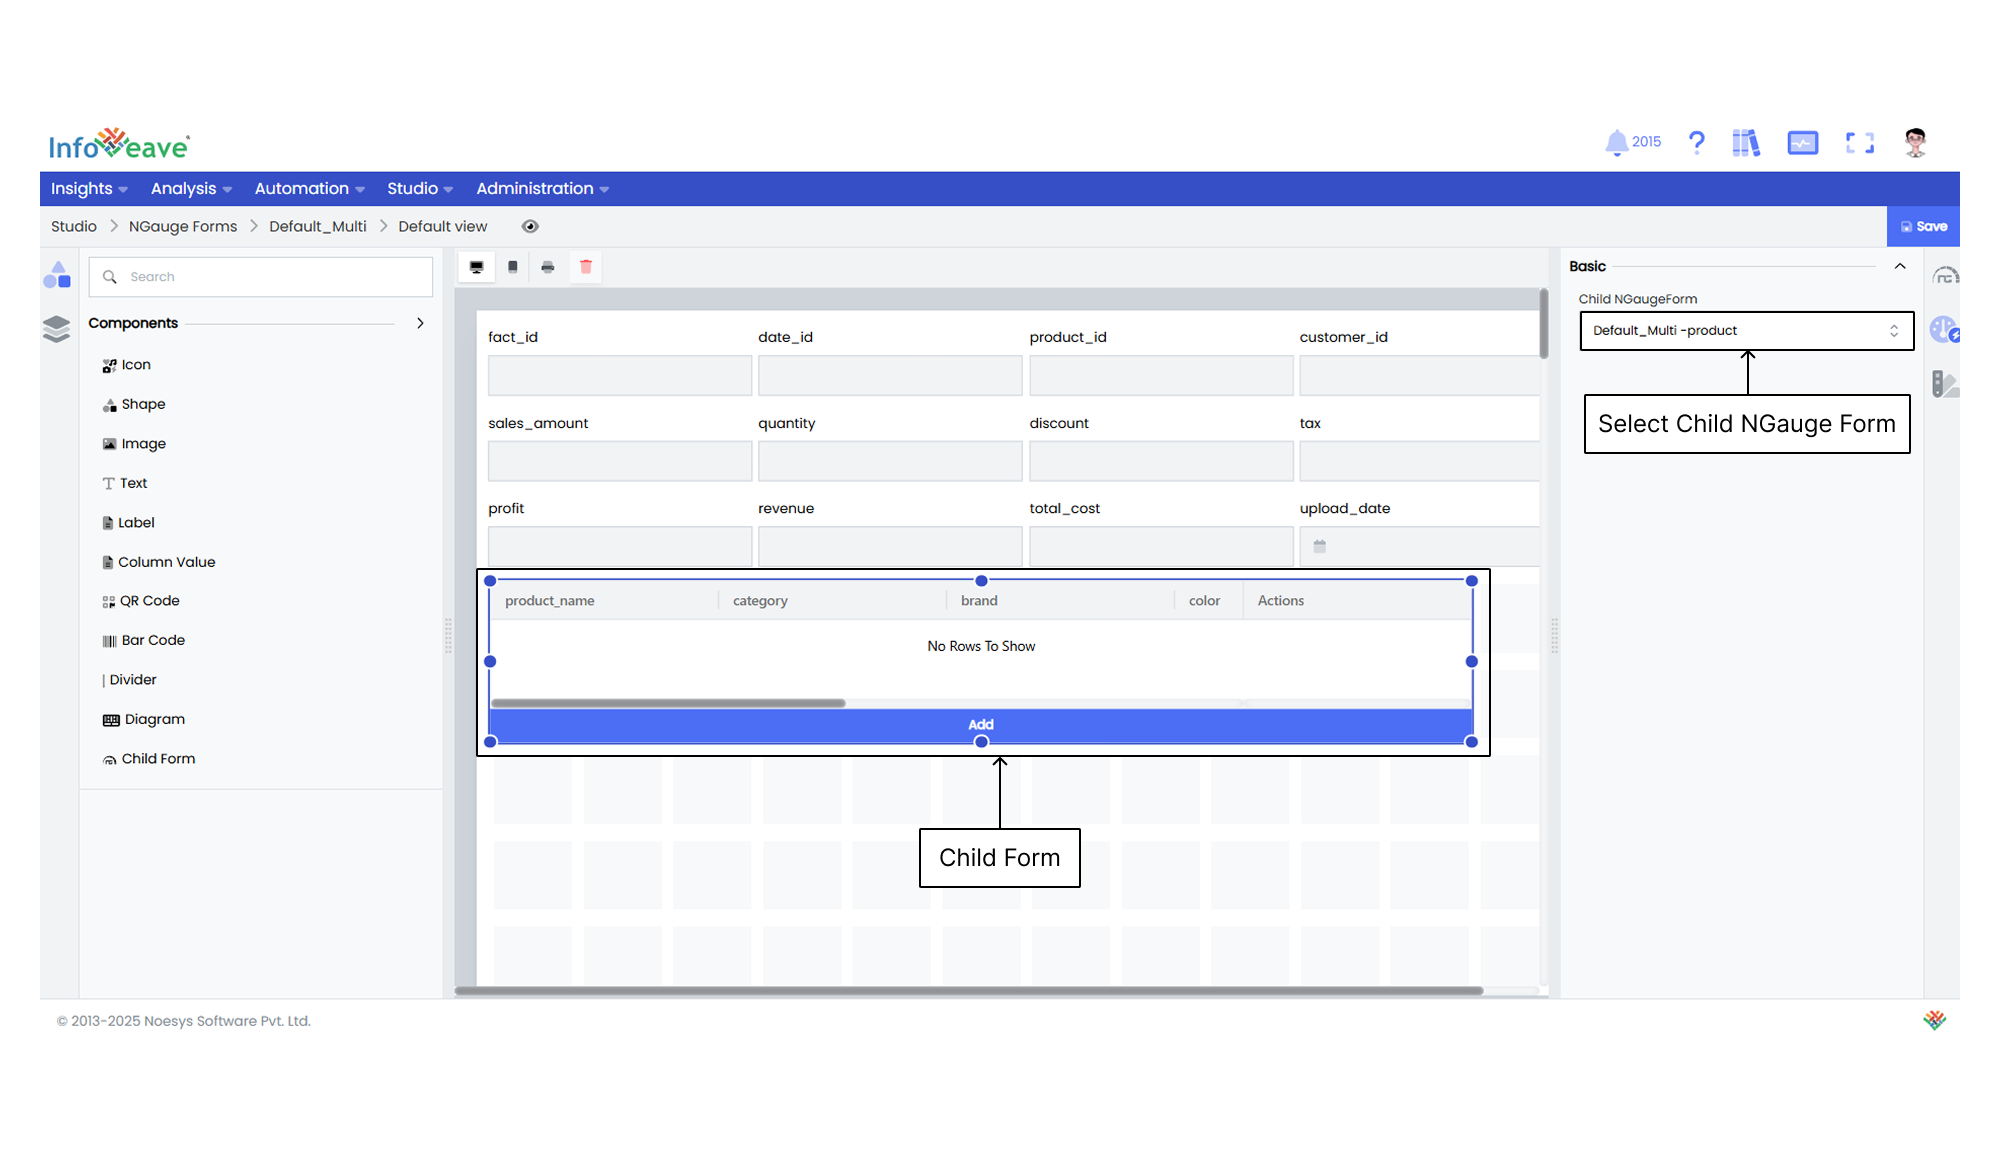
5. Click on the **Customize** icon on the parent NGauge form.
6. Drag and drop the **Child Form** component from the component panel.
7. From the Configuration Panel, select the associated child form from the drop-down.
8. Click on **Save** to add the child form to the parent form.
## Adding Data to an NGauge Form

Add data to the NGauge form to continuously enrich and maintain the relevance of your datasets. This ensures real-time updates for accurate analysis, reporting, and informed decision-making.
To add data in the NGauge form, follow these steps.
1. Click on the **Add** button.
2. Enter the required data in the designated fields. You can enter the required value in your key column field to automatically populate your child form.
3. You can also edit and delete your child form data.
4. Click on **Save** to save the changes.