---
title: Creating Data Quality
description: Creating Data Quality
---
import { Aside, Steps } from '@astrojs/starlight/components';
import { MediaPlayerComponent } from "../../../../components/video-player";
import RunScript from "../../../../components/RunScript.astro";
# Creating Data Quality
This section provides you with comprehensive guidance and support for navigating and using the Infoveave Data Quality creation features effectively.
## Creating Data Quality Manually
1. You begin the process by clicking the **New Data Quality** button.
2. This action opens a dialog box where you can select a specific data quality type (such as **Data Quality using AI** or **Data Quality**) by using the toggle button before proceeding to the next step.
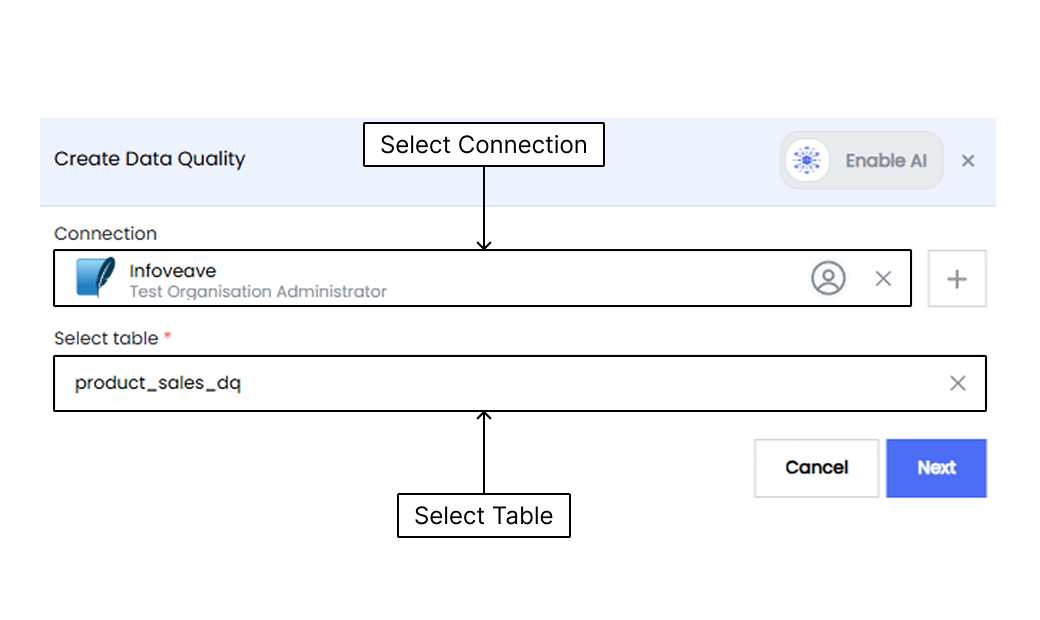
3. After selecting the data quality type, select the connection and table to be used for the data quality checks. Then click on **Next**.
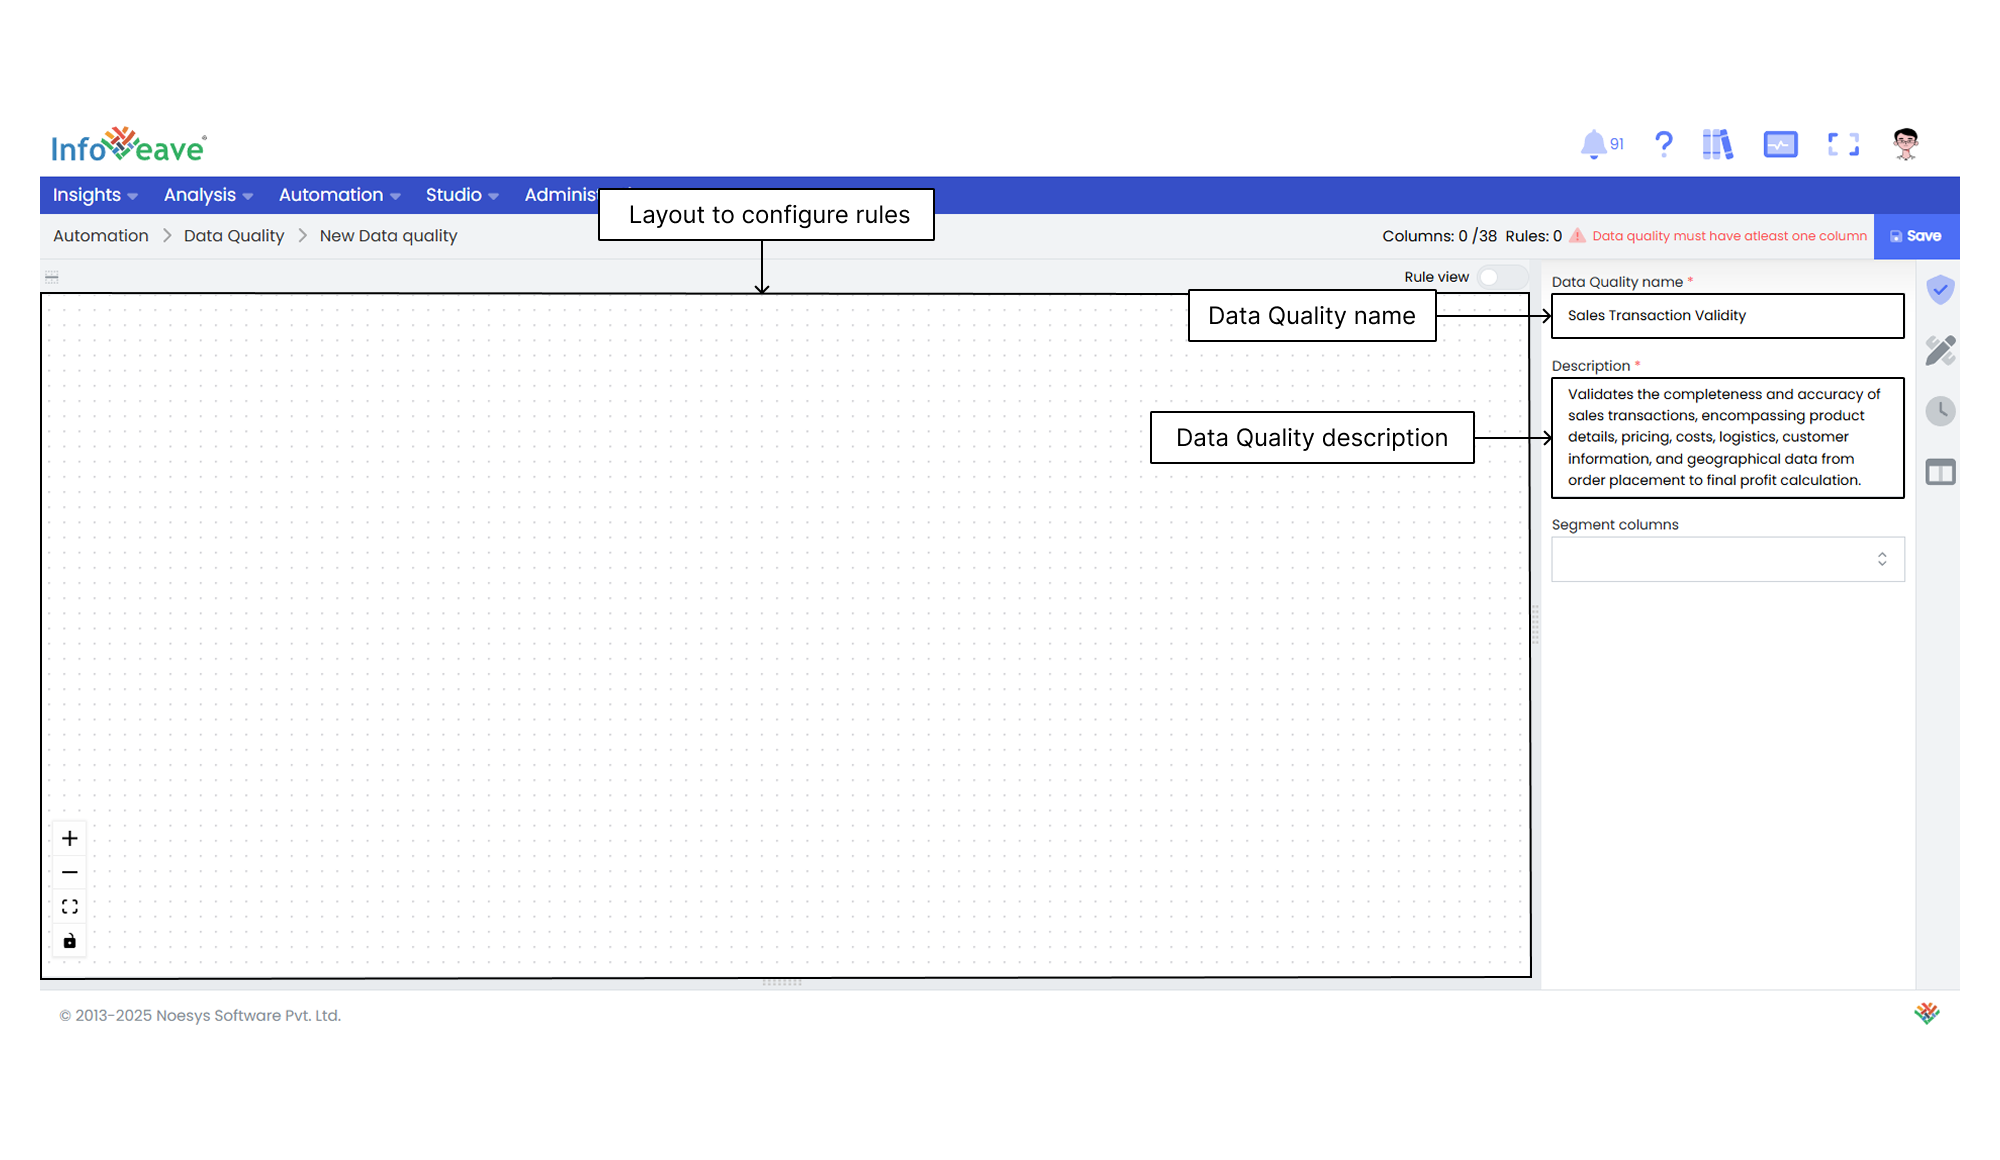
4. On the **Data Quality Setup** tab, enter the name and description of the Data Quality.
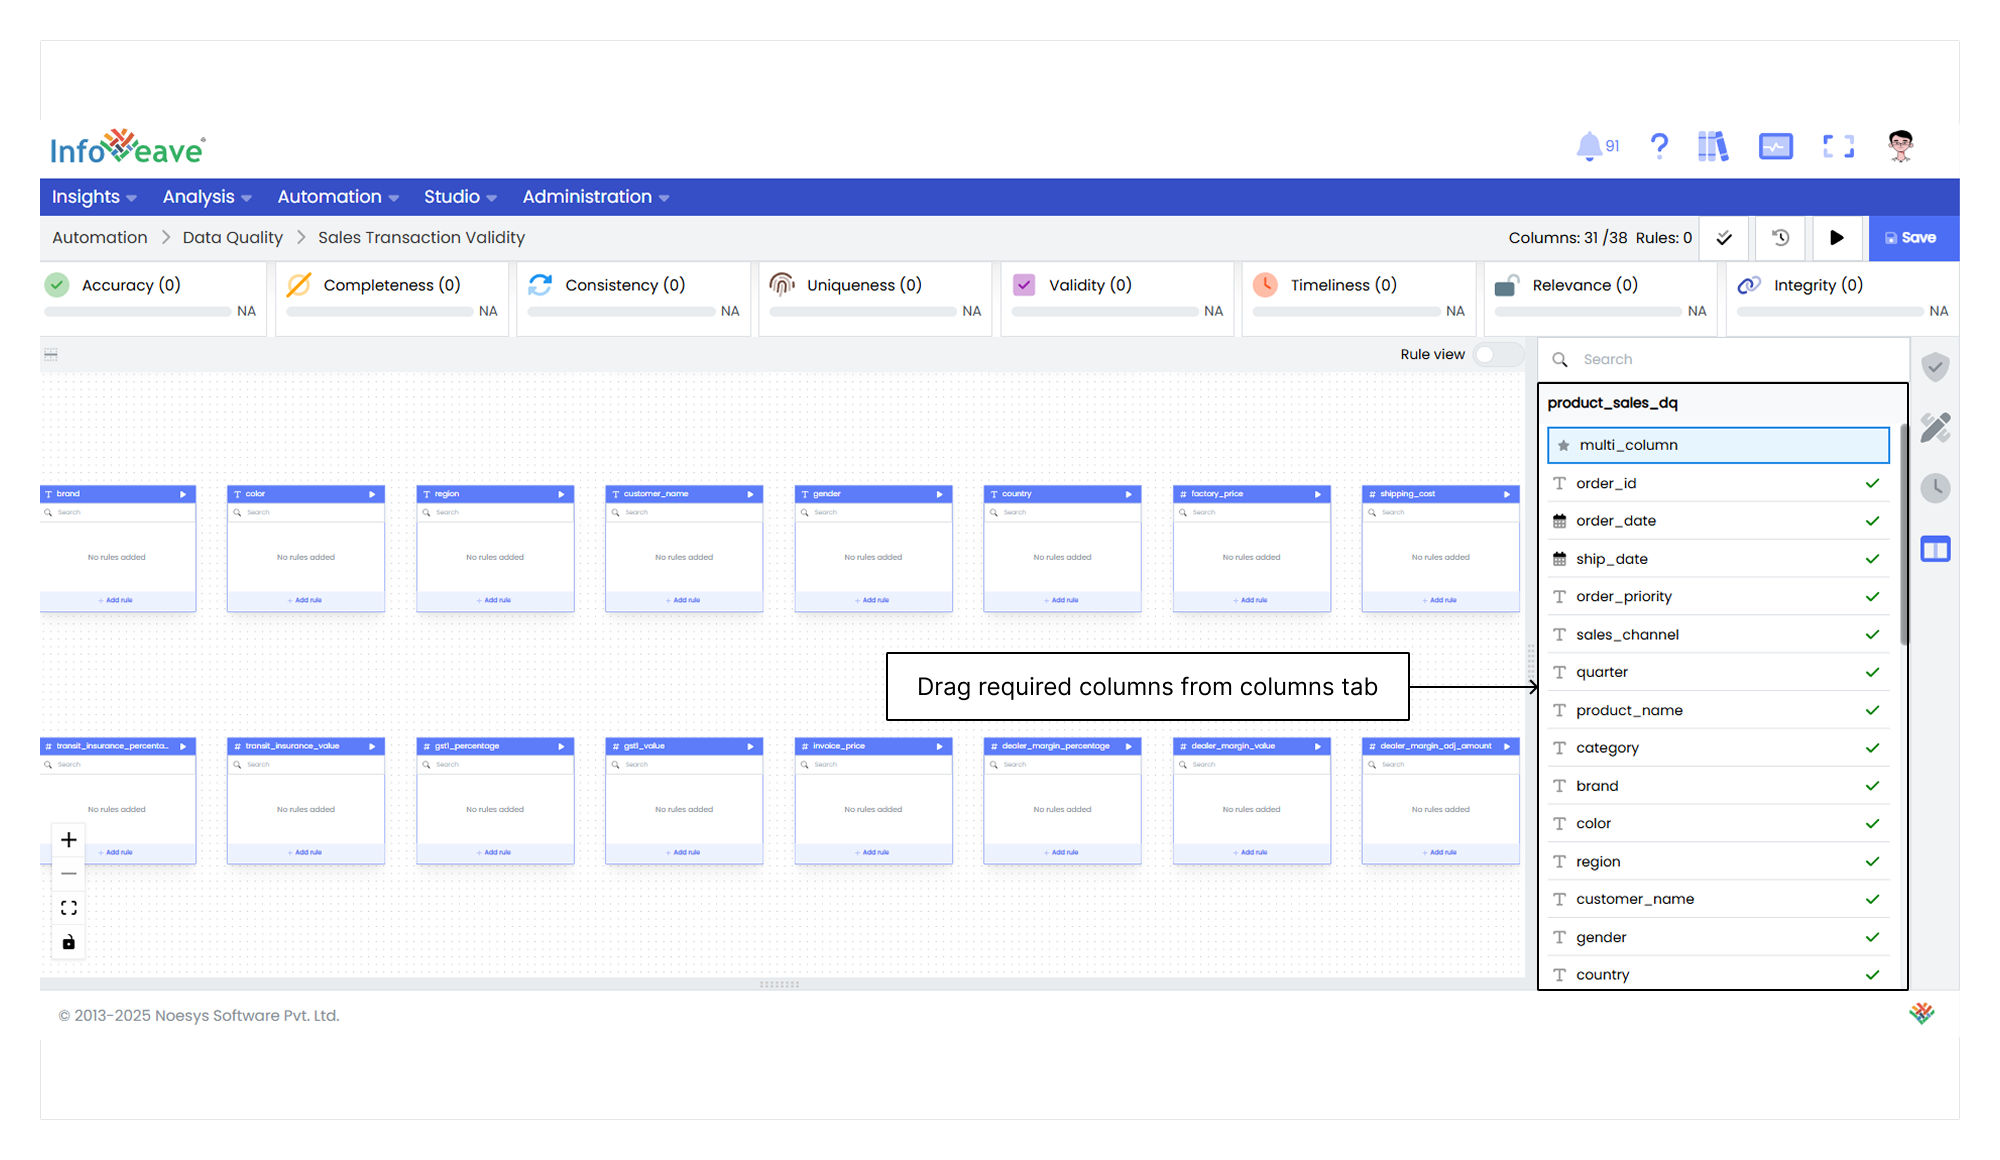
5. Drag a column from the **Columns** tab to the designer.
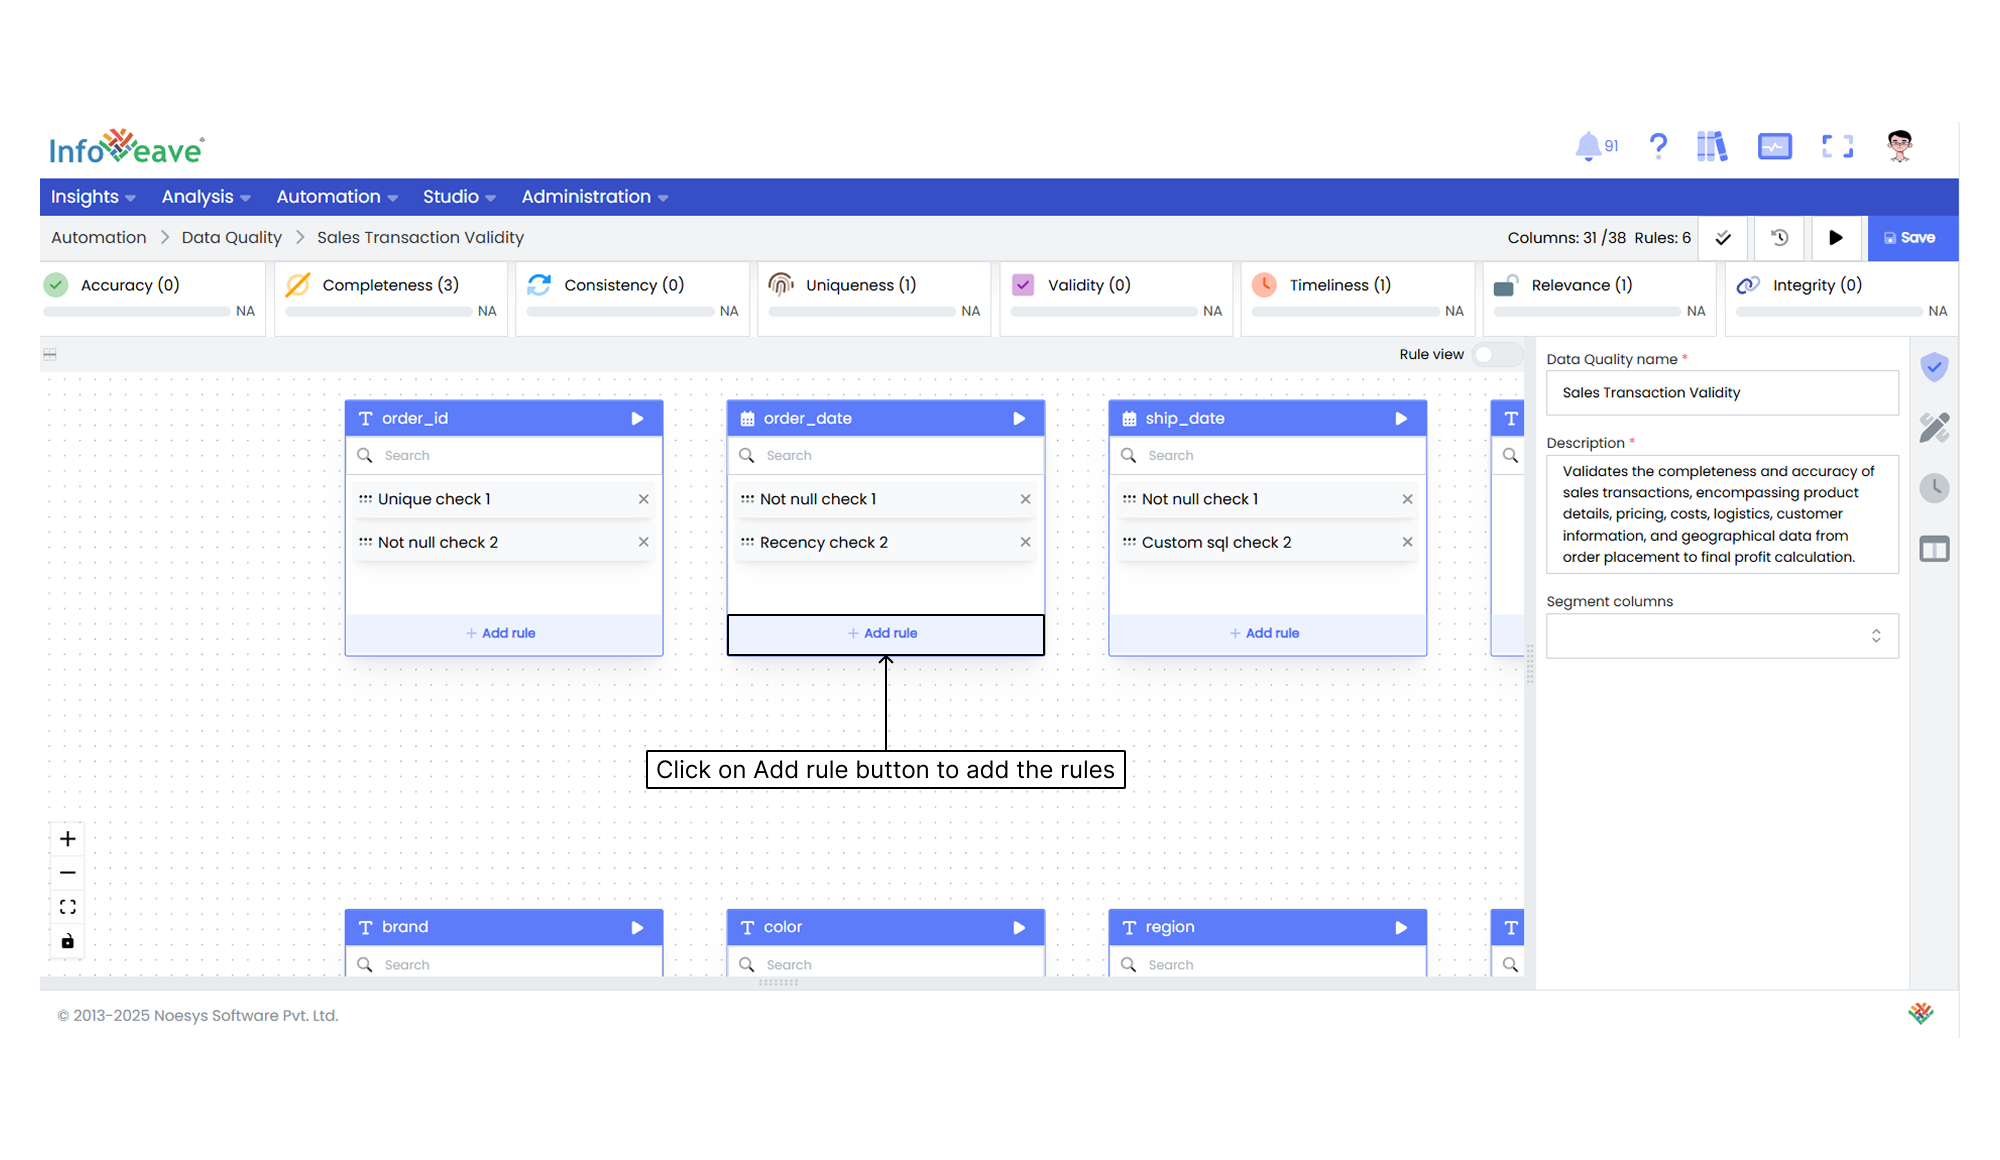
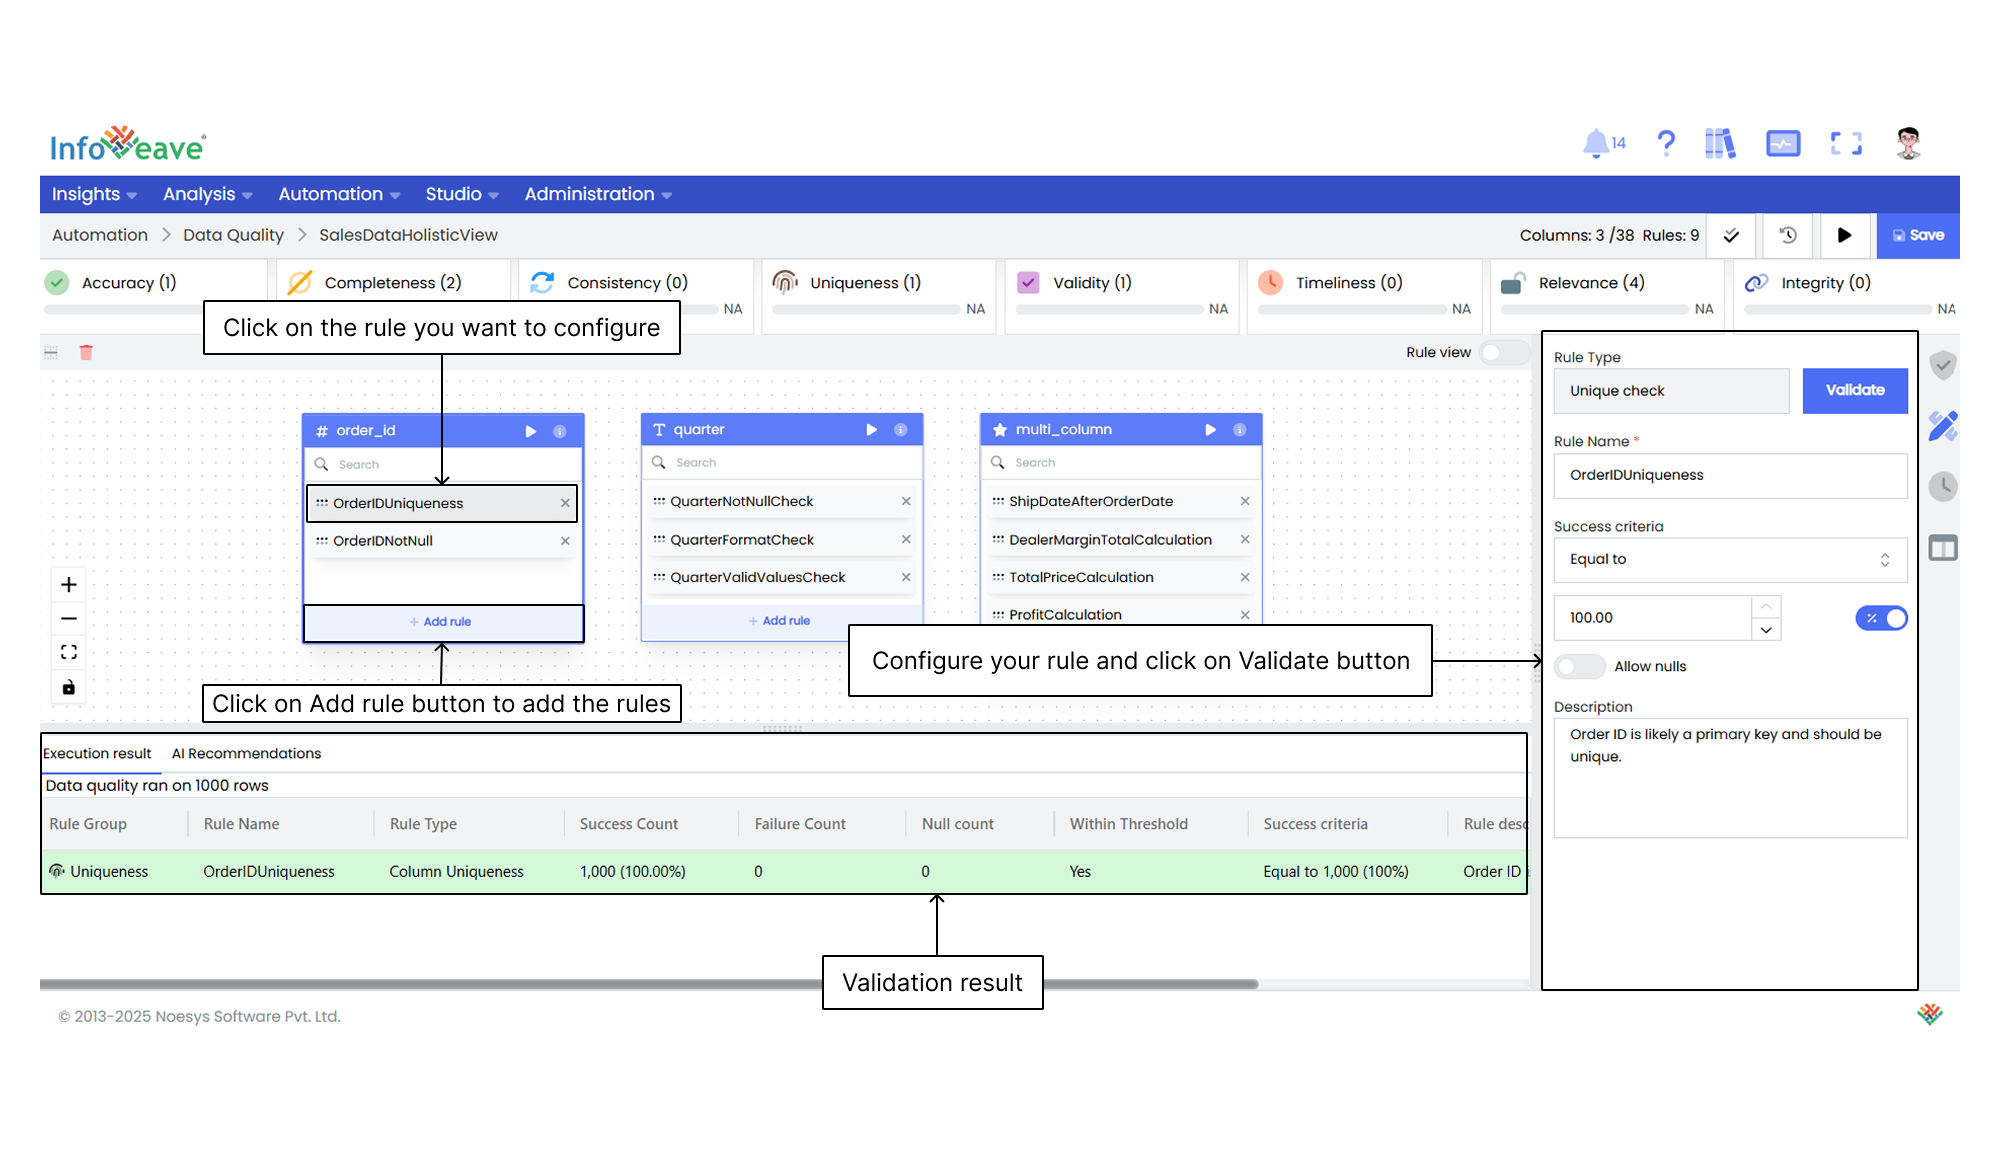
6. Click on the **+ Add rule** button to add and configure rules.
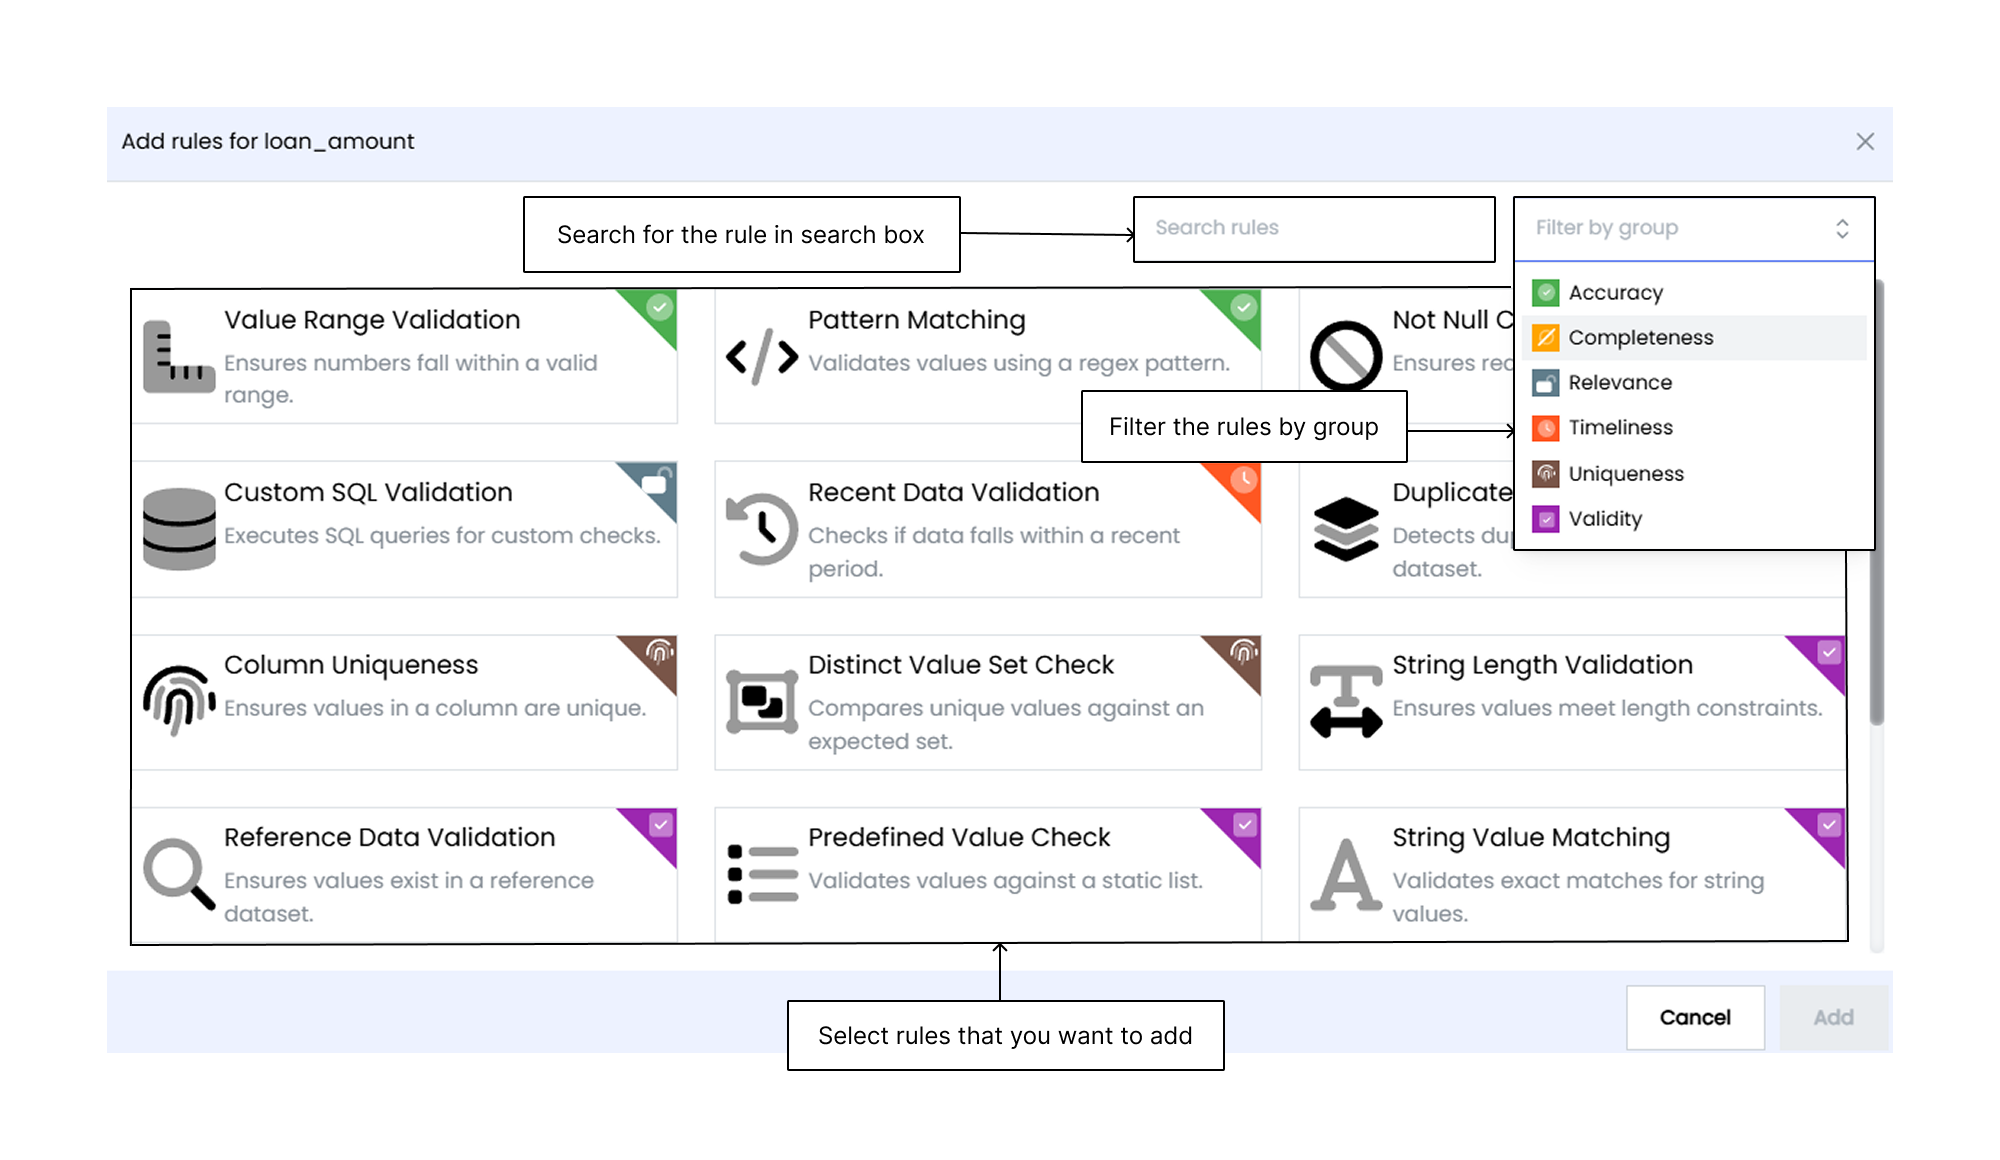
7. On the rule setup screen, you can select rules for data quality. These rules include checks such as accuracy, completeness, and validity.
8. Select the **Primary key columns** from the dropdown. It is a unique key used to track failed records.
9. You can also select the **Segment columns** to apply filters.
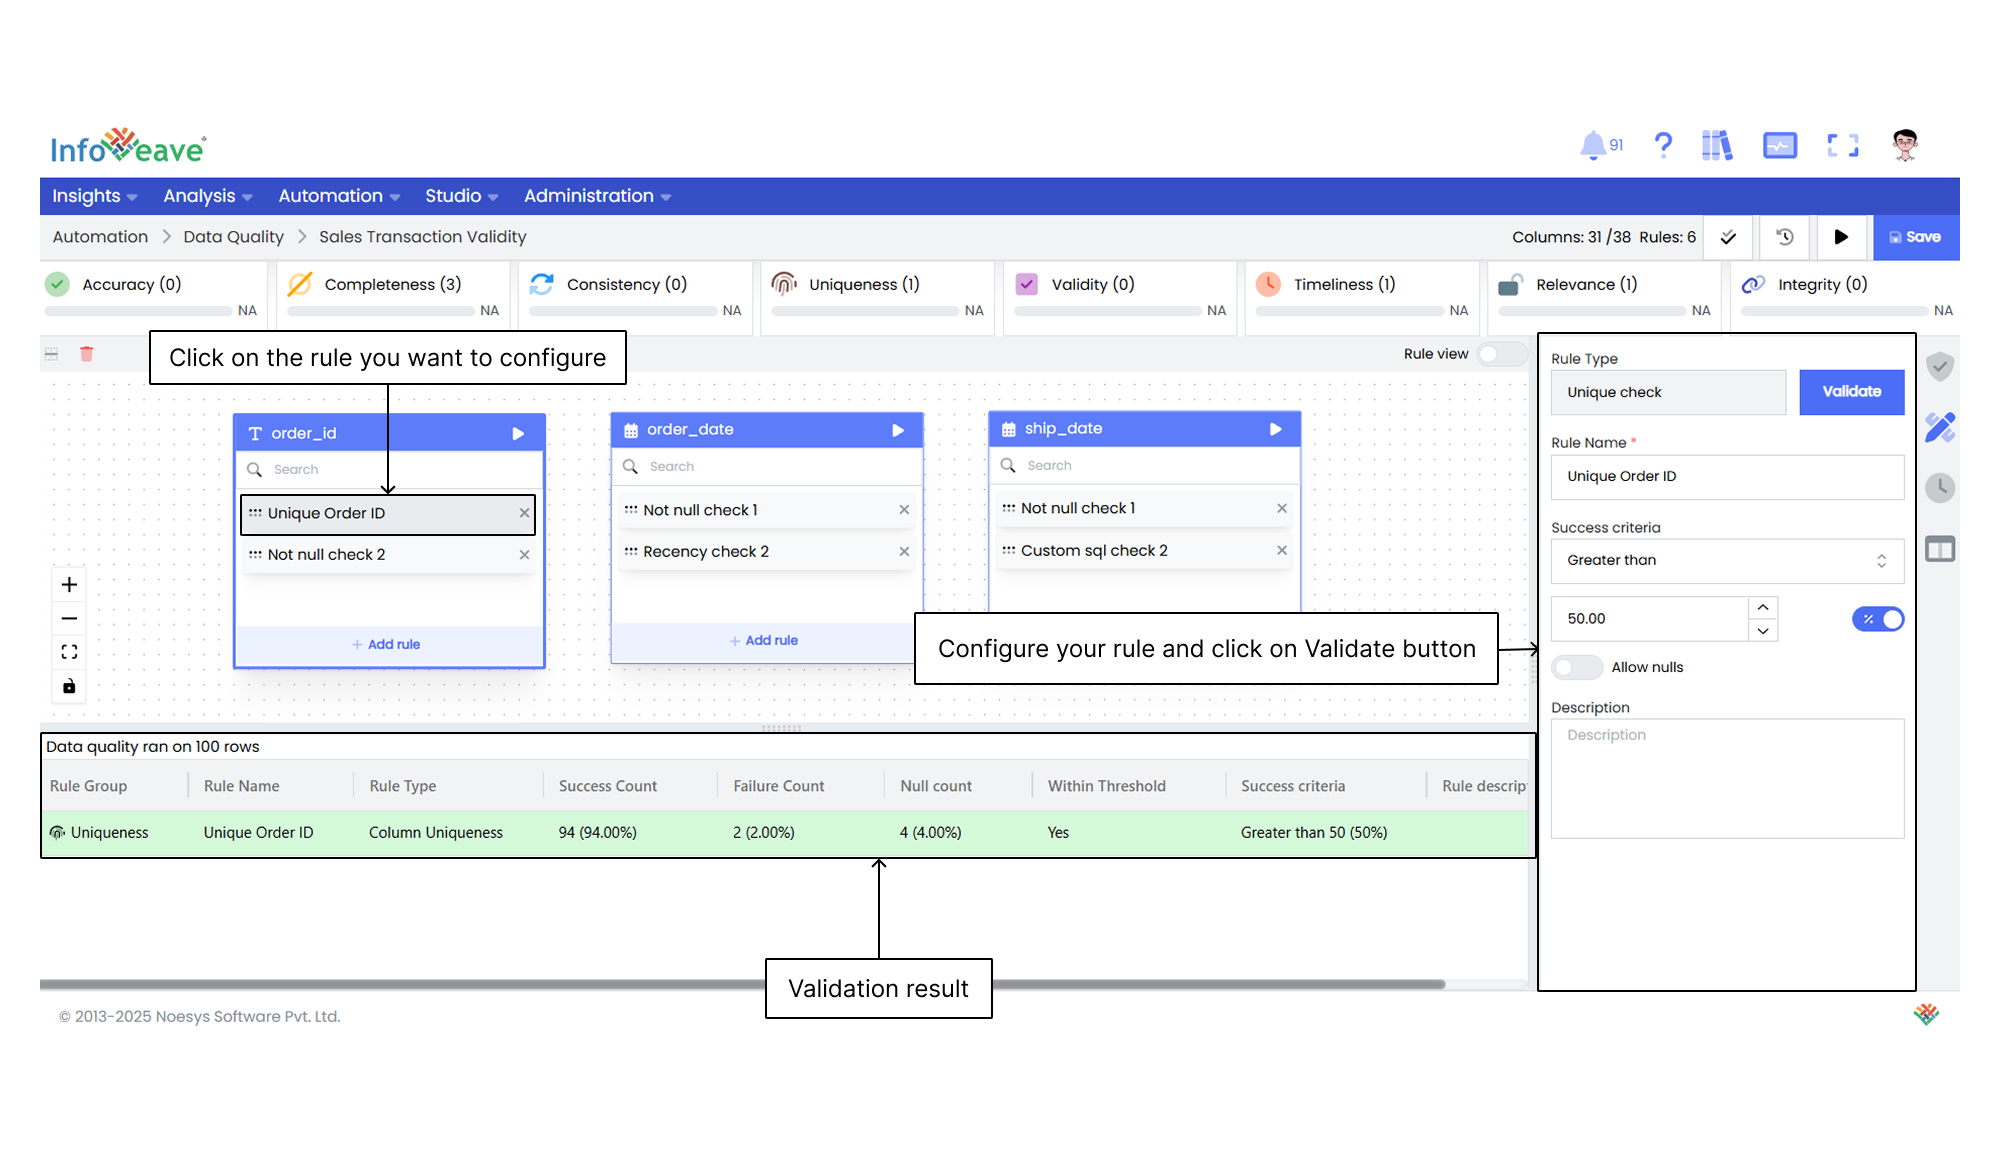
10. Click on **Save**. Once saved, configure each rule and click on the **Validate** button.
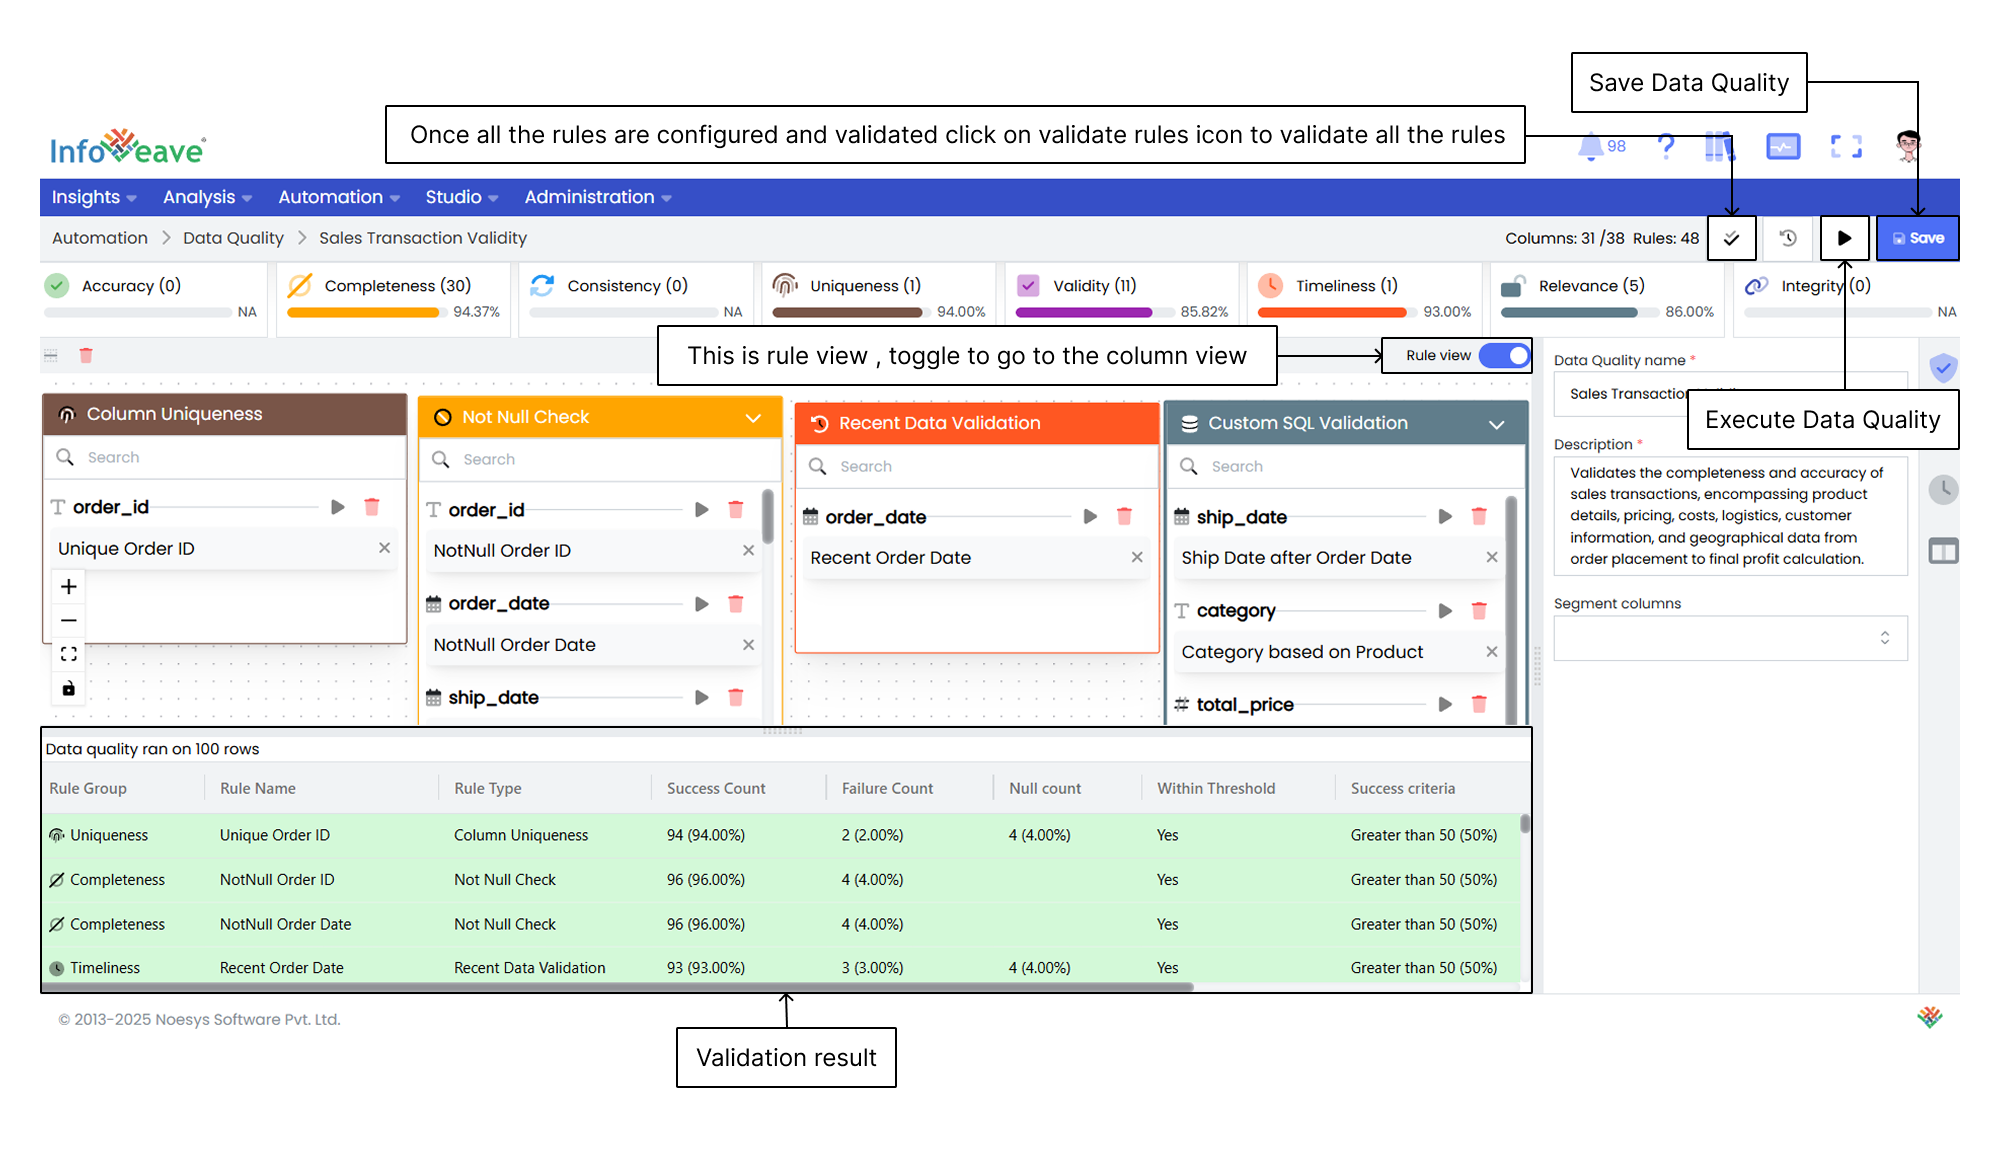
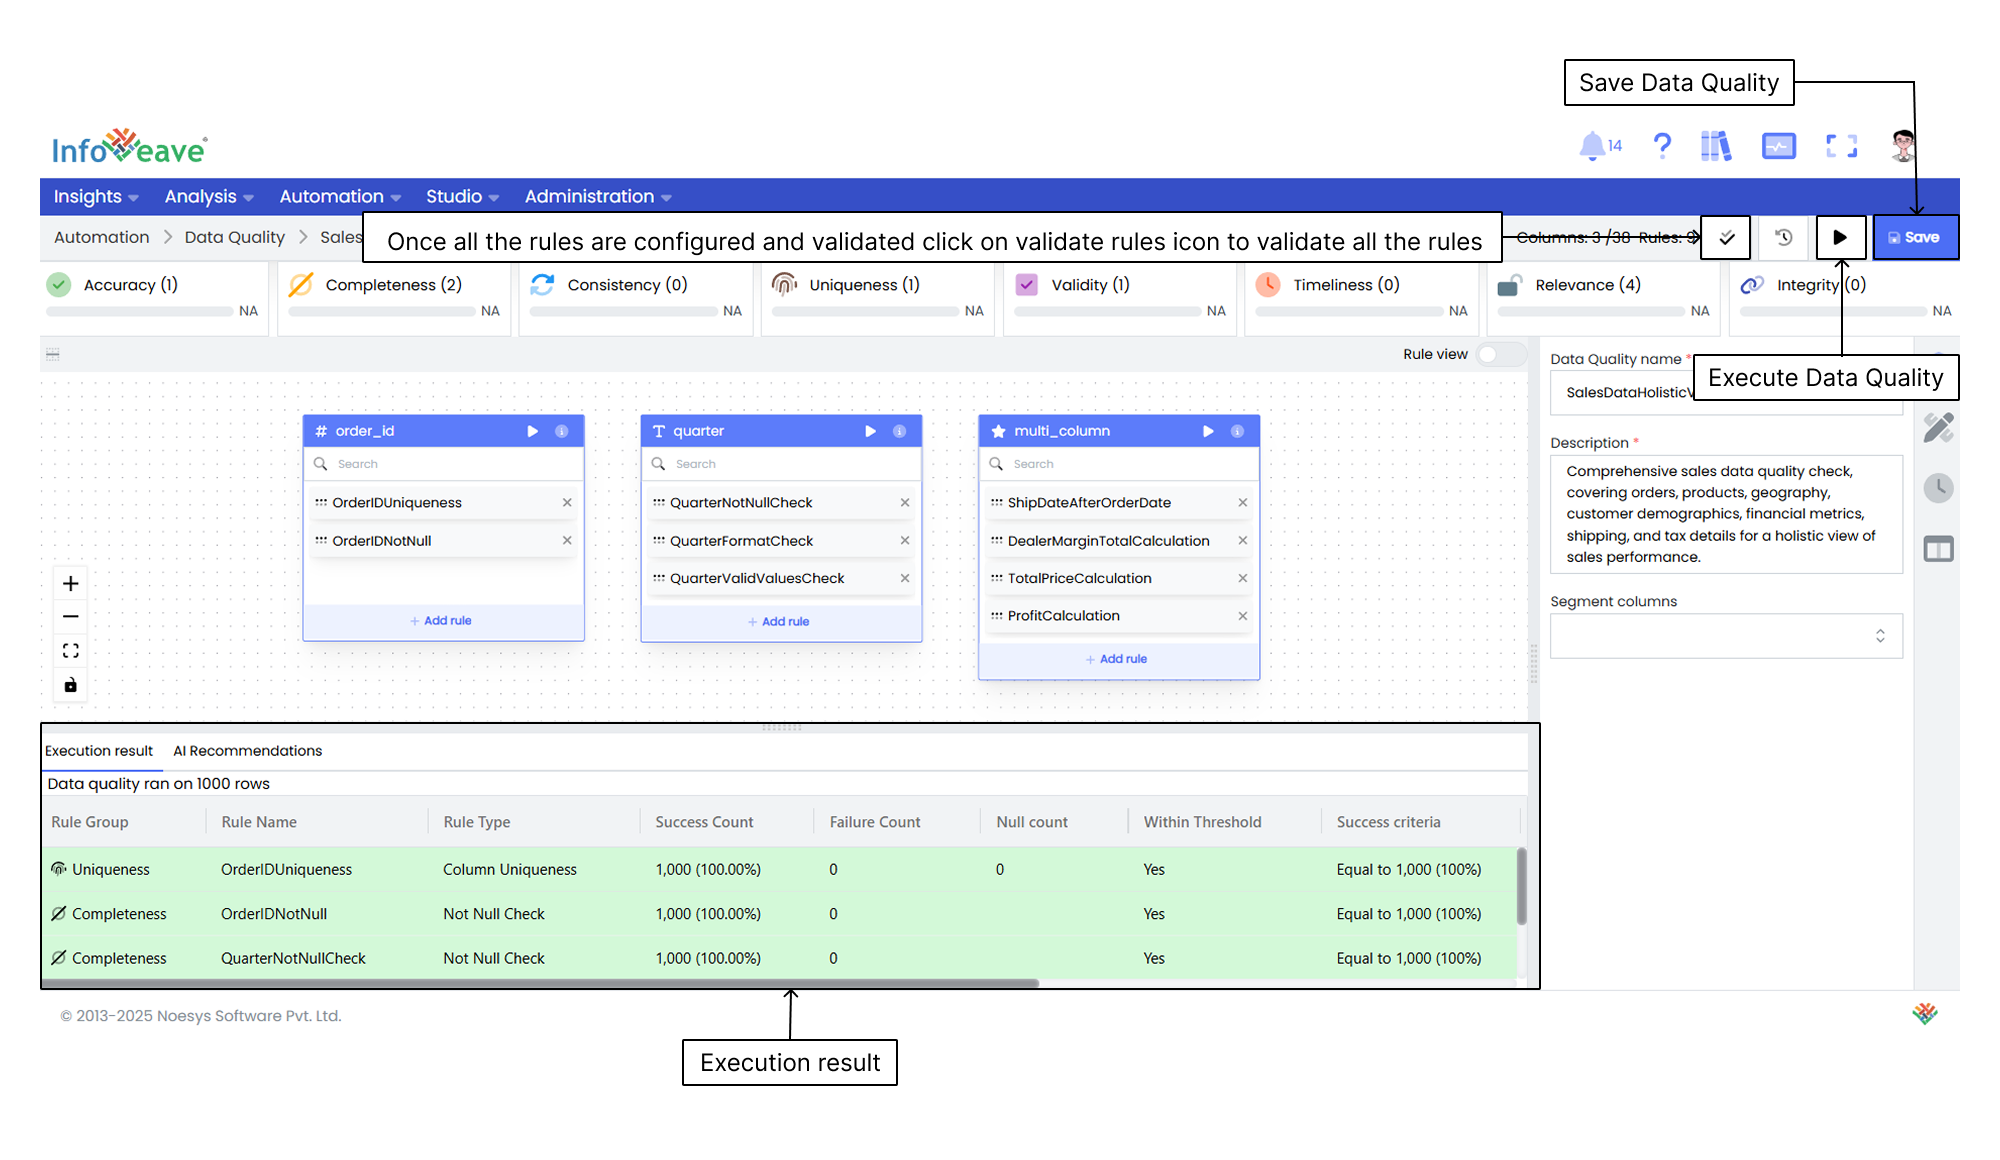
11. After configuring and validating all the rules, click on the **Validate rules** icon to view the validation results.
12. Once the validation is complete, the results are displayed in a table that shows the success percentage and other details about the rule configurations. If needed, you can tweak the rules and validate them again.
13. After validating the rules, click on **Save** to save the configuration.
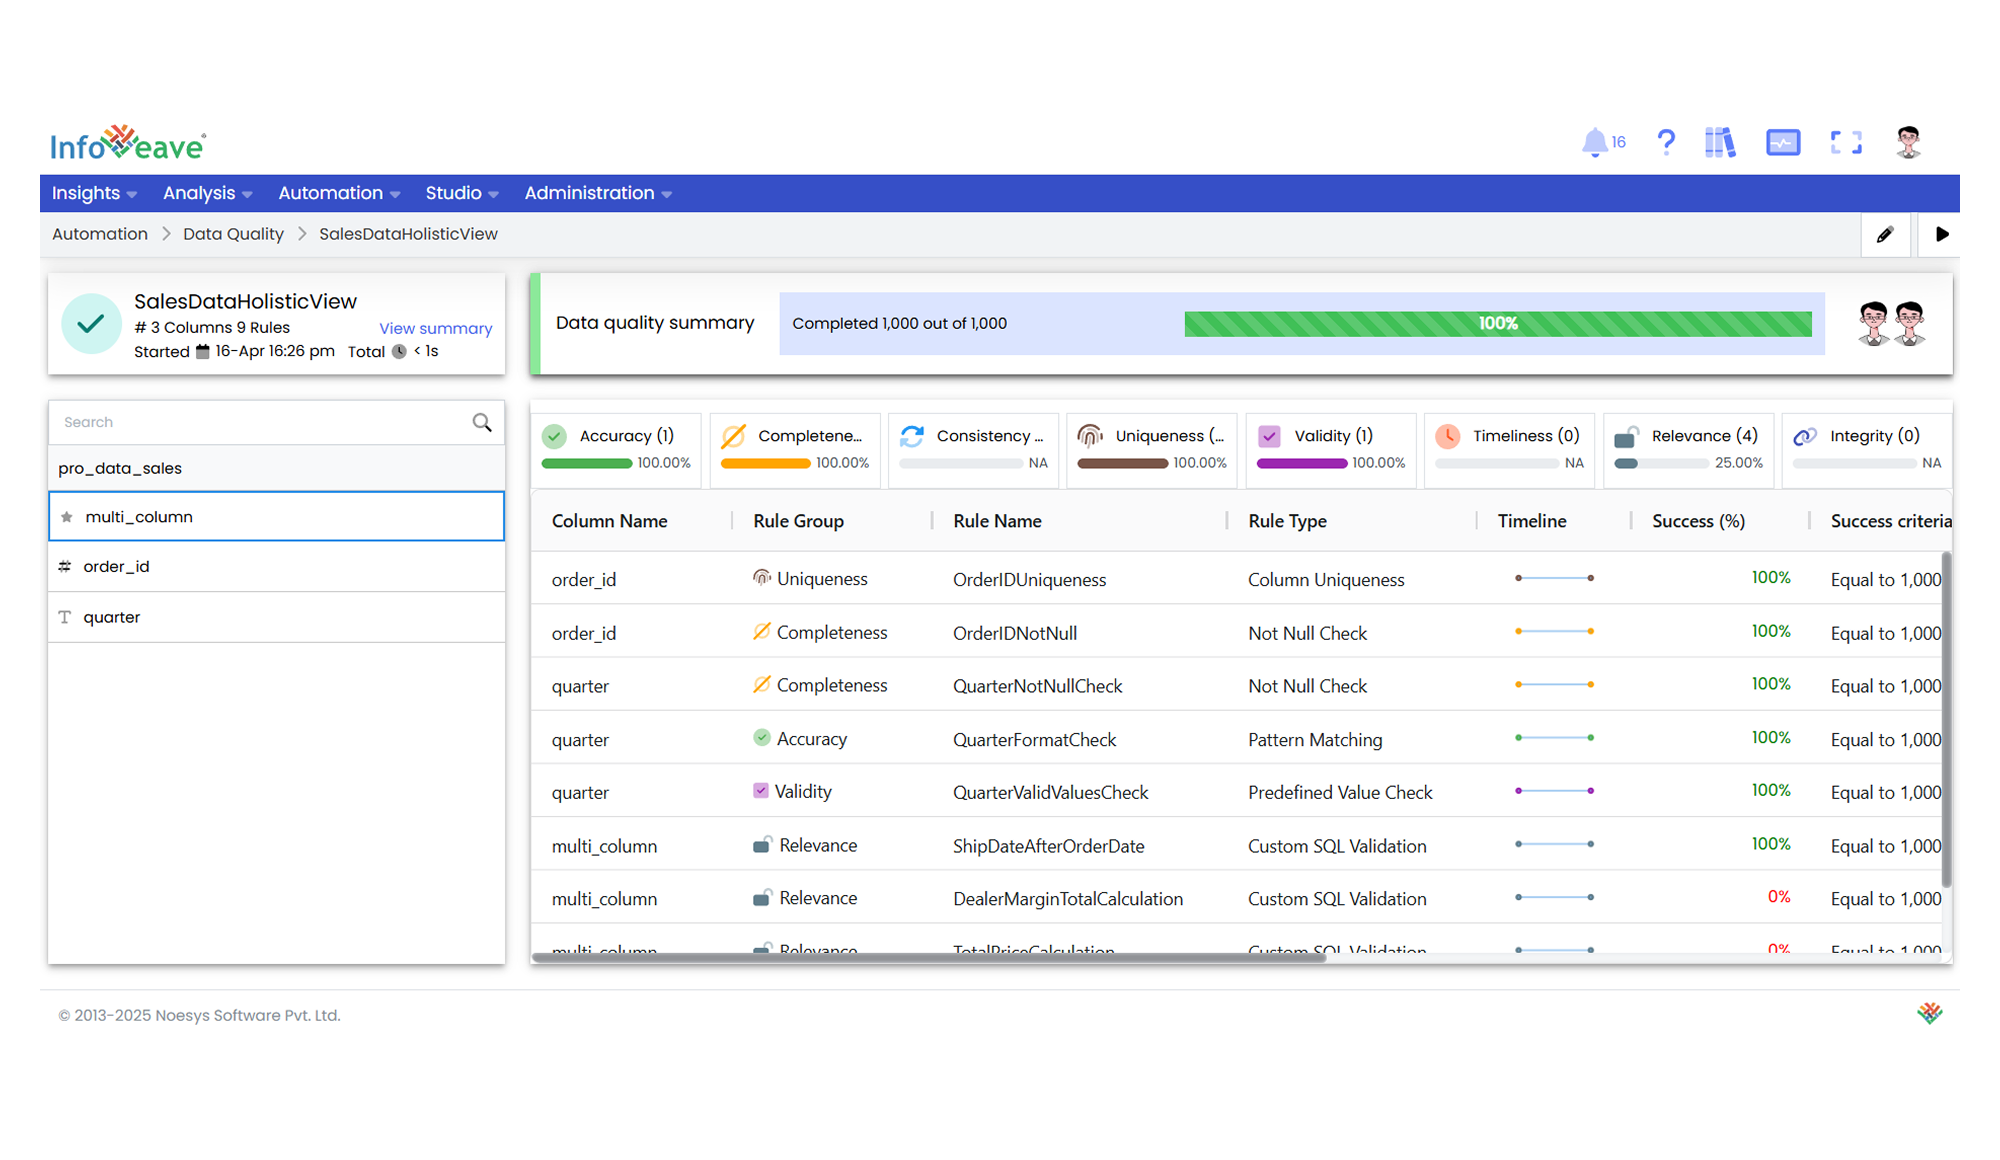
14. The final step is to **Execute** Data Quality. This runs the configured data quality checks.
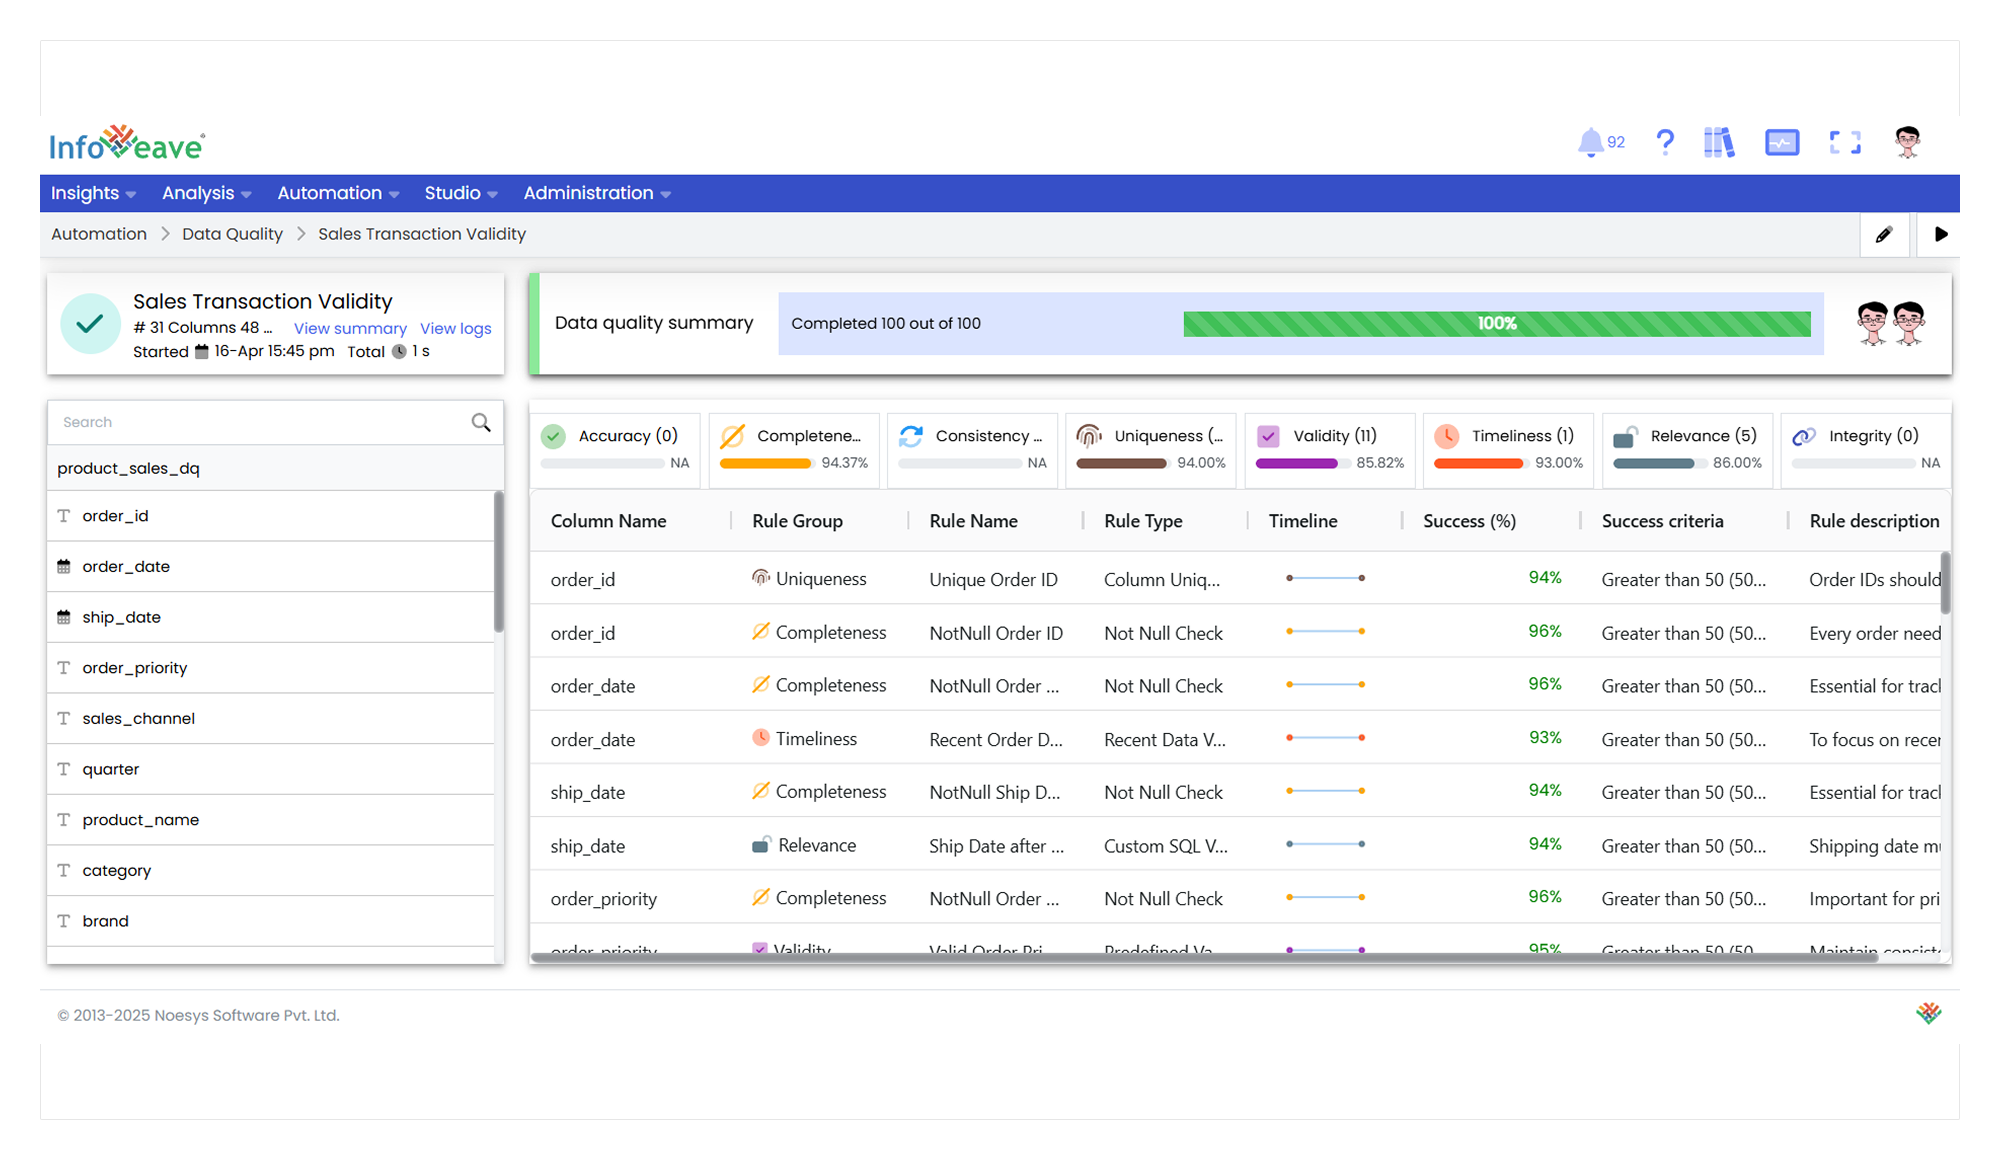
15. The execution of the data quality check displays the results in a table. It shows various details such as success rates for different rules. You can monitor the progress and ensure that the data quality checks are successfully completed.
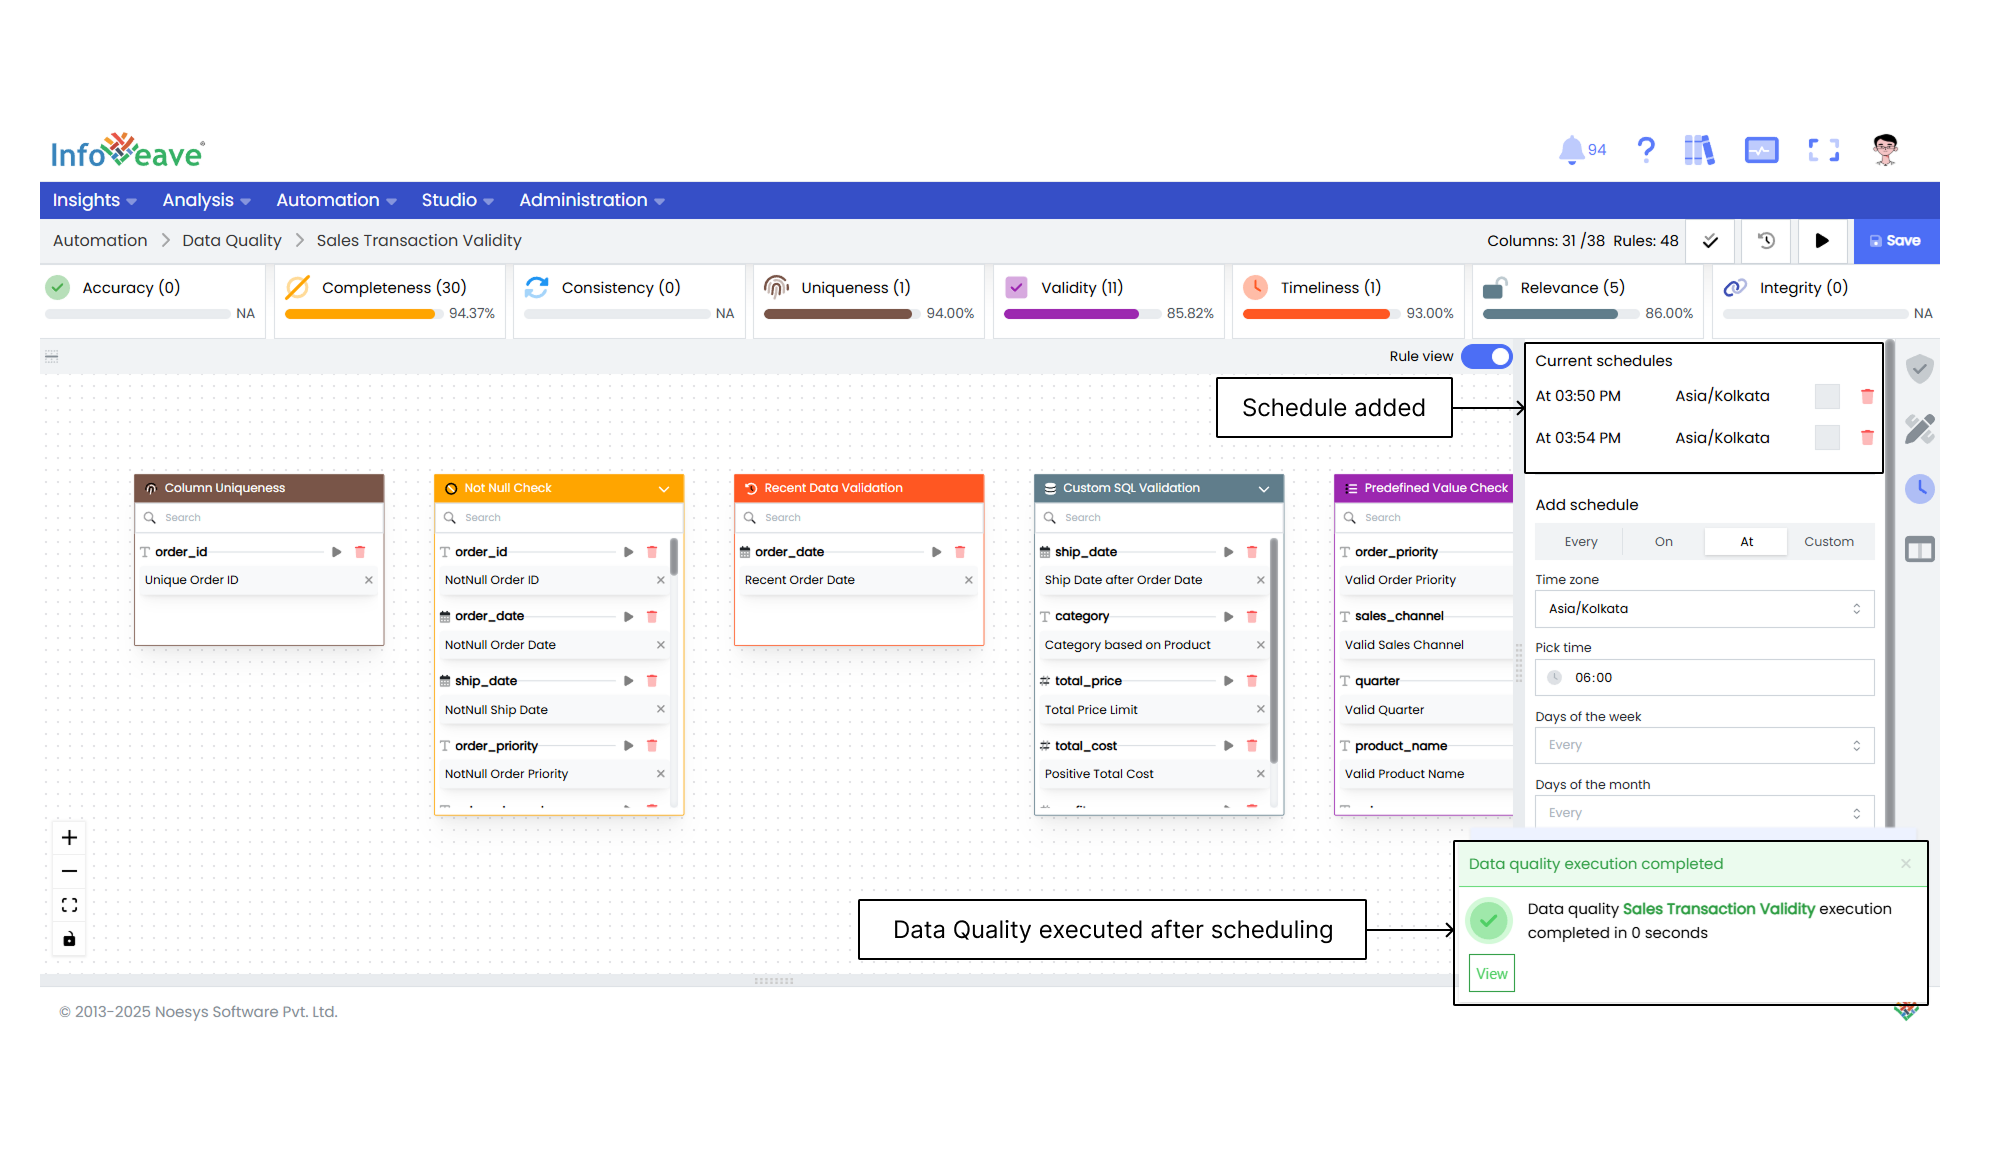
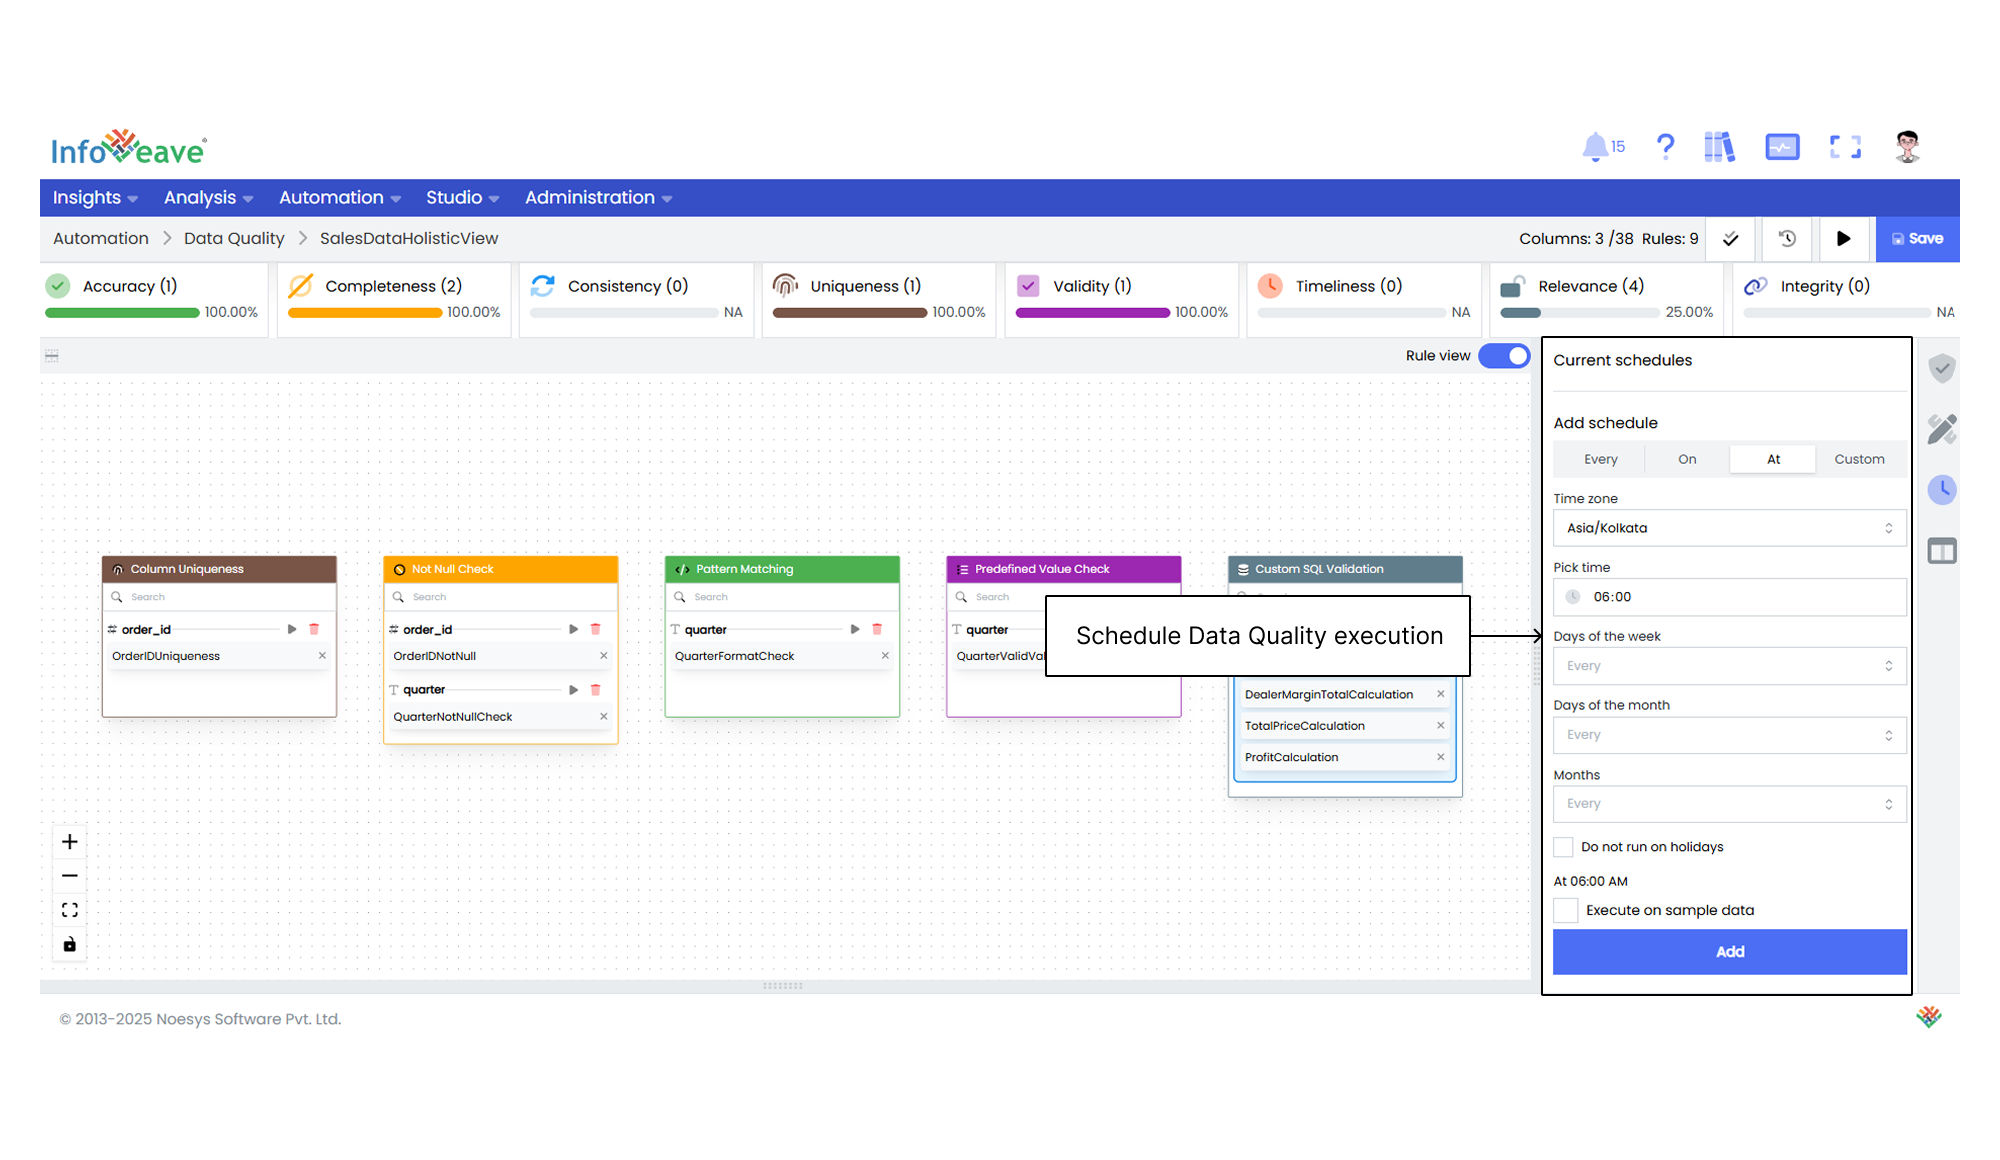
16. You can also schedule your Data Quality execution under the **Schedules** tab. After adding the schedule, click on **Save**.
## Creating Data Quality Using AI

1. You begin the process by clicking the **New Data Quality** button.
2. In the resulting dialog box, enable the toggle **AI enabled**.
3. After selecting the data quality type, select the connection and table to be used for the data quality checks. Then click on **Next**.
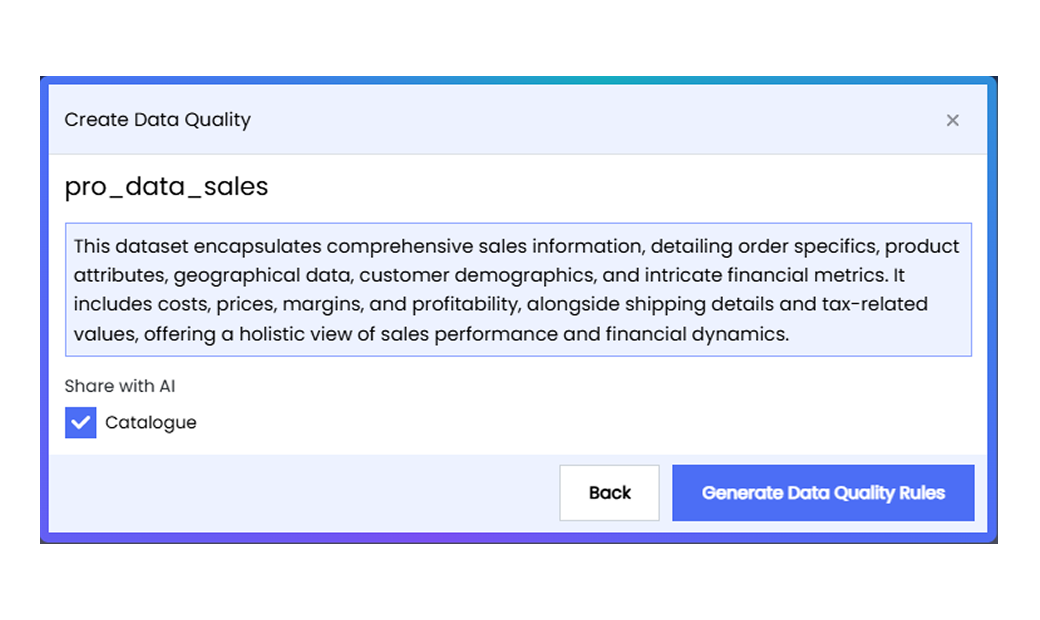
4. An AI-generated description is auto-filled in the resulting pop-up. You can also choose to share Catalogue information with AI by checking the displayed checkbox. Click on the **Generate Data Quality Rules** button.
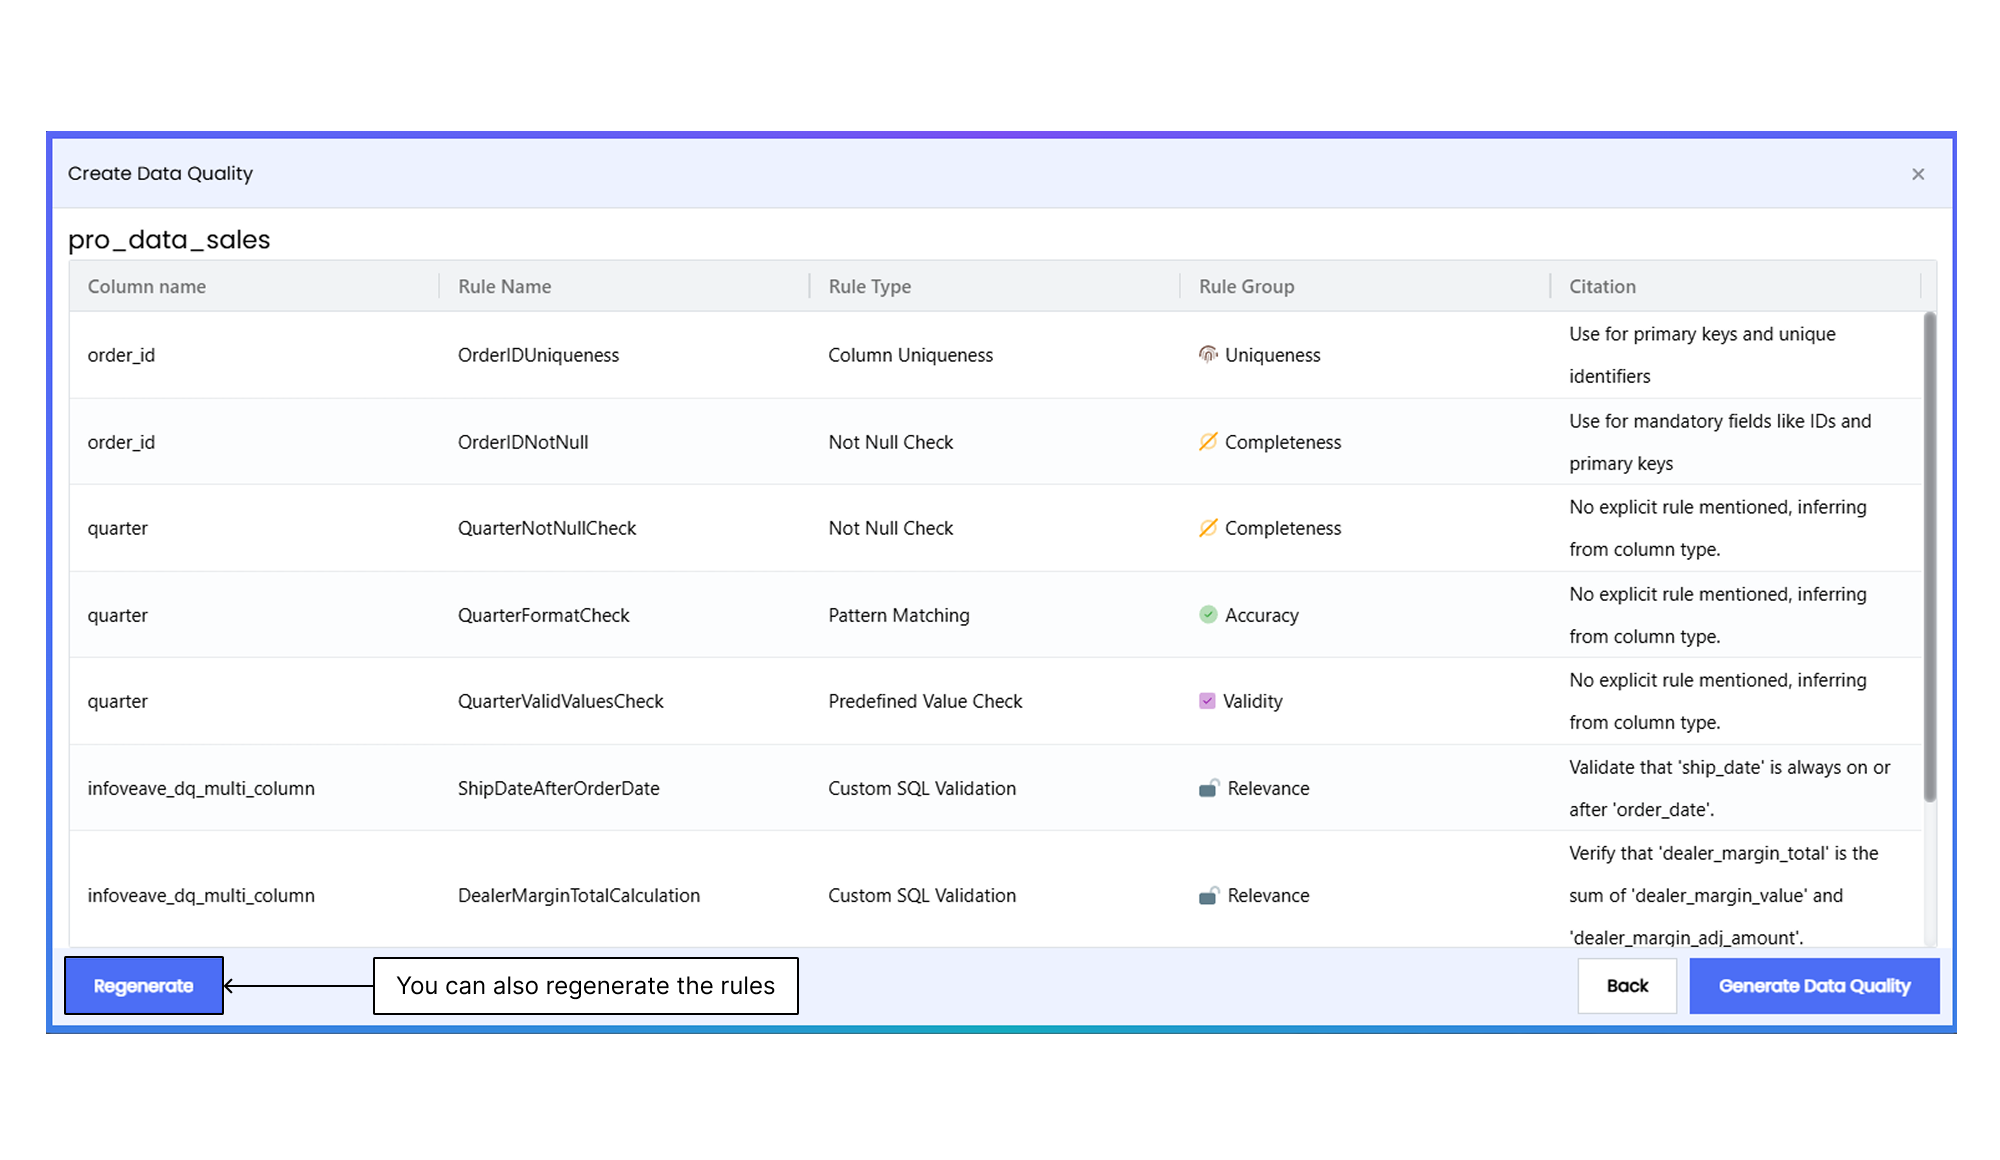
5. AI generates the data quality rules for the selected dataset. This ensures that the data meets specified standards and is ready for further analysis.
- The relevant **Column name** for each rule is specified, ensuring that the validation is applied accurately.
- Each rule is accompanied by a **Citation and Rule Group**. These explain the rule's purpose, such as ensuring uniqueness, non-null values, or the correct format for columns like IDs or dates.
- Each rule is assigned a unique **Rule name** and a **Rule type**. Once reviewed, the rules can be applied to the data by clicking on **Generate Data Quality**, which enforces the specified checks across the dataset.
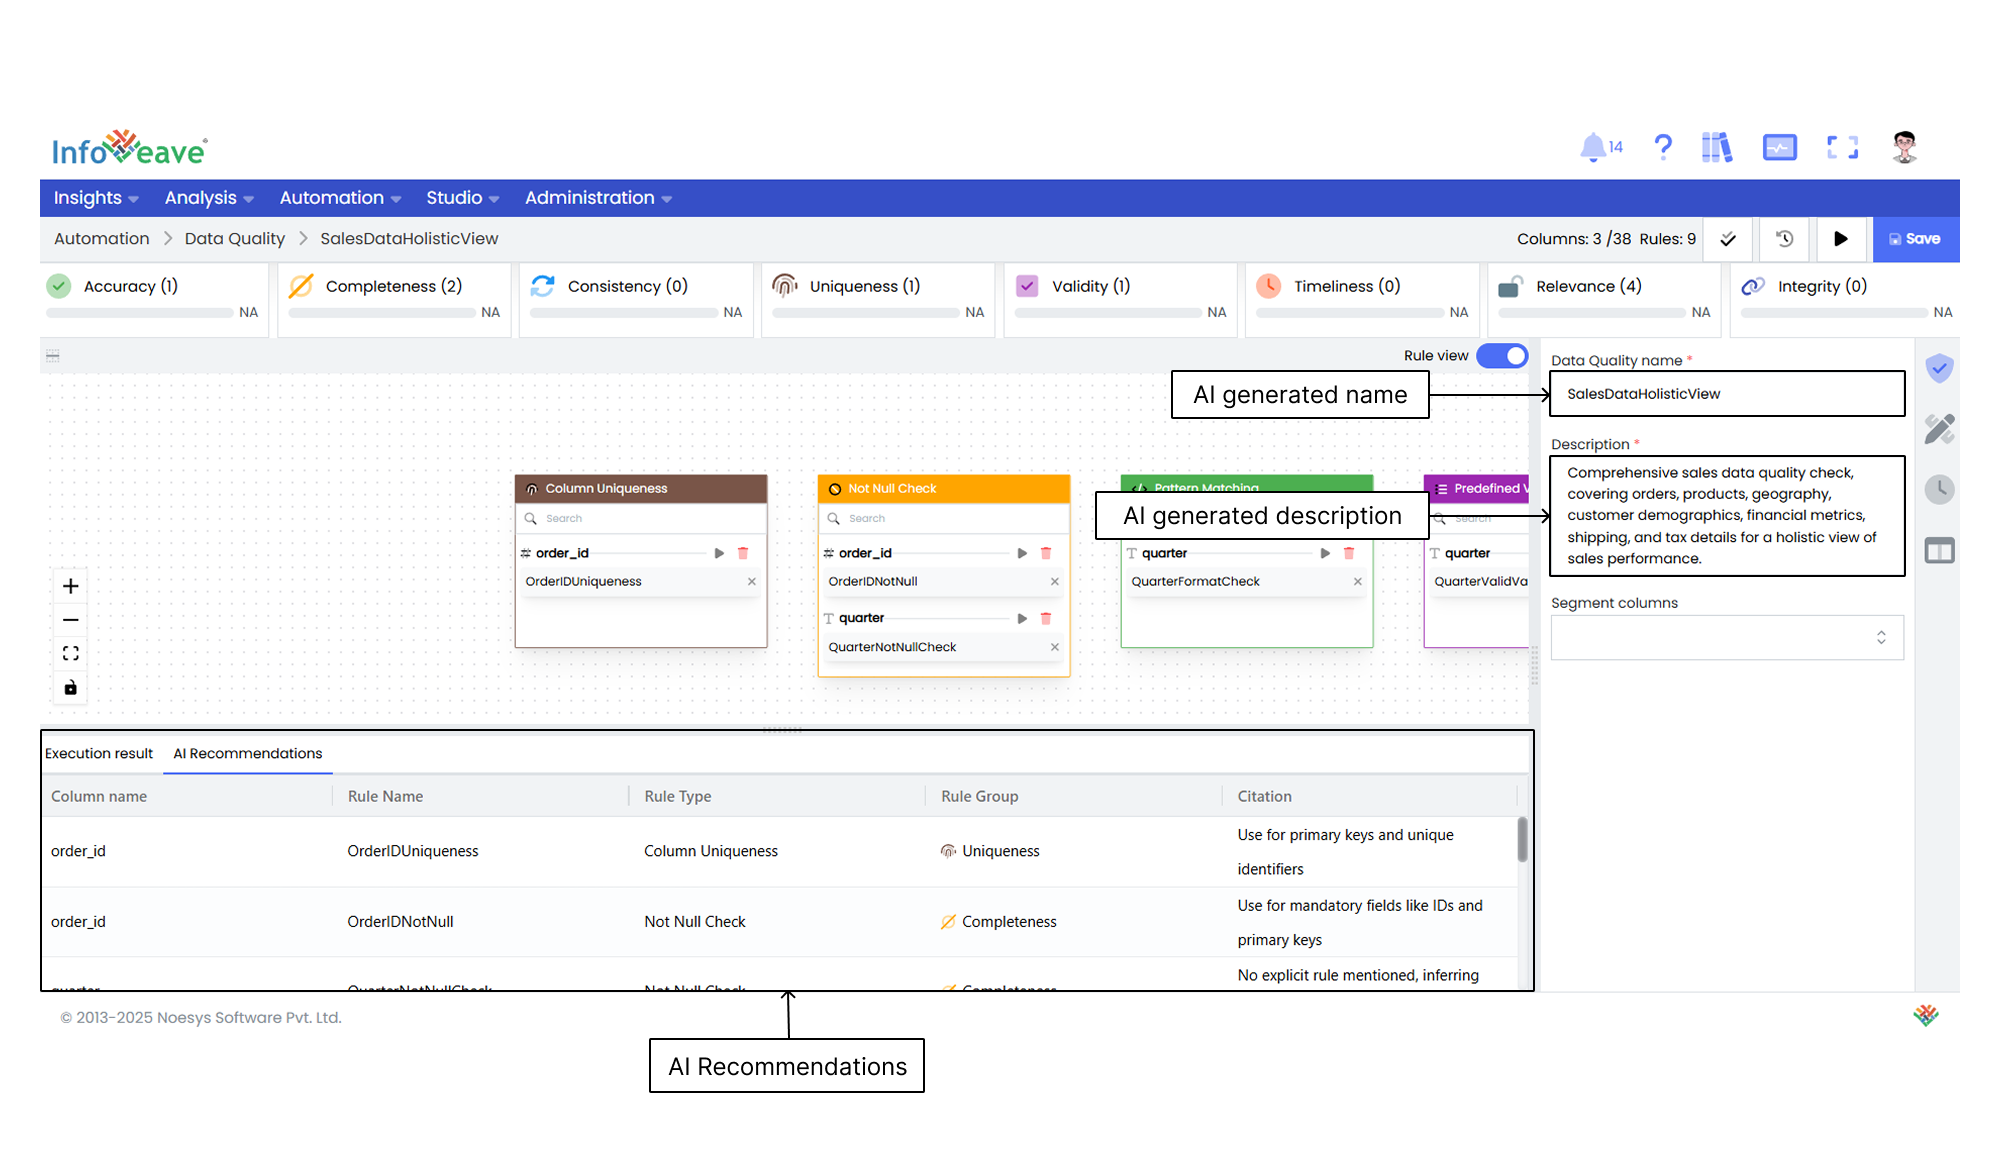
6. The Data Quality name and description are auto-generated by AI.
7. Select the **Primary key columns** from the dropdown. It is a unique key used to track failed records.
8. You can also select the **Segment columns** to apply filters.
9. Click on the **Save** button. After saving, you can **Validate** each rule.
10. After validating each rule, click on the **Validate rules** icon to view the validation results.
11. Once the validations are completed, the results are displayed in a green table. This table shows the success percentage and other details about the rule configurations. If needed, you can tweak the rules and validate them again.
12. After validating the rules, click on **Save** to save the configuration.
13. The final step is to **Execute** Data Quality. This runs the configured data quality checks.
14. The execution of the data quality check displays the results in a table. It shows various details such as success rates for different rules. You can monitor the progress and ensure that the data quality checks are successfully completed.
15. You can also schedule your Data Quality execution under the **Schedules** tab. After adding the schedule, click on **Save**.