---
title: Defining SciPyR Models
description: Create custom Python analyses in Infoveave&#039;s SciPyR workbook. Run SQL queries, build models, and export results as PDFs.
---

import { Aside, Steps } from '@astrojs/starlight/components';

import { MediaPlayerComponent } from "../../../../../components/video-player";
import RunScript from "../../../../../components/RunScript.astro";

# Defining SciPyR Models

<MediaPlayerComponent video="new-scipyr-video.mp4"
chapters={[
    {
      start: 0,
      end: 5,
      text: "Click on SciPyR under Analysis",
      description:
         "From the Infoveave menu, click 'Analysis', then click 'SciPyR' from the dropdown menu. Wait for the SciPyR Books page to load."
    },
    {
      start: 5,
      end: 7,
      text: "Create a New SciPyR Book",
      description:
        "Click the New SciPyR Book button, provide a name (e.g., Loan SciPyR Book), select a language (Python), then save.",
    },
    {
      start: 7,
      end: 11,
      text: "Enter Python Code",
      description:
        "Enter Python code into the SciPyR Book editor.",
    },
     {
      start: 11,
      end: 15,
      text: "Run Python Code",
      description:
        "Click the Run button to execute the code.",
    },
     {
      start: 15,
      end: 19,
      text: "Save Python Code",
      description:
        "Click the Save button to save the code.",
    },
    {
      start: 19,
      end: 21,
      text: "View Summary Panel",
      description:
        "Comments are displayed in the Summary panel. Clicking a comment navigates to the corresponding code line.",
    },
    {
      start: 21,
      end: 27,
      text: "View Variables Panel",
      description:
        "The Variables panel displays all defined variables, their type, and associated data from the executed code.",
    },
    {
      start: 27,
      end: 43,
      text: "View PDF Export of Book",
      description:
        "Click the View PDF menu bar to download or print the SciPyR book as a PDF file, saving it to your local storage.",
    },
]}
poster="/images/introduction-poster.png"
posterText="SciPYR"
client:load/>

Infoveave supports custom analysis using Python on the SciPyR Workbench to run large statistical models. The SciPyR Workbench helps you define accurate custom analysis easily by using existing Infoveave Datasources.


## Creating a SciPyR Book
![New SciPyR Workbook](/images/Analysis/SciPyR/Defining-SciPyR-Models/New-SciPyR-Workbook.png)

To perform SciPyR analysis in Infoveave, follow these steps.
<Steps>
1. Access the SciPyR section by clicking on **Analysis <i class="fa-duotone fa-regular fa-arrow-right"></i> SciPyR.** You can view a list of all SciPyR books, including those created by you or shared with you.
2. To create a new SciPyR book based on Python, click on the **New SciPyR Book** button. The **New SciPyR Book** dialog box appears.  
![Add SciPyR Book](/images/Analysis/SciPyR/Defining-SciPyR-Models/Add-SciPyR-Book.png)
3. Assign a **Name** to the SciPyR Workbook.
4. Click on **Save** to start creating your custom analysis in Infoveave. This action takes you directly to the SciPyR Workbook.
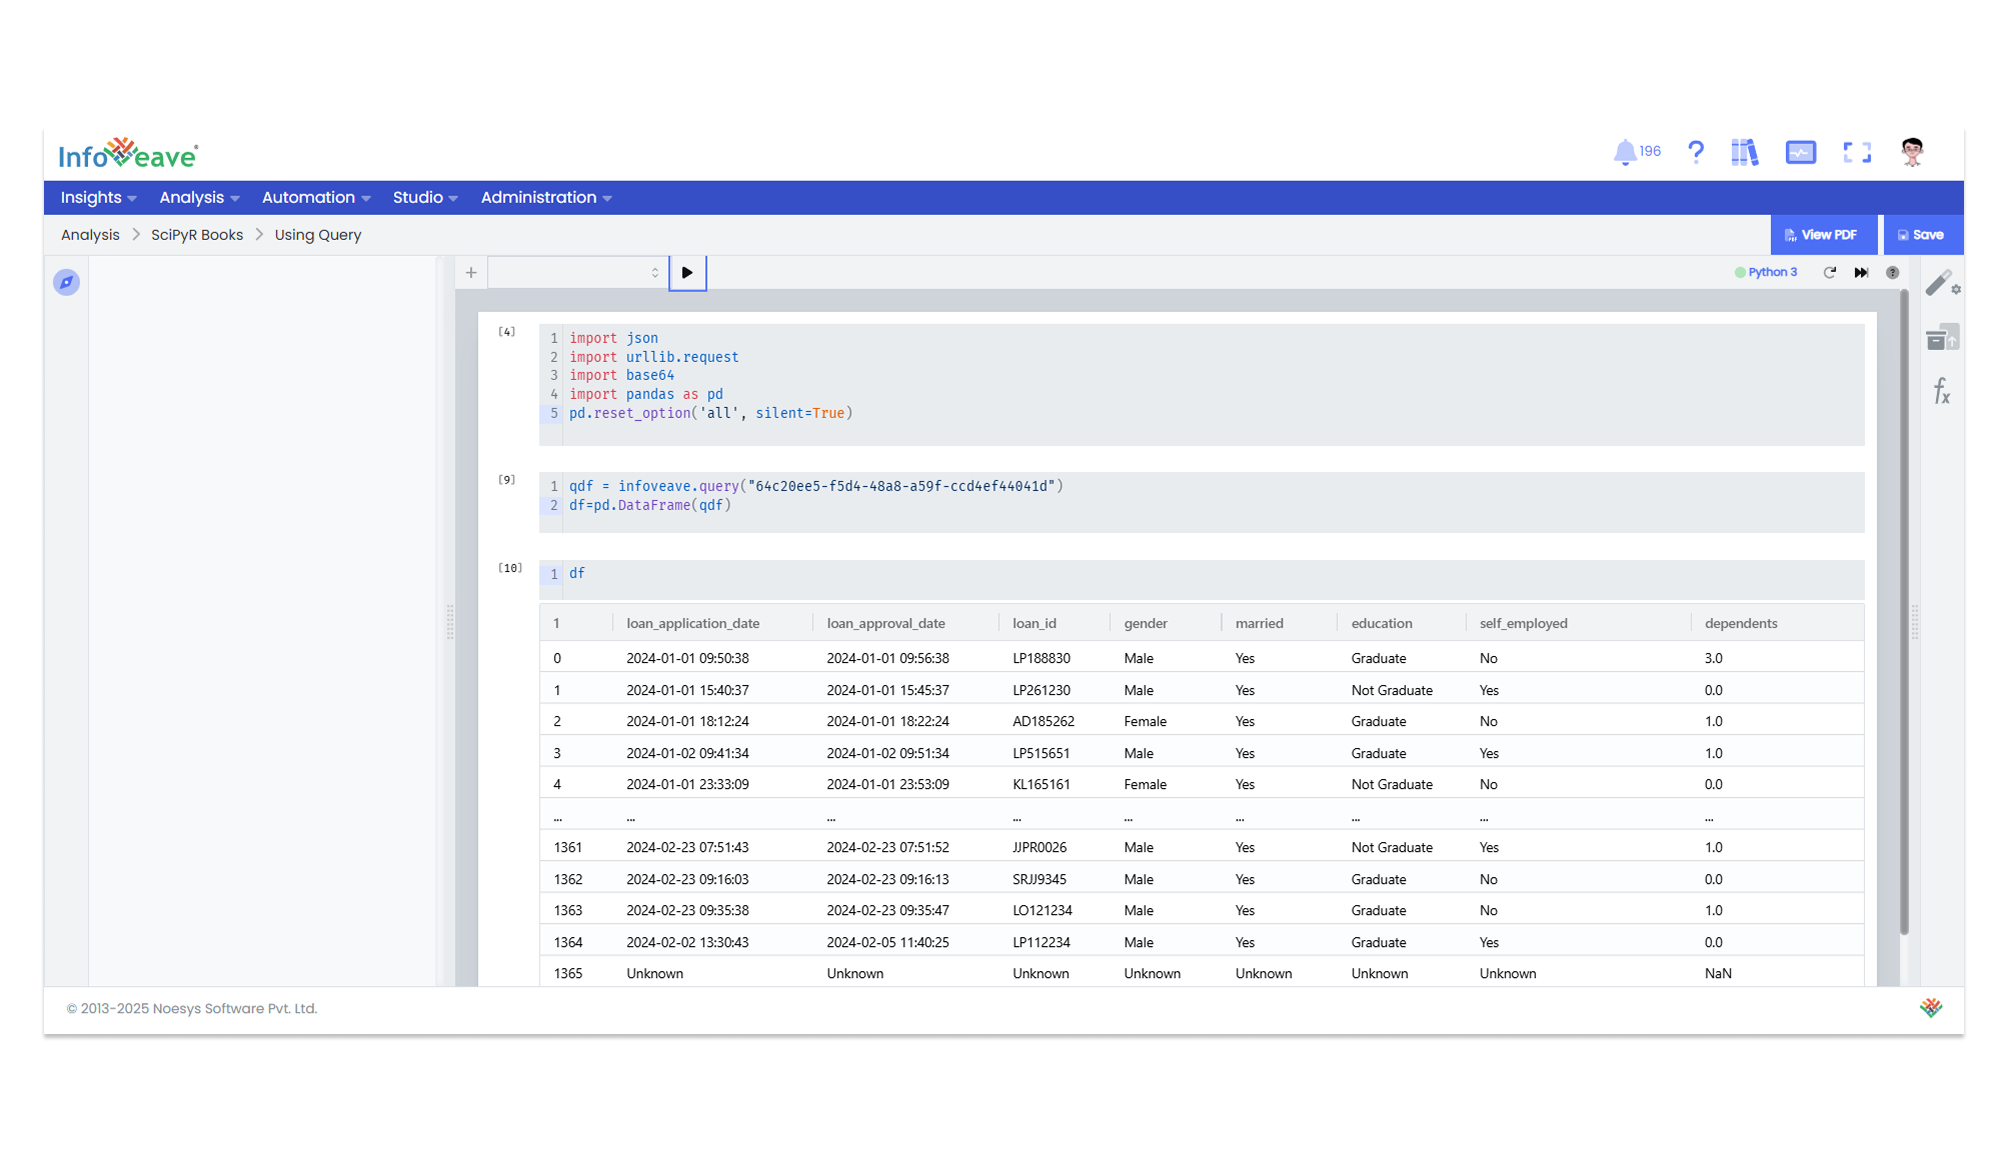
5. When the SciPyR Workbook opens, you can begin writing your Python program directly in the Workbook.
6. To start writing your Python program, select the default cell and begin typing.
7. To expand your analysis, add new cells by clicking on the plus icon **+** near the drop-down.
8. Use the drop-down menu in the Workbook to select **Code** when writing Python code and **Markdown** when adding headings or titles.
</Steps>

<Aside>
* You can select the checkbox option for **Optional Upload of Jupyter Book** to upload a Jupyter Notebook file directly.
* For Jupyter Notebook uploads, make sure to use only **.ipynb files.**
* When you upload a Jupyter Notebook, the workspace loads with the content.
* When you add a title using Markdown in the SciPyR Workbook, it is automatically saved as a summary in the Summary Panel.
* While coding in Python, any comments you include in the code are also automatically added as a summary in the Summary Panel.
</Aside>


## Connecting to a Datasource for Exploratory Data Analysis

<MediaPlayerComponent
  video="Perform-Exploratory-Data-Analysis-Using-Scipyr.mp4"
  chapters={[
{ "start": 0, "end": 12, "text": "Introduction"},
{ "start": 12, "end": 35, "text": "Navigate to SciPyR and Create a New Book", "description" : "To start, go to the Analysis menu and select SciPyR. Click the New SciPyR Book button. In the pop-up window, enter a name for your workbook, choose the programming language (e.g., Python), and click Save."},
{ "start": 35, "end": 87, "text": "Explore the Workbook Interface" , "description" : "Get familiar with the layout. The Tasks panel on the left helps you navigate your analysis. The Setup panel on the right shows installed packages and variables. The top bar provides controls to run code, manage cells (Code or Markdown), and restart the kernel." },
{ "start": 87, "end": 102, "text": "Import Data Using a Query	", "description" : "First, import your necessary Python libraries. In a new code cell, click the Insert Query icon at the bottom. Select your desired Datasource, and the corresponding SQL query will appear. Click Save to load the data into a Pandas DataFrame." },
{ "start": 102, "end": 112, "text": "Perform and Visualize Data Analysis" , "description" : "Write and run Python code to clean, transform, and analyze your data. You can generate visualizations like plots and charts, which will appear directly below the code cells. You can also view any created variables, like DataFrames, in the Setup panel on the right."},
{"start": 112, "end": 119, "text": "Export Your Analysis as a PDF" , "description" : "Once your analysis is complete, click the View PDF button at the top right of the screen. This action will generate and open a PDF version of your entire notebook, including all code, text, and visualizations, ready for sharing or saving."}
]}
  poster="/images/introduction-poster.png"
  posterText="Perform Exploratory Data Analysis Using Scipyr"
  client:load
/>

You can integrate SQL queries into your analysis using the **Insert Query** feature.

To insert SQL queries from Datasources into the SciPyR Workbook, follow these steps.
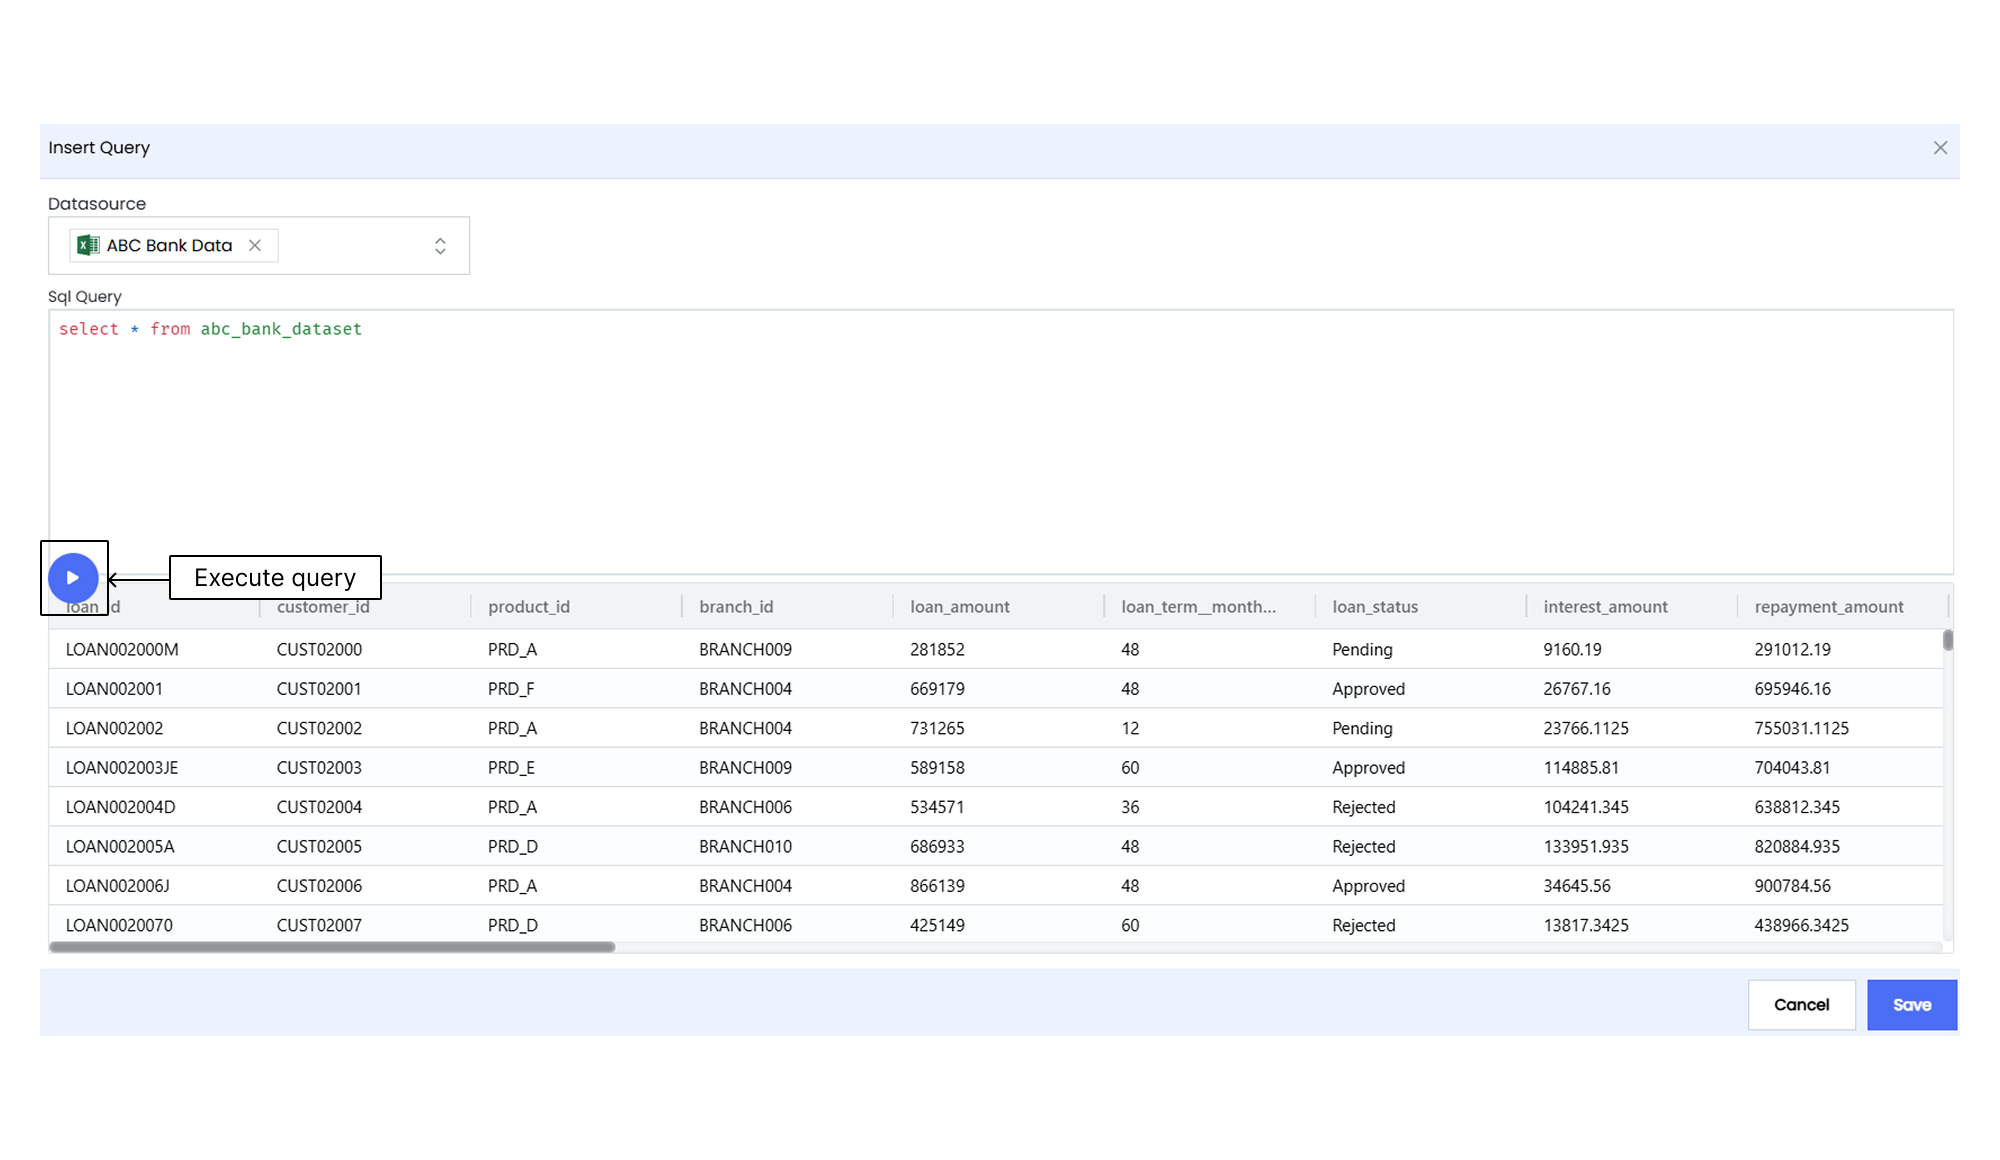
![Insert Query](/images/Analysis/SciPyR/Defining-SciPyR-Models/Insert-Query.png)

<Steps>
1. Click on the **Insert Query** icon <i class="fa-duotone fa-regular fa-database"></i> in the SciPyR Workbook. The Insert Query popup appears.
2. From the dropdown menu, select the required Datasource that contains the SQL data.
3. Write your SQL query in the provided workspace area.
4. Click on the **Execute query** icon <i class="fa-duotone fa-regular fa-play" style="--fa-secondary-opacity: 1;"></i> to execute the SQL query and view the results.
5. If you want to insert the query into the SciPyR Workbook, click on the **Save** button after executing the query.
6. After this, run the query. The query and its results are inserted into the Workbook for further analysis and reporting.  
![insert query](/images/Analysis/SciPyR/Defining-SciPyR-Models/insert-query-in-workbook.png)
</Steps>

<Aside type="note">
When you use the **Insert Query** feature to add a query into the SciPyR Workbook, it is automatically inserted using the following syntax.  
```python
df = infoveave.query("34e44add-3bae-4ae6-a096-9888c52ada29")
```
* `df` is the variable name used to store the data retrieved from the query. It stands for **DataFrame**, a data structure used in Python to store tabular data.  
* `"34e44add-3bae-4ae6-a096-9888c52ada29"` is the unique identifier of the specific query within Infoveave. It serves as a reference to fetch the required data from the associated dataset.
</Aside>

<Aside type="tip">
The **Date** option in the Insert Query dialog box appears based on the structure of your query. If the query includes date-related data, you can select the "Date" option to handle date values appropriately within the SciPyR Workbook.
</Aside>

## Editing the Inserted Query
 To edit an inserted query, place the cursor on the query and click the **Edit Query** icon <i class="fa-duotone fa-regular fa-pencil"></i>.


<Aside>
The **Edit Query** option works only when a query has been inserted into the specific cell.
</Aside>

## Building a Model and Generating Insights

You can customize your analysis by adding, editing, and running cells while building your machine learning model within the SciPyR Workbook. Use the flexibility of manipulating cells to refine and tailor your analysis, leading to the generation of valuable insights from the data.

* Customize the analysis by adding and editing cells within the SciPyR Workbook.
* Incorporate Python code specific to your analysis requirements.
* To execute individual cells, select the cell and click on the **Run** icon <i class="fa-duotone fa-regular fa-play" style="--fa-secondary-opacity: 1;"></i>.
* To run all cells together, click on the <i class="fa-duotone fa-regular fa-forward-fast"></i> icon to execute the complete analysis.
* To refresh the kernel, click on the <i class="fa-duotone fa-regular fa-arrows-rotate"></i> icon.
* To save the SciPyR as a PDF file in your local storage, click on the **View PDF** button.  
  ![Save PDF](/images/Analysis/SciPyR/Defining-SciPyR-Models/Save-PDF.png)
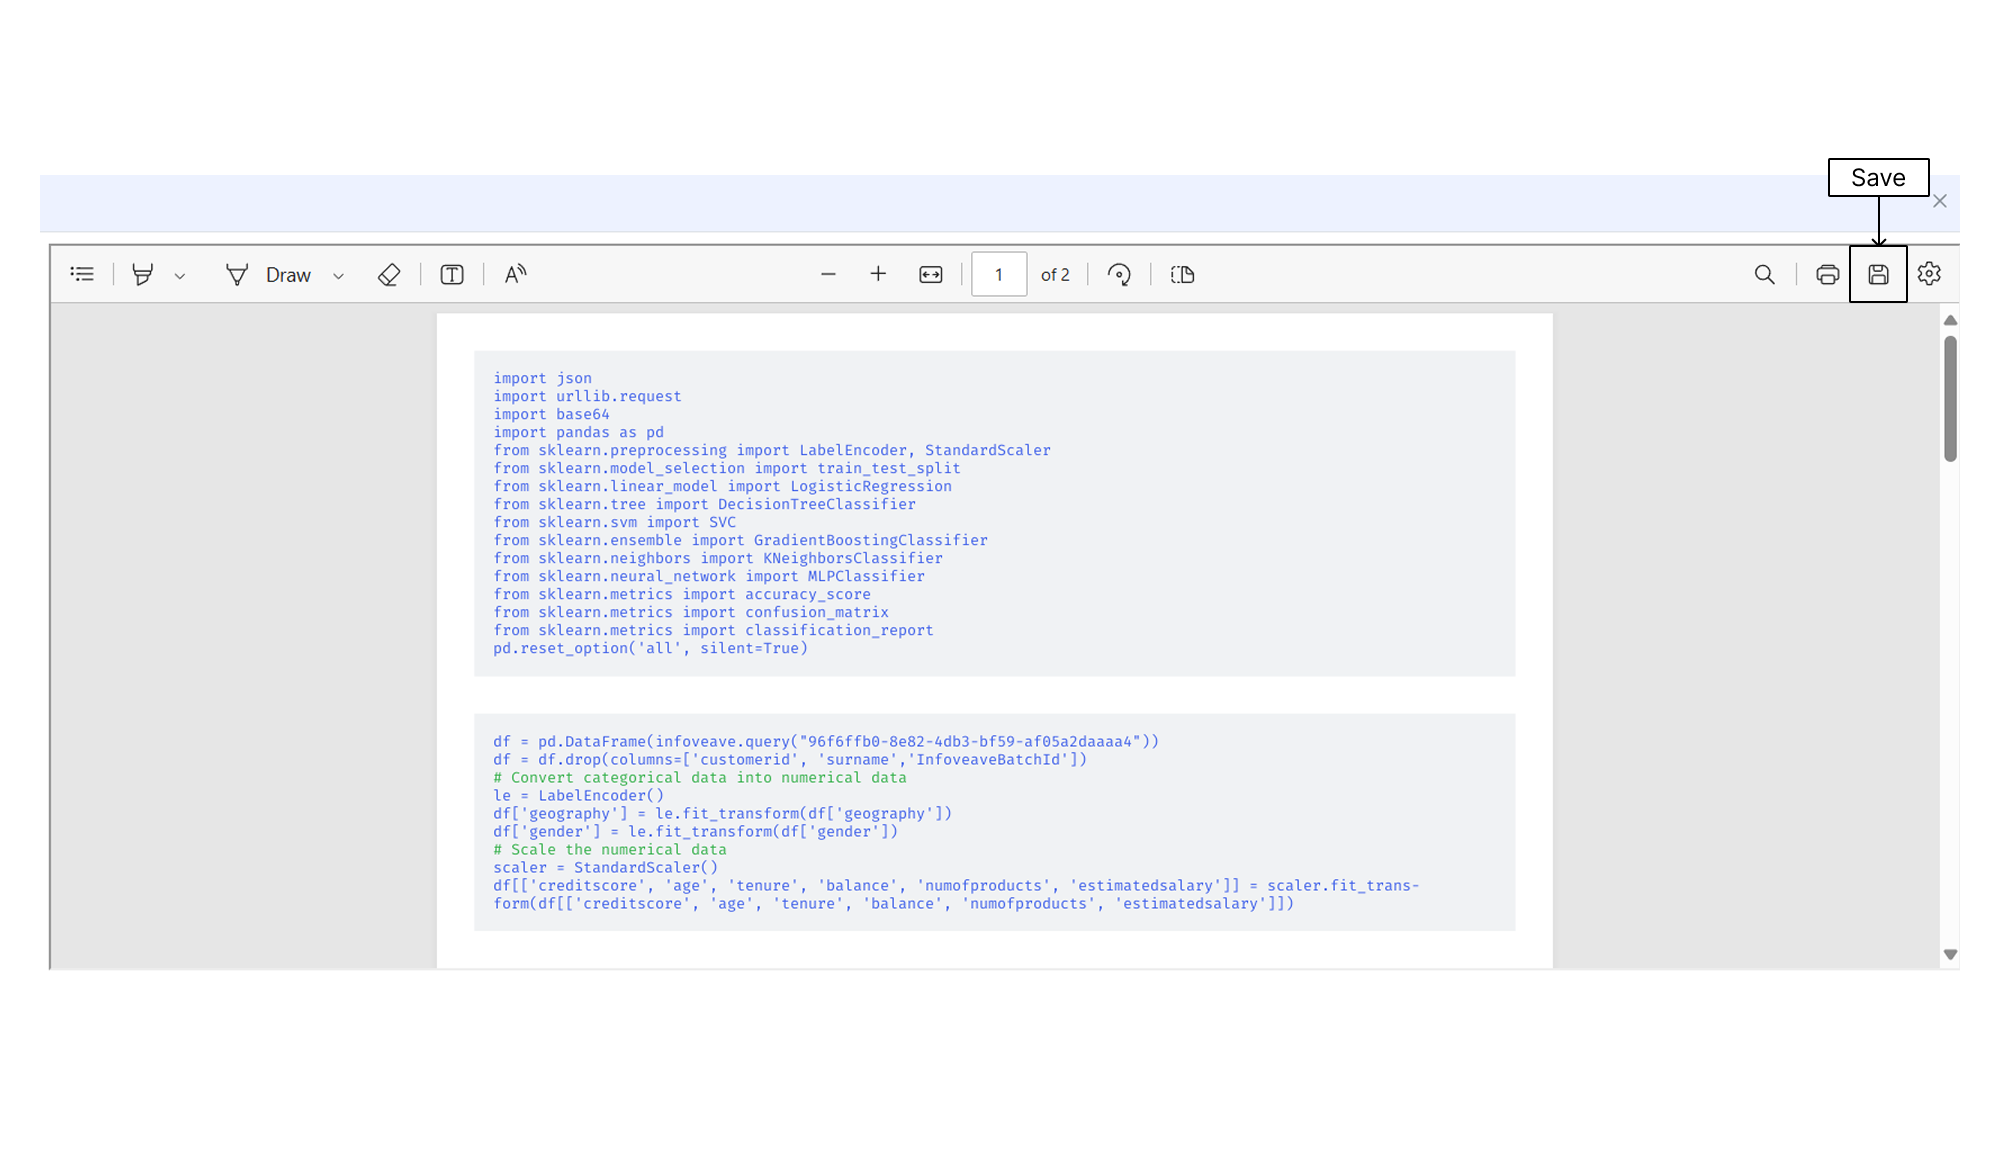
* To save the analysis, click on **Save**.
* Go to **Analysis <i class="fa-duotone fa-regular fa-arrow-right"></i> SciPyR** to view your saved analysis.

You have the flexibility to add cells above or below existing ones. You can also move cells, copy or duplicate cells, and delete cells to customize your analysis as needed.

<Aside>
You can view any generated tables from the **Variables** section.
</Aside>
