---
title: Managing SciPyR
description: Manage your Workbooks with options to edit, share, organize, and add descriptions. Efficiently customize and control your analysis workflow.
---
import { Aside, Steps } from '@astrojs/starlight/components';
# Managing SciPyR
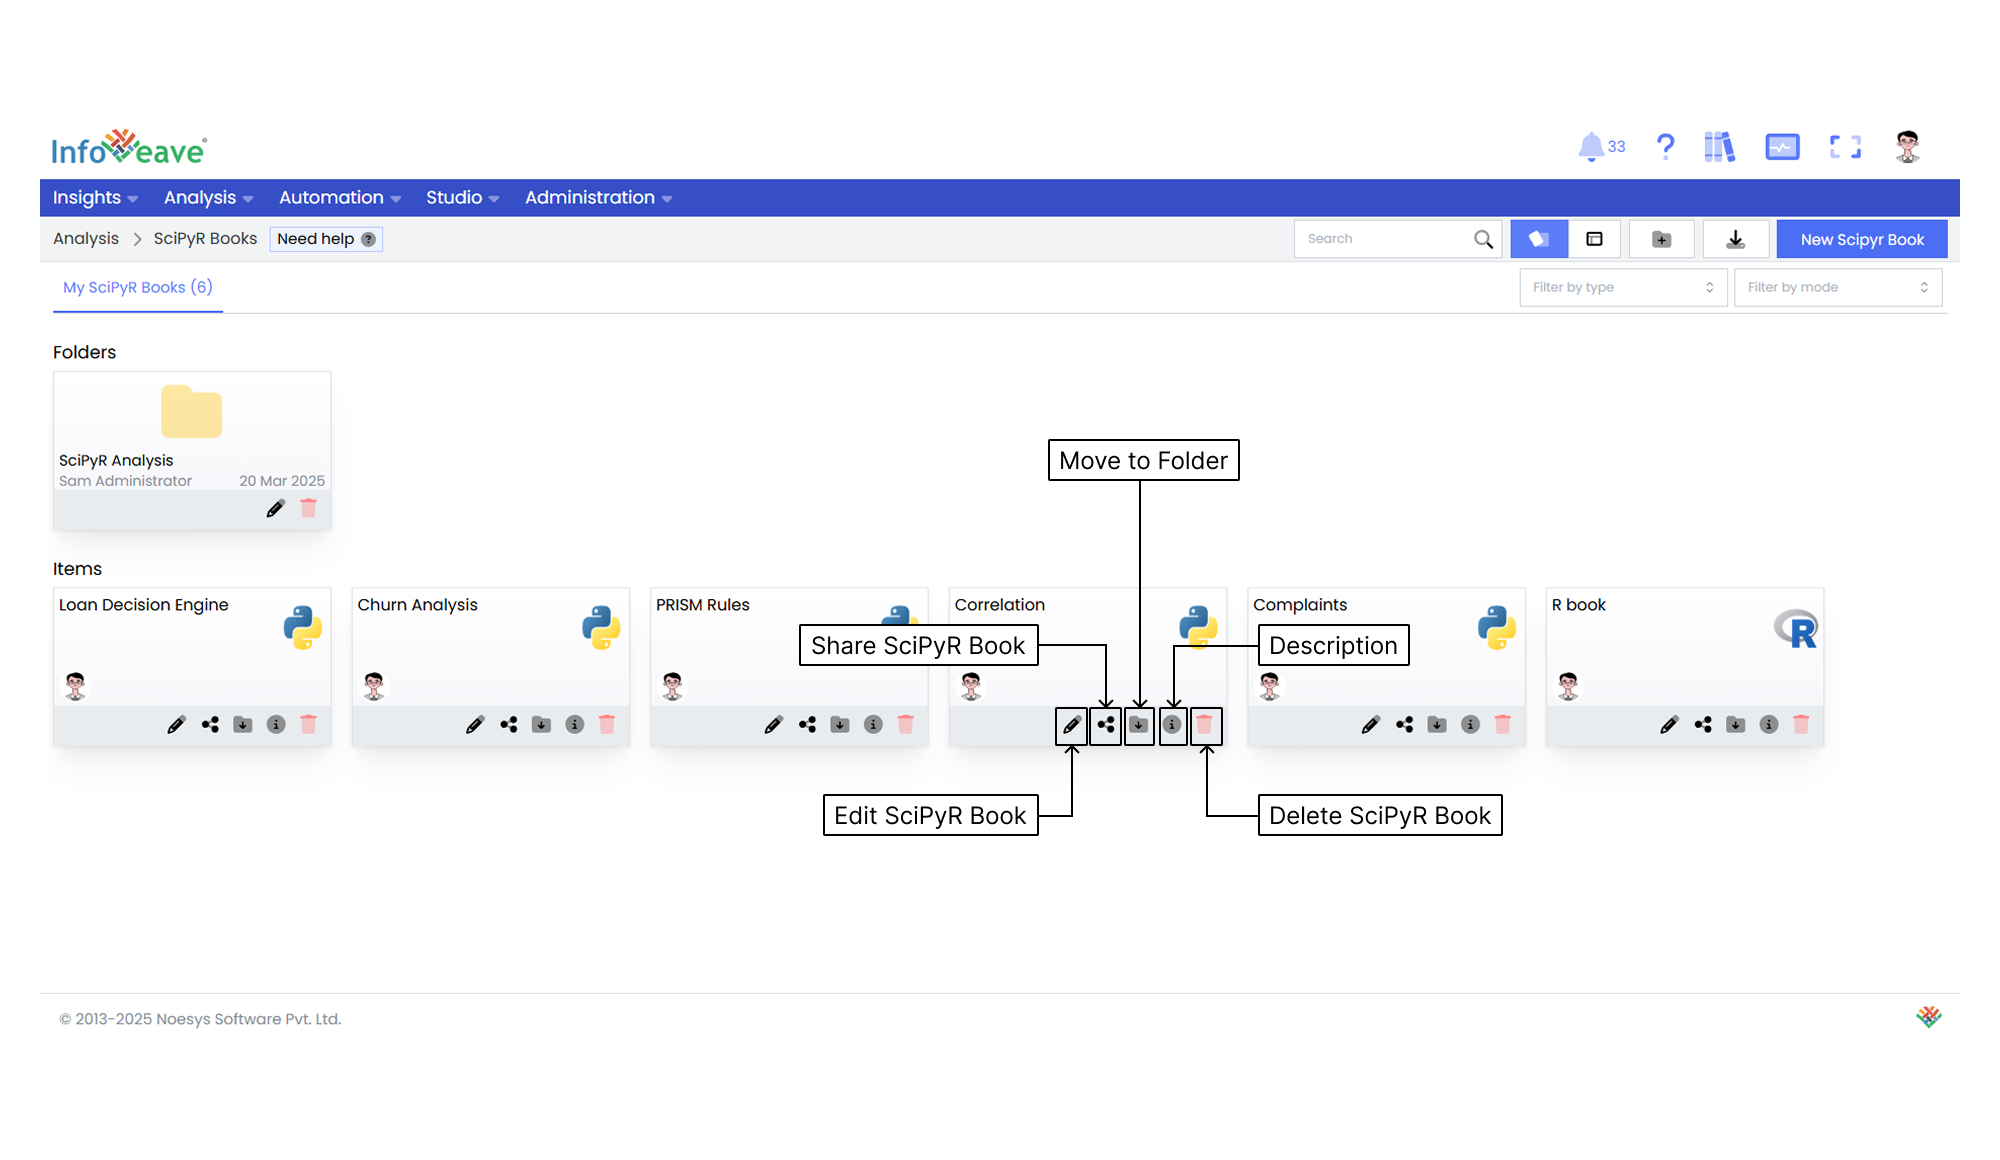
The **Manage SciPyR** feature gives you complete control over your SciPyR Book. It allows you to organize, customize, and share your books efficiently. Below is a brief overview of the various management options available for your SciPyR Book.
You can manage your SciPyR Book using the options to **Share**, **Edit**, **Move to Folder** and **Delete**.
## Editing a SciPyR Book
To modify a SciPyR Book in Infoveave, follow these steps.
1. Find the specific SciPyR Book that you want to edit.
2. Click on the **Edit** icon associated with the SciPyR Book. This opens the SciPyR Book and allows you to make changes.
3. After making the necessary modifications, click on the **Save** button to save your edits.
## Sharing a SciPyR Book
The sharing option in a SciPyR Book allows user-based and role-based sharing. This ensures efficient distribution and utilization of your analysis among the intended audience.
Follow these steps to share your SciPyR Book.
1. Click on the **Share** icon to share the SciPyR Book with a team or role.
2. Choose between the available options: **Share with User** or **Share with Role**.
3. If you choose **Share with User**, select the user or users you want to share the SciPyR Book with.
4. If you want to share the SciPyR Book with all users, select the **Everyone** option.
5. If you choose **Share with Role**, pick the roles you want to share the SciPyR Book with.
6. To remove a specific user or role from the shared list, uncheck the corresponding checkbox.
7. Click **Save** to share your SciPyR Book with the selected users or roles.
## Moving to a Folder

You can organize your SciPyR Book by moving it to designated folders. Follow these steps.
1. Select the SciPyR Book you want to move by clicking on the **Move to Folder** icon.
2. Choose the desired folder from the dropdown menu.
3. Click the **Save** button to complete the move.
## Deleting a SciPyR Book
To delete a SciPyR Book in Infoveave, follow these steps.
1. Find the SciPyR Book that you want to delete.
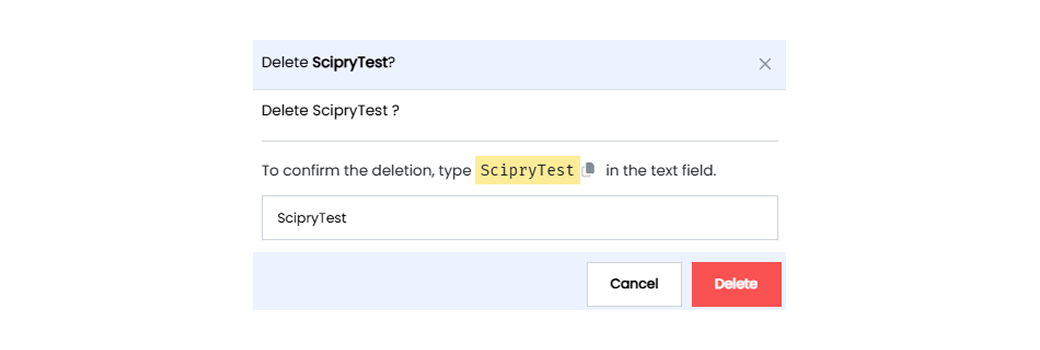
2. Click on the **Delete** icon .
3. Type the specified text into the provided text field.
4. Alternatively, you can copy the text from the icon and paste it into the text field.
5. Once you have entered the correct text, click on **Delete**.