---
title: Managing Data Quality
description: Managing Data Quality
---
import { Aside, Steps } from '@astrojs/starlight/components';
# Managing Data Quality
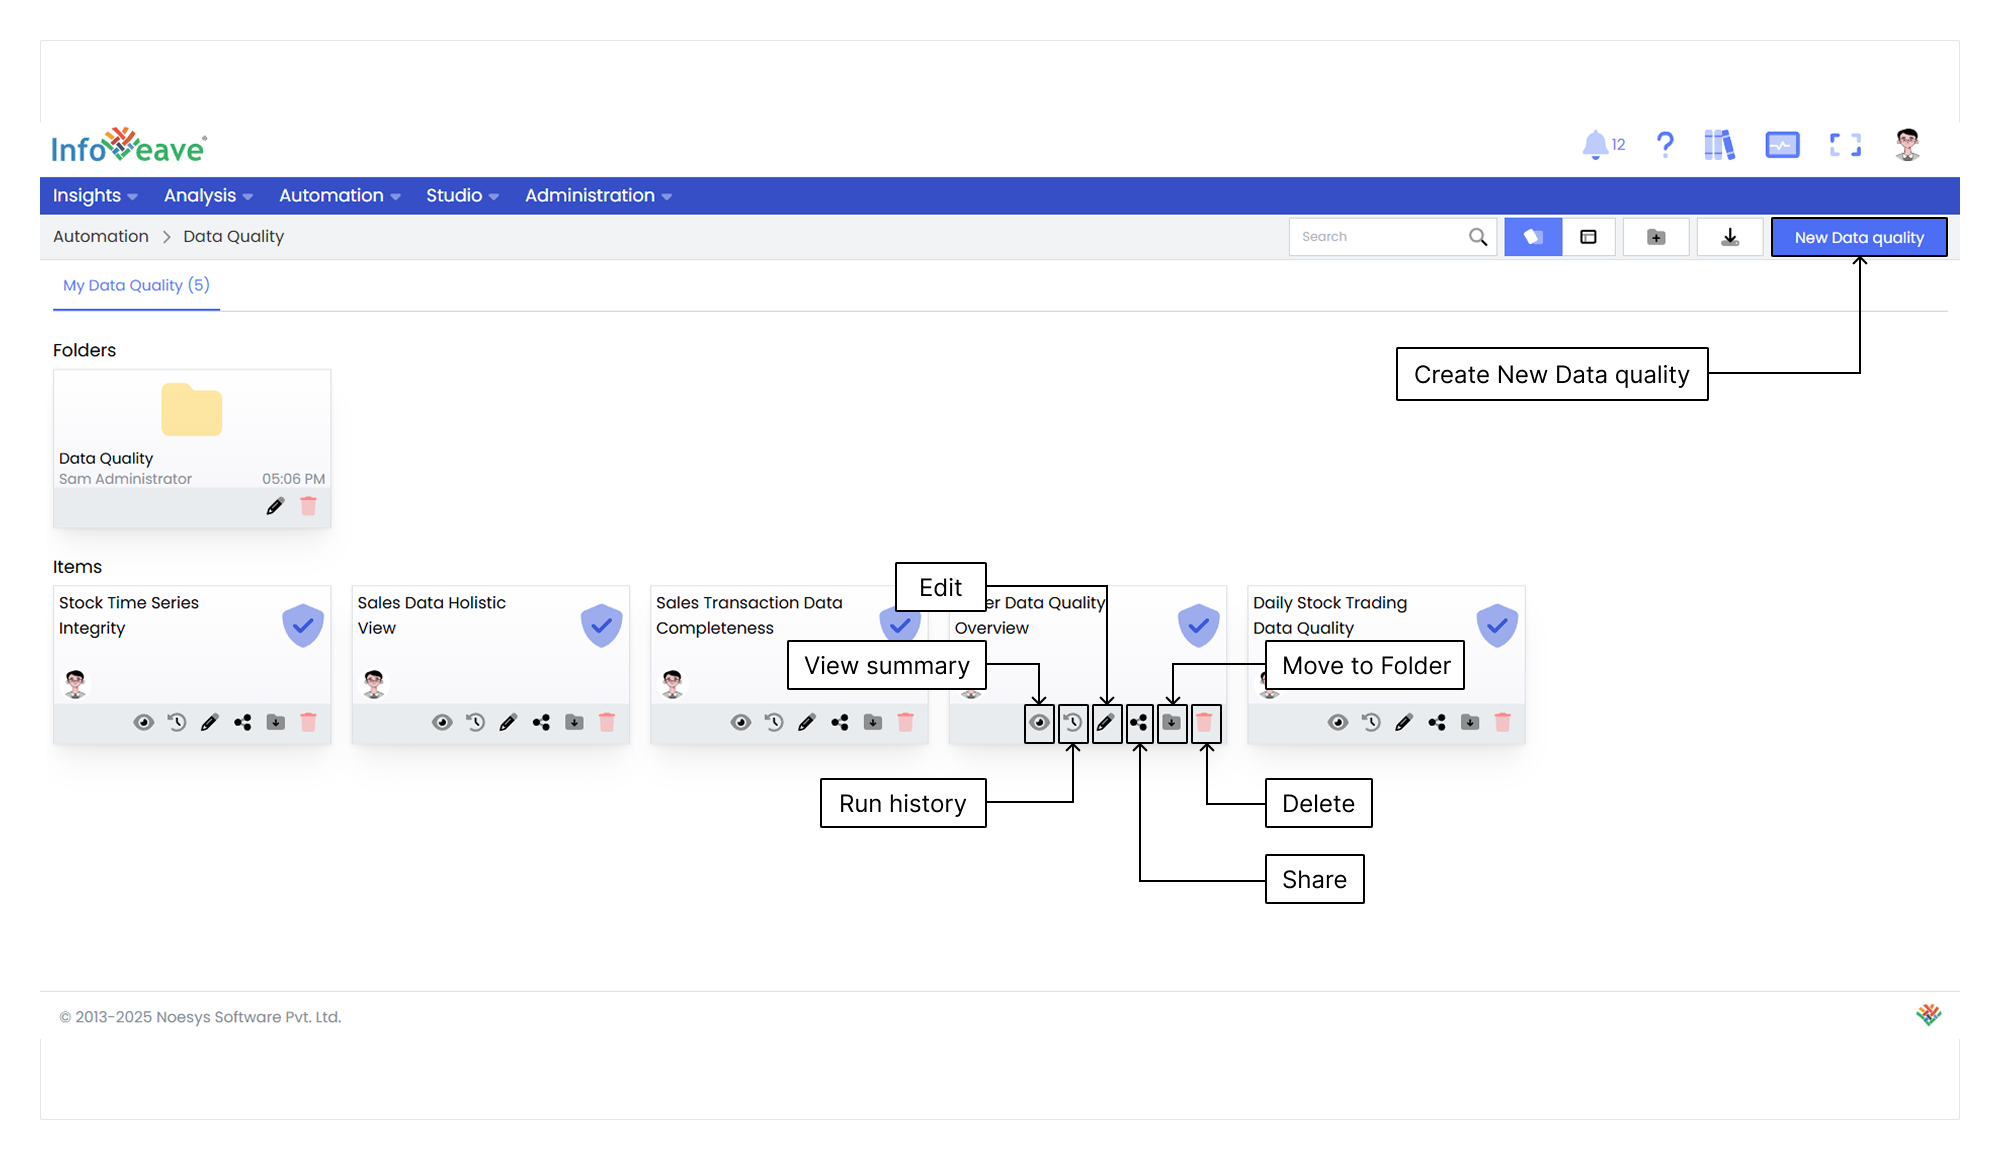
The **Manage Data Quality** section provides comprehensive control over your Data Quality rules. It allows you to organize, customize, and share them efficiently. Here is a brief overview of the various management options available for your Data Quality.
You can manage Data Quality rules using the options to View, Run history, Edit, Share, Move to Folder and Delete.
## Viewing the Summary
To view the Data Quality summary information, follow these steps.
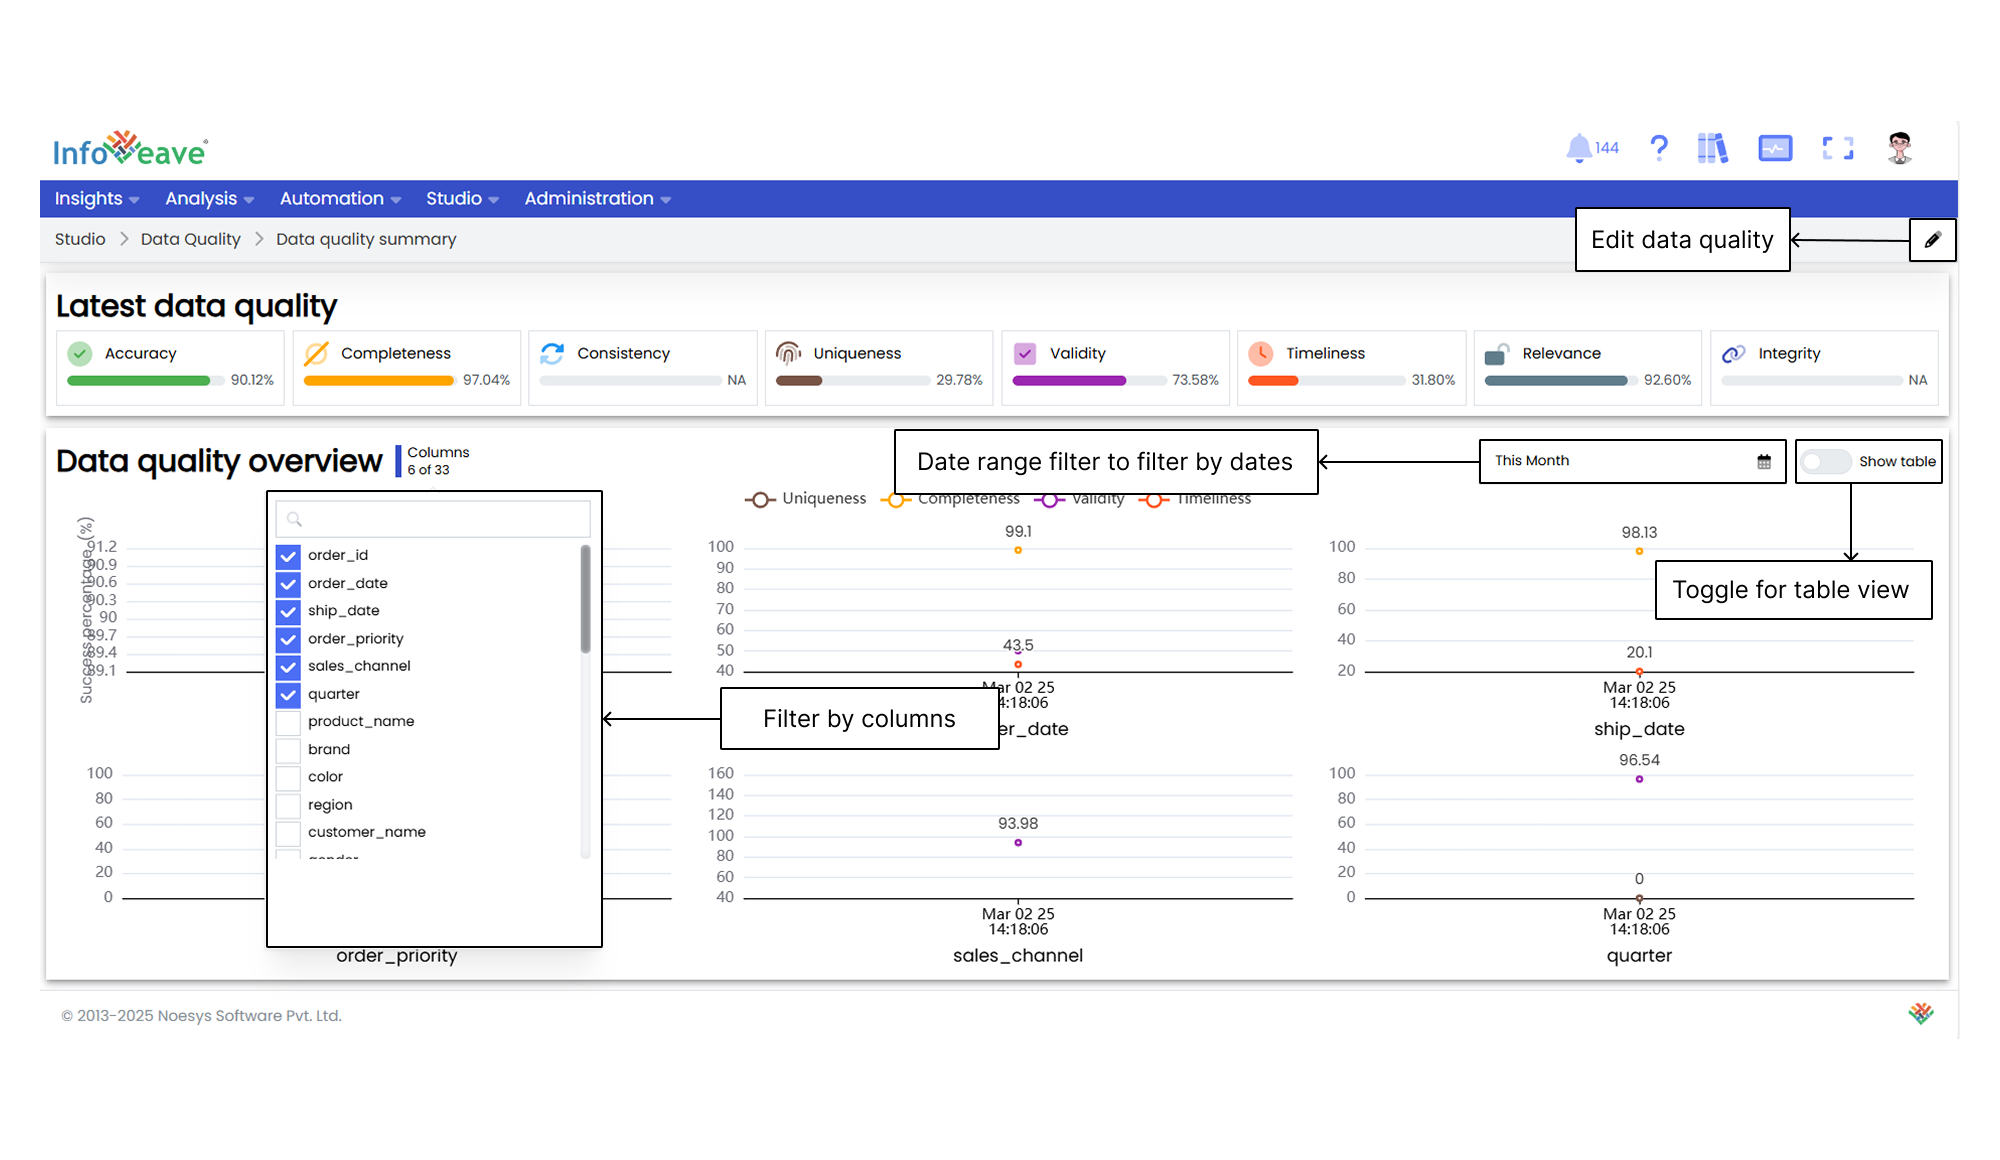
1. Find the specific Data Quality that you want to view.
2. To view the configured Data Quality, click on the **View summary** icon associated with the Data Quality.
3. To edit the Data Quality, click on the pencil icon located at the top right corner. This will take you to the **Data Quality Designer** screen where you can make edits.
4. You can filter the Data Quality view based on the columns.
5. To view the Data Quality in a tabular format, toggle the **Show table** button.
6. You can also filter the Data Quality view by date using the **Date range filter**.
## Viewing the Run history
To view the Run history of a specific Data Quality in Infoveave, follow these steps.
1. Locate the Data Quality for which you want to see the Run History in Infoveave.
2. Click on the **Run history** icon associated with the selected Data Quality. This action takes you to the **Data Quality history** page.
3. On the Data Quality history page, you will see a tabular display with various details related to the Data Quality execution. These details include:
* **Data Quality instance id**. A unique identifier for each Data Quality instance.
* **Initiated by**. The user or account responsible for initiating the Data Quality.
* **Created by**. The user or account responsible for creating the Data Quality.
* **Started on**. The date and time when the Data Quality execution was initiated.
* **Total Row Count**. The total number of rows.
* **Sample Size**. The size of the Data Quality.
* **Completed on**. The date on which that particular Data Quality is completed.
* **Execution time**. The time taken by the Data Quality to execute.
4. From the Data Quality history page, you can edit the Data Quality in the **Data Quality Designer** using the **Edit** icon . This allows you to modify the sequence and configuration of activities within the Data Quality.
5. Additionally, you can execute the Data Quality again from the history page.
6. Executing the Data Quality takes you to the **Instance history** page, where you can monitor the real-time progress and details of the Data Quality execution.
## Editing the Data Quality
Edit the Data Quality to ensure that it reflects the desired modifications.
To modify a Data Quality in Infoveave, follow these steps.
1. Find the specific Data Quality that you want to edit.
2. Click on the **Edit** icon associated with the Data Quality.
3. After making the necessary modifications, click on the **Save** button to save your edits.
## Sharing the Data Quality
Sharing options in Infoveave Data Quality, such as user and role-based sharing, ensure efficient distribution and utilization of analysis among the intended audience.
You can share your Infoveave Data Quality with other users or roles in Infoveave. Follow these steps to share your Infoveave Data Quality.
1. Click on the icon to **Share** the Data Quality with the team or role.
2. Select between the available options. Share with User or Share with Role.
3. If you choose Share with User, go to the **Share with Users**. From the share dialogue box, select the user or users you want to share the Data Quality with.
4. If you want to share the Data Quality with all users, select the **Share with Everyone** option.
5. If you choose Share with Role, switch to **Share with Role**.
6. Pick the roles you want to share the Data Quality with from the share dialogue box.
7. To remove a specific user or role from the shared list, uncheck the corresponding checkbox.
8. Click **Save** to share your Data Quality with the selected users or roles.
## Moving the Data Quality to a Folder
Organize your Data Quality by easily moving it to designated folders.
To organize your Data Quality under folders, follow these steps.
1. Select the Data Quality you want to move by clicking on the **Move to Folder** icon.
2. Choose the desired folder from the dropdown menu.
3. Click the **Save** button to finalize the move.
## Deleting the Data Quality
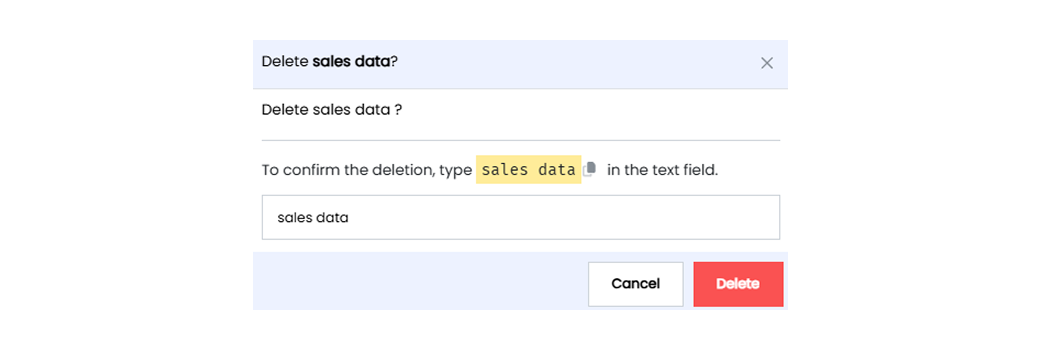
To delete a Data Quality in Infoveave, follow these simple steps.
1. Find the Data Quality you want to delete.
2. Click on the **Delete** icon .
3. Type the specified text from the warning message in the provided text field.
4. Alternatively, you can copy the text from the icon and paste it in the text field.
5. Once you have entered the correct text, click on **Delete**.