---
title: Managing Workflow
description: Manage workflows with features to execute, edit, share, and move activities. Access run history and export/import workflows.
---
import { Aside , Steps} from '@astrojs/starlight/components';
# Managing Workflow
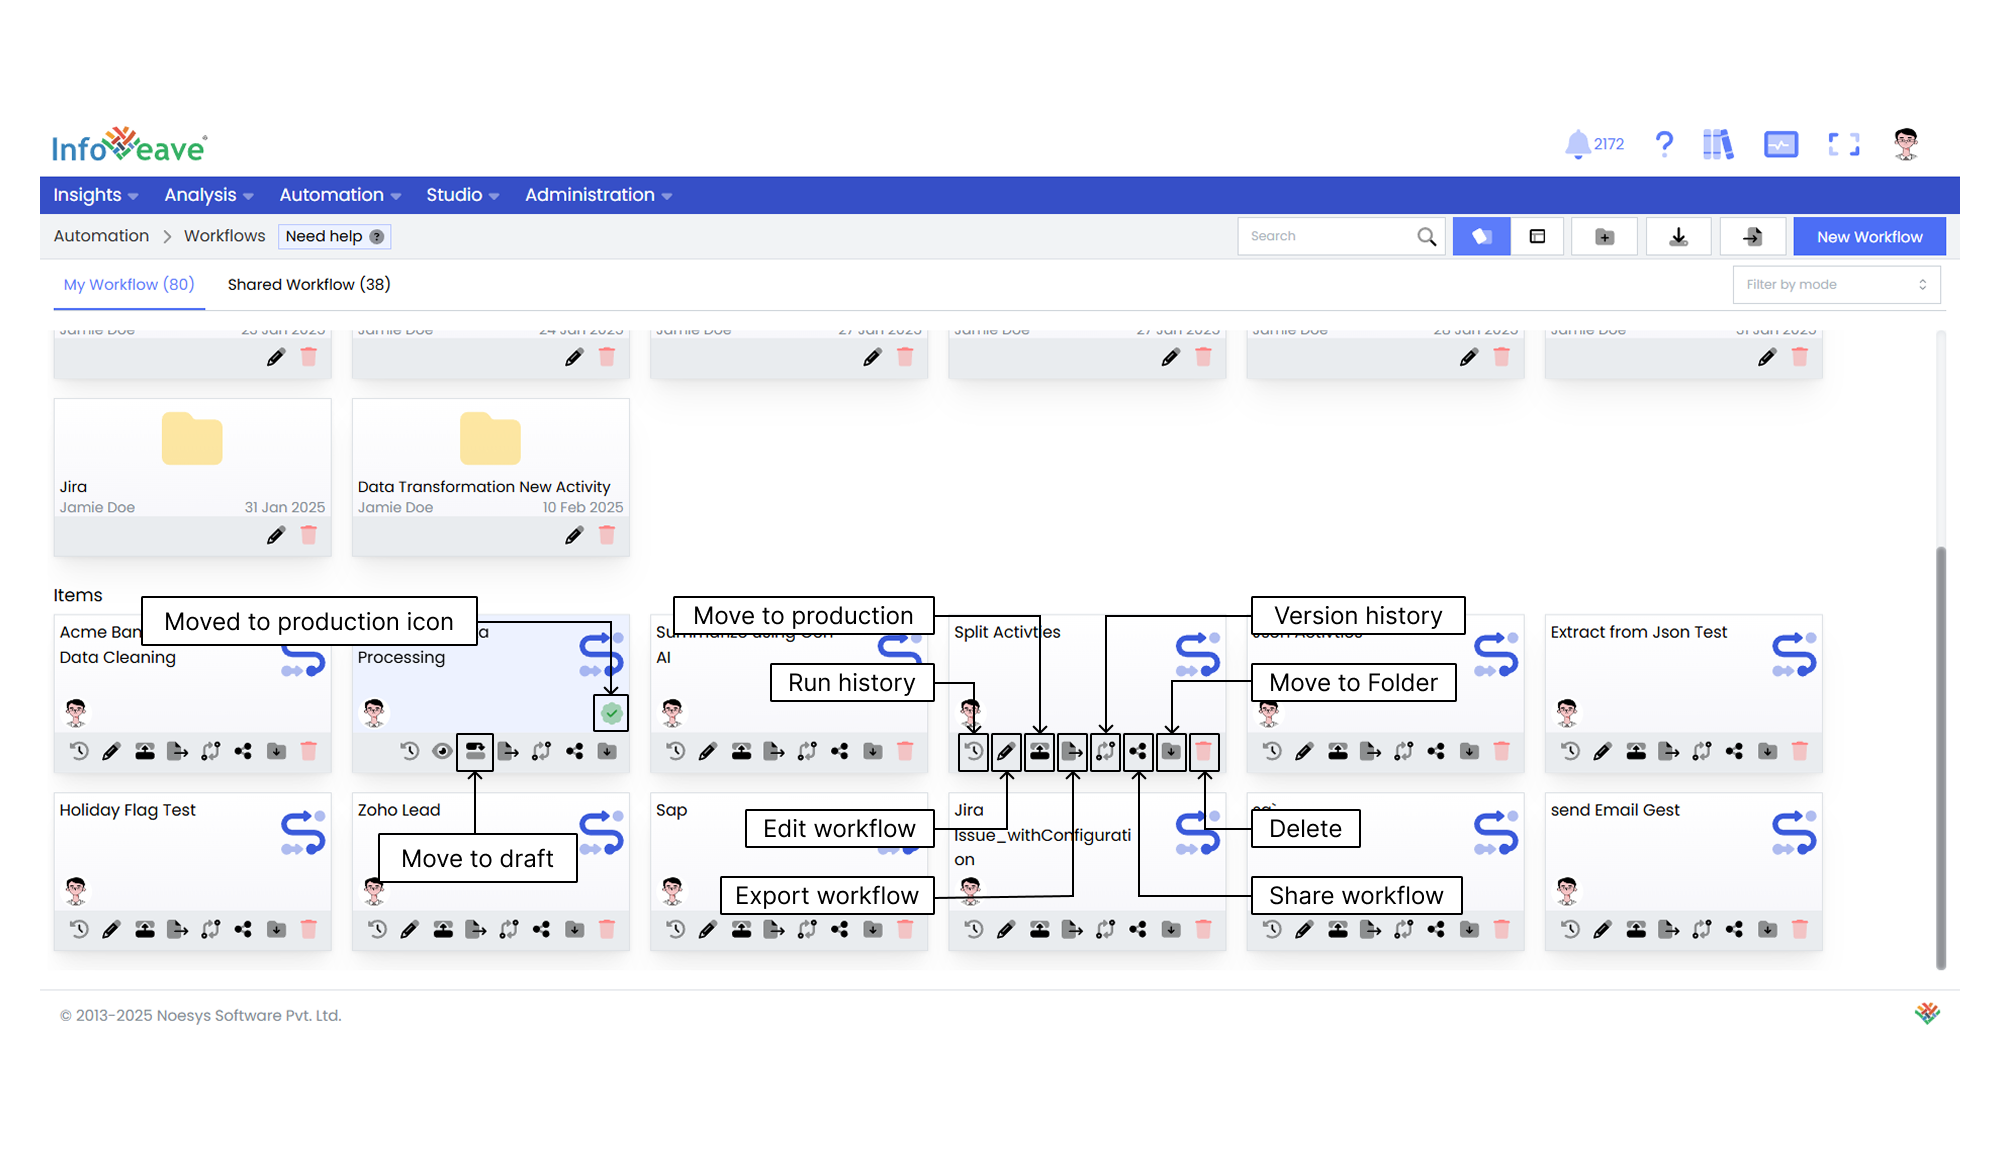
Manage Infoveave Workflows with the flexibility and control you need to streamline your data processing and automation activities. The comprehensive set of features empowers you to execute Workflows, view run history, edit configurations, move to production, move to draft, share with others, move to folders and delete Workflows.
## Run history
To view the run history of a specific Workflow in Infoveave, follow these steps.
1. Locate the Workflow you want to view the run history for.
2. Click on the **Run history** icon associated with the identified Workflow. This action takes you to the Workflow Summary page.
3. On the Workflow Summary page, you find a tabular display with various details related to the Workflow execution. These details include:
* **Workflow Instance ID**. A unique identifier for each Workflow instance.
* **Started On**. The date and time when the Workflow execution is initiated.
* **Failure Reason**. If the Workflow encounters any failure, this column provides the reason for the failure.
* **Activity Name (Failed)**. The name of the activity that fails during execution, if any.
* **Activity Type**. The type of activity performed during the Workflow execution.
* **Execution Time**. The duration of time taken for the Workflow to complete its execution.
* **Created By**. The user or account responsible for creating and initiating the Workflow.
* **Delete Action**. Provides an option to delete the specific Workflow instance from the history.
* **Pause/Resume**. Provides the option to re-run the Workflow.
4. From the Workflow Summary page, you can edit the Workflow in the [**Workflow Designer**](/automation-v8/workflows/workflow-configuration-layout/#workflow-designer) using the **Edit** icon . This allows you to modify the sequence and configuration of activities within the Workflow.
5. Additionally, you can execute the same Workflow again from the Workflow Summary page.
* Executing the Workflow takes you to the **Instance History** page, where you can monitor the real-time progress and details of the Workflow execution.
* Click on each activity to see the details.
## Editing Workflows
To edit a Workflow in Infoveave, follow these steps.
1. Find the Workflow you want to edit in the Workflow Manager.
2. Click on the **Edit** icon associated with the Workflow.
3. Update the Workflow activities, settings, and scheduled time as needed.
4. Drag and drop activities to add or rearrange them and link them to define the Workflow flow.
5. Modify the Workflow name, description, and other settings in the **Workflow Setup** tab.
6. If necessary, reschedule the Workflow by clicking on the Cron Trigger icon.
7. Click **Save** to apply the updates.
## Moving to production
To move a Workflow to production in Infoveave, follow these steps.
1. Locate the Workflow you want to move in the Workflow Manager.
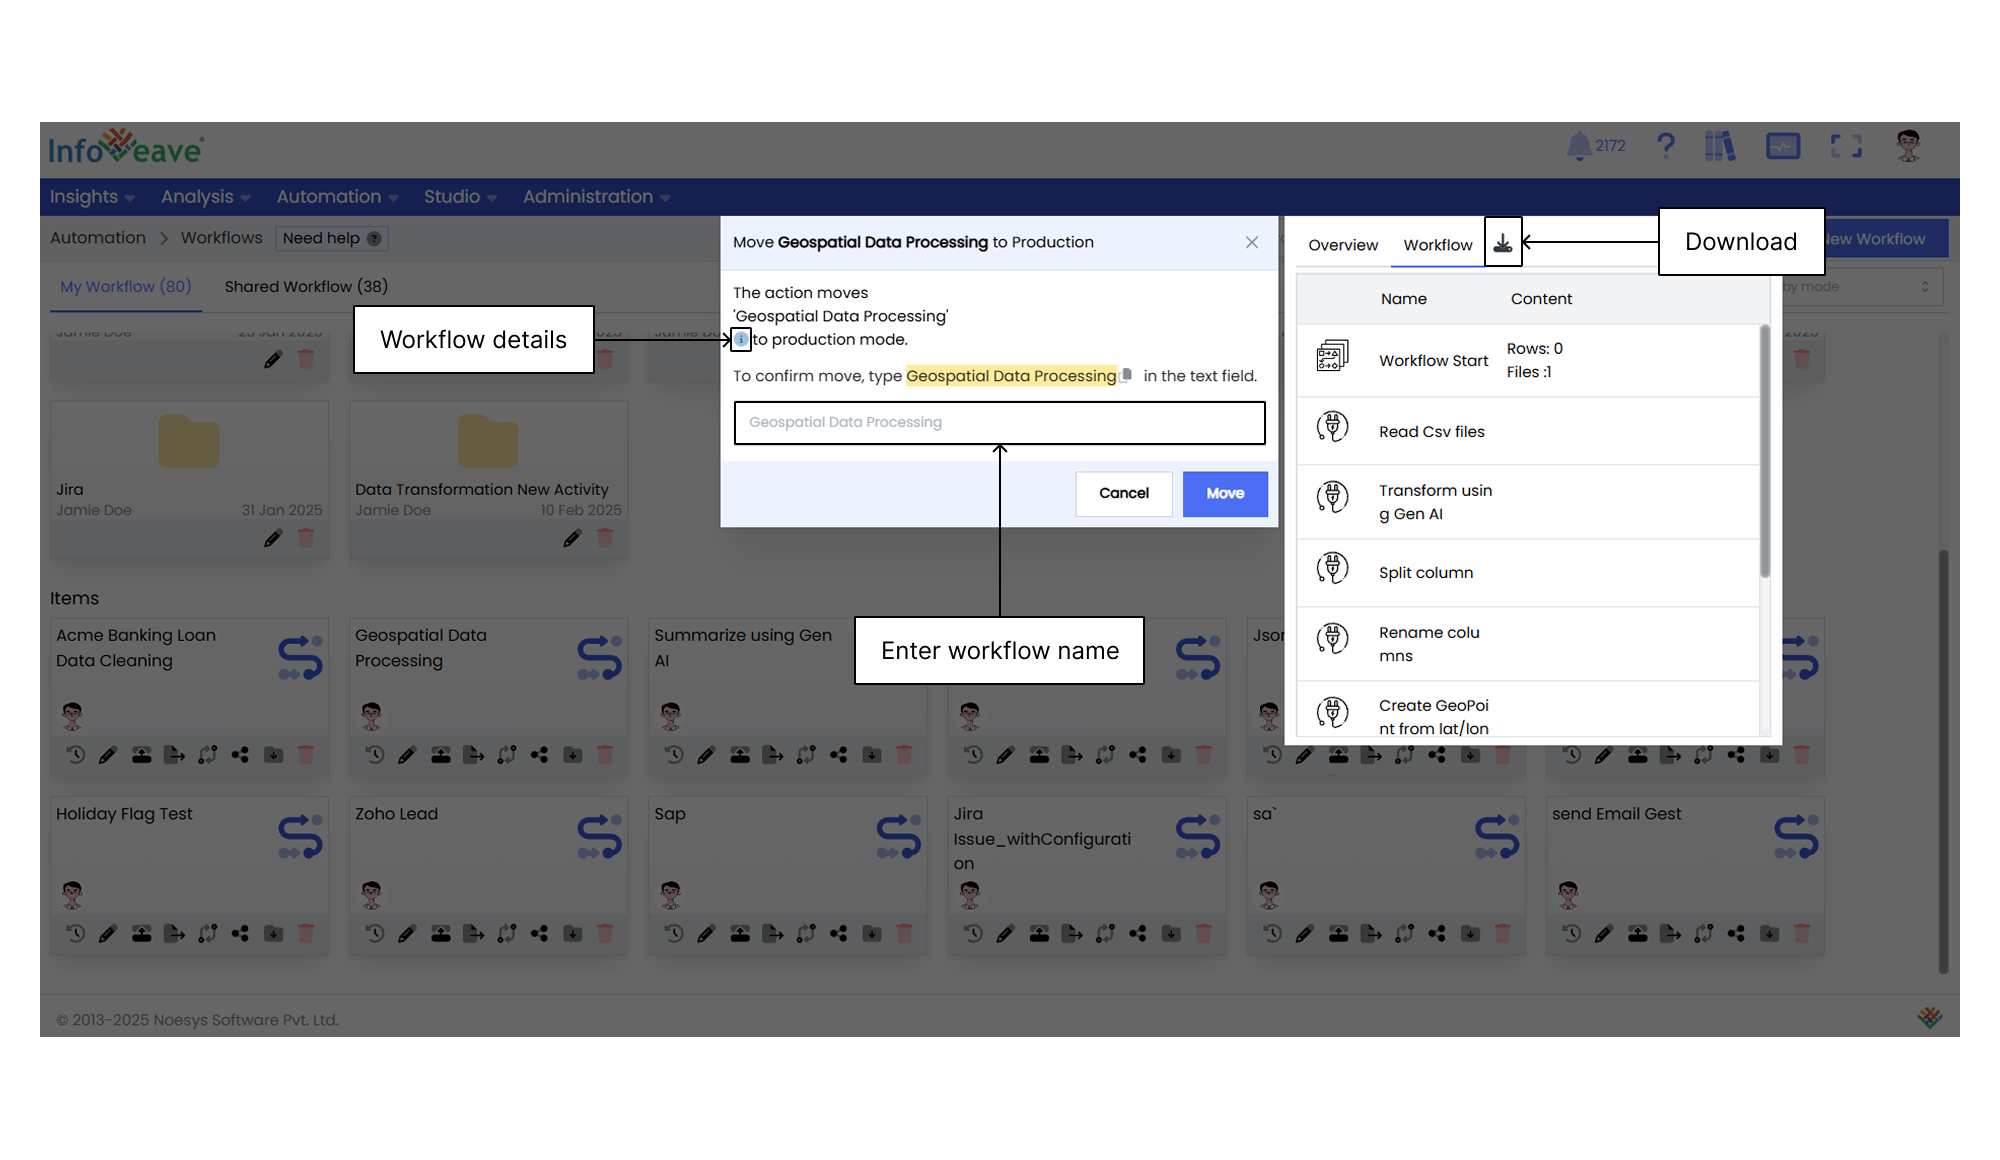
2. Click on the **Move to Production** icon associated with the Workflow.
3. A confirmation dialog appears showing the Workflow name and the list of linked Workflows.
4. Enter the Workflow name in the associated text field to confirm the move.
5. Click on **Move** to proceed. The Workflow, along with any linked Workflows, moves to production.
6. Once you move it into production, the Workflow displays the Production tag that confirms the move.
## Moving to draft
To move a Workflow back to draft, follow these steps.
1. Locate the Workflow you want to move in the Workflow Manager.
2. Click on the **Move to Draft** icon associated with the Workflow.
3. A confirmation dialog appears showing the Workflow name.
4. Type the Workflow name in the associated text field to confirm the move.
5. Click **Move** to proceed with the move. The Workflow, along with any linked Workflow, moves to **Draft**.
## Exporting a Workflow
To learn about exporting workflows, visit [Exporting a Workflow](/automation-v8/workflows/duplicating-a-workflow#exporting-a-workflow)
## Version history
The version history feature allows you to view and manage different saved versions of a workflow. You can compare any two versions side by side to identify the changes made. Each version is listed with a timestamp, and you can select, download, or delete a version as needed.
## Sharing Workflows
Sharing options such as sharing with specific users or roles provide control and flexibility in sharing the Workflows with the right audience, ensuring efficient utilization and leveraging of the feature.
You can share your Workflows with other users or roles in Infoveave. Follow these steps to share your Workflows.
1. Click on the **Share** icon to share the Workflows with the team or role.
2. Select between the available options. Share with User or Share with Role.
3. If you choose Share with User, select the user(s) you want to share the Workflows with.
4. If you want to share the Workflows with all users, select the **Share With Everyone** option.
5. If you choose Share with Role, pick the roles you want to share the Workflows with from the share dialog box.
6. To remove a specific user or role from the shared list, uncheck the corresponding checkbox.
7. Click **Save** to share your Workflows with the selected users or roles.
## Moving to a Folder
Organize your Workflows by easily moving them to designated folders.
To organize your Workflows under folders, follow these steps.
1. Select the Workflows you want to move by clicking on the **Move to Folder** icon.
2. Choose the desired folder from the dropdown menu.
3. Click the **Save** button to finalize the move.
## Deleting a Workflow

To delete a Workflow in Infoveave, follow these simple steps.
1. Find the Workflow you want to delete.
2. Click on the **Delete** icon .
3. Type the specified text in the provided text field.
4. Alternatively, you can copy the text from the icon and paste it in the text field.
5. Once you have entered the correct text, click on **Delete**.